| Deletions are marked like this. | Additions are marked like this. |
| Line 122: | Line 122: |
|
Check the image viewing program Freeview can be found, will run and display a volume. Launch Freeview from the command line in the terminal window. Please note '''it may not work to launch Freeview via the Finder''' by double clicking on its application icon. Check Freeview is found in PATH and then launch "freeview" from the command line with no arguments to check it displays an empty window. |
Check Freeview is found in PATH and then launch "freeview" from the command line with no arguments to check it displays an empty window. Please note '''it may not work to launch Freeview via the Finder''' by double clicking on its application icon. |
MacOS Install & Setup
Xquartz Pre-requisite
The most recent version of the Xquartz (X-windows) framework should be installed on your system in order for the Freeview program (included in the Freesurfer distribution) to correctly display images. Locate the Xquartz application in the Utilities folder inside the Applications folder.
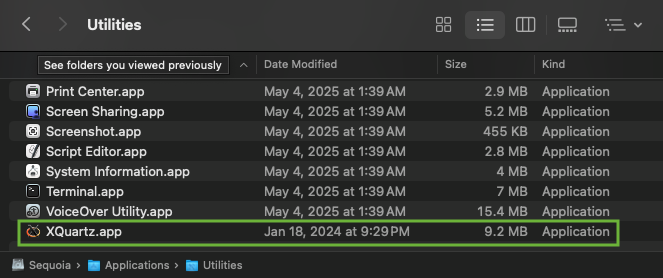
Right click on the Xquartz application, select "Get info" and note the version number reported in the pop-up window. In the screenshot below, Xquartz reports version 2.8.5 is installed on the system.

Route to the Xquartz web site in your browser and check the latest version listed there, Xquartz
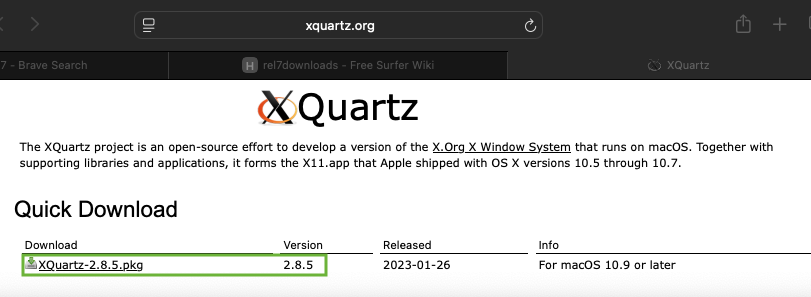
In the above screenshot, the latest version listed on the web site matches the version installed on the machine. If the version listed on the web site is however greater (or newer) than the version installed on your machine, then click on the link to download the latest Xquartz package.
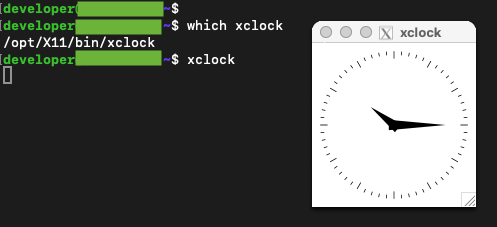
Once the latest Xquartz version is installed, check in a terminal window that it works to run a simple X-Windows program like xclock.
$ xclock
Remove Any Pre-existing Freesurfer Installation
Please note - if you already have a freesurfer distribution installed under /Applications/freesurfer, then it is strongly advised you rename or uninstall the existing freesurfer directory to be something other than freesurfer under /Applications. This is because the Mac pkg installer may complain about and/or clobber any existing freesurfer installation.
if you have been running an existing freesurfer 7.X or 8.X release, then chances are an uninstall script is available to run under $FREESURFER_HOME. In the example below the uninstall.sh script provided with the 7.1.0 release is used to uninstall it.
$ cd $FREESURFER_HOME
$ sudo ./uninstall.sh
Password:
The following packages will be REMOVED:
   freesurfer-7.1.0
Do you wish to continue [Y/n]? Y
[1/2] [DONE} Successfully deleted freesurfer information
[2/2] [DONE} Successfully deleted freesurfer
freesurfer 7.1.0 uninstalled
Download and Run the Mac Package Installer
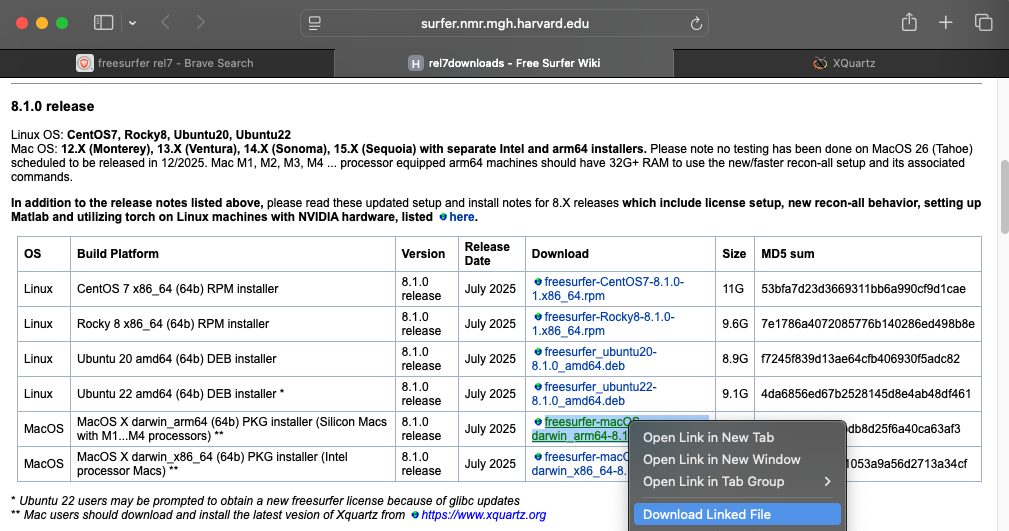
The screenshots and terminal commands listed below show how to install the pkg file and setup the Freesurfer environment on a a Silicon (darwin_arm64) Mac using the freesurfer 8.1.0 installer, freesurfer-macOS-darwin_arm64-8.1.0.pkg
if however, you are still using an older Mac with an Intel processor, you should instead download and install the Intel (darwin_x86_64) installer freesurfer-macOS-darwin_x86_64-8.1.0.pkg. The screenshots and terminal output should be similar for the Intel Mac.
You can download the Mac pkg installer file for the latest freesurfer release from the web page, freesurfer releases. In the screenshot below, the latest (8.1.0) release is downloaded thru a web browser by right clicking on the link, and then selecting "Download Linked File"
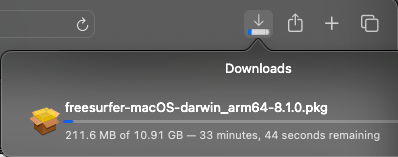
Once the download is complete, RIGHT CLICK on the pkg file icon with the mouse and select "Open With" --> "Installer app (default)". Right clicking instead of double clicking on the icon may prevent you from having to go into the System Security and Privacy preferences to make a security exception to install the package (which is currently unsigned).

The standard Mac installer will prompt you thru 6 steps in order to install the software; some of these steps may display more than 1 splash screen in which you provide input or select a choice. The 6 steps are:
- Introduction
- License
- Destination Select
- Installation type
- Installation
- Summary
The installer screens are shown below (in a 3 X 3 screenshot layout) annotated in green to indicate how they correspond to the steps above including the choices to select. Please expand the page width on the right hand side to see all the screens.

Once the install is complete, you can setup the license, freesurfer commands and test Freeview in a terminal window.
Setup the Freesurfer Environment
All commands listed below are run using the bash shell.
% bash

The default interactive shell is now zsh.
To update your account to use zsh, please run `chsh -s /bin/zsh`.
For more details, please visit https://support.apple.com/kb/HT208050.
Enable Your Own Private Copy of A Freesurfer License
We recommend users set the FS_LICENSE environment variable (and/or define it in your shell initialization file, .bashrc, ,.cshrc, ...) so that a license file is always available in your login shell. If you do not already have a license.txt file then please follow the link and fill out the form in order to have license.txt emailed to you, freesurfer registration form
In the examples below, the users home directory ($HOME) is /Users/developer. A license.txt file has already been copied to that location. The first line in the license file is the email address you used in the registration form for the license. Freesurfer commands (including Freeview) will fail to run unless the license file is found.
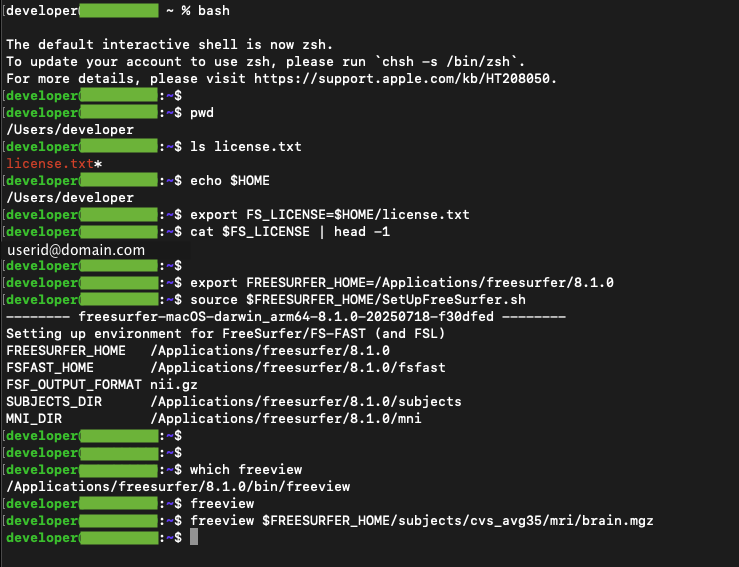
$ echo $HOME
/Users/developer
$ export FS_LICENSE=$HOME/license.txt
$ cat $FS_LICENSE | head -1
userid@domain.com
Source the Freesurfer Setup Scripts
Use the bash shell to set FREESURFER_HOME followed by source'ing the setup scripts. The output from source'ing the setup scripts is a short list of environment variables whose paths include the FREESURFER_HOME base path.
$ export FREESURFER_HOME=/Applications/freesurfer/8.1.0
$ source $FREESURFER_HOME/SetUpFreeSurfer.sh
-------- freesurfer-macOS-darwin_arm64-8.1.0-20250718-f30dfed --------
Setting up environment for FreeSurfer/FS-FAST (and FSL)
FREESURFER_HOME   /Applications/freesurfer/8.1.0
FSFAST_HOME       /Applications/freesurfer/8.1.0/fsfast
FSF_OUTPUT_FORMAT nii.gz
SUBJECTS_DIR      /Applications/freesurfer/8.1.0/subjects
MNI_DIR           /Applications/freesurfer/8.1.0/mni
Check Freeview Can Run
Check Freeview is found in PATH and then launch "freeview" from the command line with no arguments to check it displays an empty window. Please note it may not work to launch Freeview via the Finder by double clicking on its application icon.
$ which freeview
/Applications/freesurfer/8.1.0/bin/freeview
$ freeview
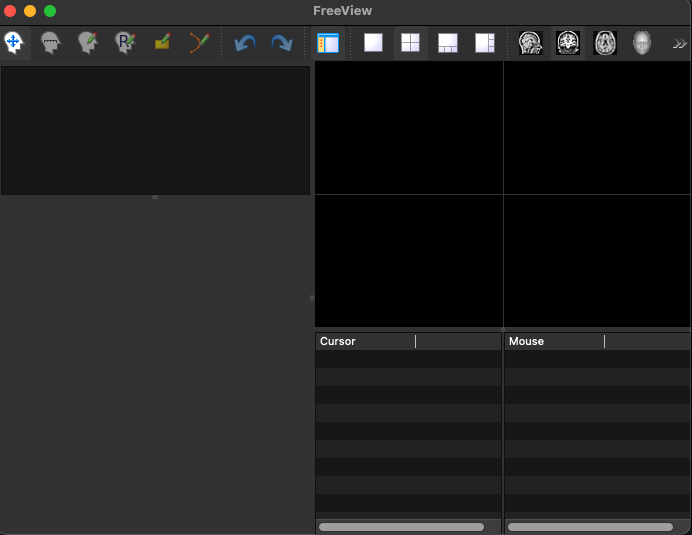
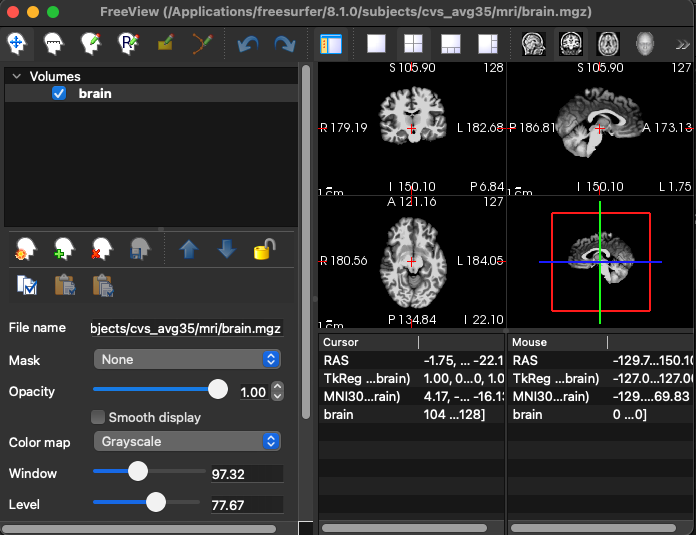
Try running freeview so that it displays a volume, e.g., first try displaying a known to be good volume file included in the Freesurfer distribution by providing its path as an argument on the command line.
$ freeview $FREESURFER_HOME/subjects/cvs_avg35/mri/brain.mgz
Terminal Session with All Commands for License, Freesurfer Scripts and Checking Freeview
You can find additional information about how to setup the Freesurfer environment to work with Matlab, and update the python (fspython) distribution to work NVIDIA/GPU hardware via release 8 notes
You can uninstall the (8.1.0) release via the included uninstall script.

