| Deletions are marked like this. | Additions are marked like this. |
| Line 17: | Line 17: |
| Here is the final output of the base for the same slices, 175 and 205:<<BR>> {{attachment:0057_175_after.jpg}} {{attachment:0057_205_after.jpg}} | Here is the final output of the base for the same slices, 175 and 205:<<BR>> {{attachment:0057_175_after.jpg}} {{attachment:0057_205_after.jpg}} <<BR>> |
| Line 23: | Line 23: |
| Here is the before image (left) of OAS2_0057_MR1.long.OAS2_0057 (slice 183) and the corresponding after image (right - slice 183).<<BR>> {{attachment:0057_long1_183_before.jpg}} {{attachment:0057_long1_183_after.jpg}} | Here is the before image (left) of OAS2_0057_MR1.long.OAS2_0057 (slice 183) and the corresponding after image (right - slice 183).<<BR>> {{attachment:0057_long1_183_before.jpg}} {{attachment:0057_long1_183_after.jpg}}<<BR>> |
Making Pial Surfaces Edits
To follow this exercise exactly be sure you've downloaded the tutorial data set before you begin. If you choose not to download the data set you can follow these instructions on your own data, but you will have to substitute your own specific paths and subject names.
Towards the anterior region of the brain, notice that there's a lot of dura remaining from the skullstrip making the pial surface extend farther out from the grey matter. In these cases, manual edits will be the quickest way to fix the problem. Also notice that this problem exists in all three stages: cross, base, and long. Except for very special cases (e.g. comparing cross sectional vs. longitudinal processing) you will not need the final cross-sectional results, but instead use the longitudinal results for downstream analysis. Therefore, it is easiest and quickest now to just edit the base, and then rerun the base and longitudinal data from there. If you prefer to correct the cross-sectionals, you can also do that, the base should automatically be fixed, but needs to be checked. Remember to delete the base directory when you are recreating the new base from your edited time points, or at least delete the brainmask.mgz file from the mri directory of the base before rerunning it, to make sure that the updates are transferred. The following are before images from the base OAS2_0057 coronal slices 175 and 205, respectively.
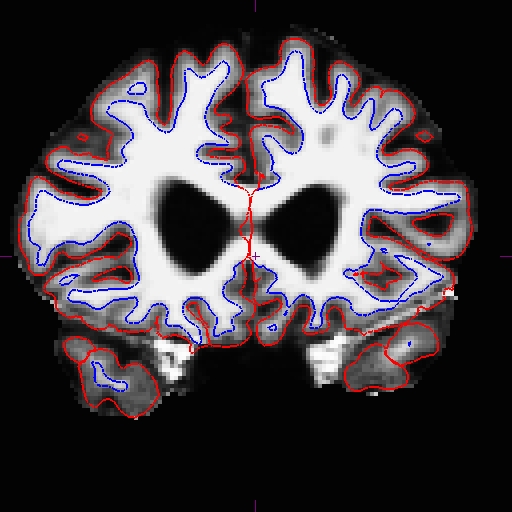
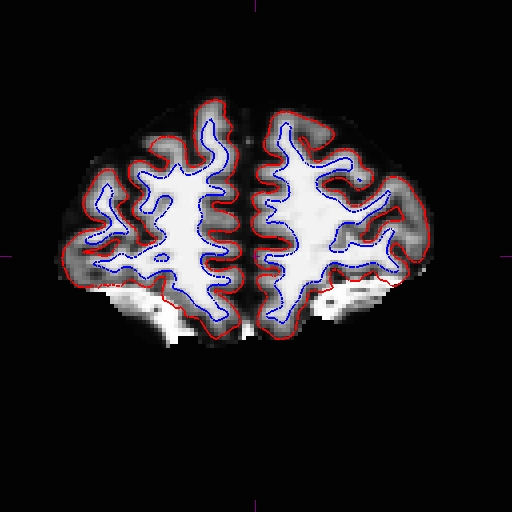
We will step through the quick route of just editing the base. After deleting the extra dura from brainmask.mgz, rerun the base with the following command:
recon-all -base OAS2_0057 -autorecon-pial
To rerun the longitudinals, use the following commands (note - it is better if you delete or rename the existing longitudinal directories for this subject. Or you can delete the brainmask.mgz in the mri directories if you don't want to delete the whole subjectdir, maybe because of other edits in the long runs.)
recon-all -long OAS2_0057_MR1 OAS2_0057 -all
recon-all -long OAS2_0057_MR2 OAS2_0057 -all
Here is the final output of the base for the same slices, 175 and 205:
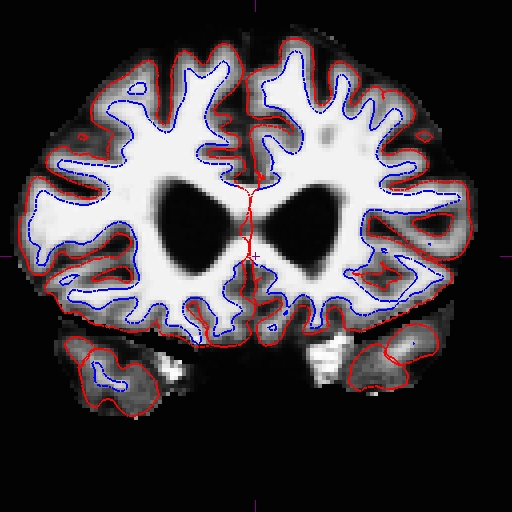
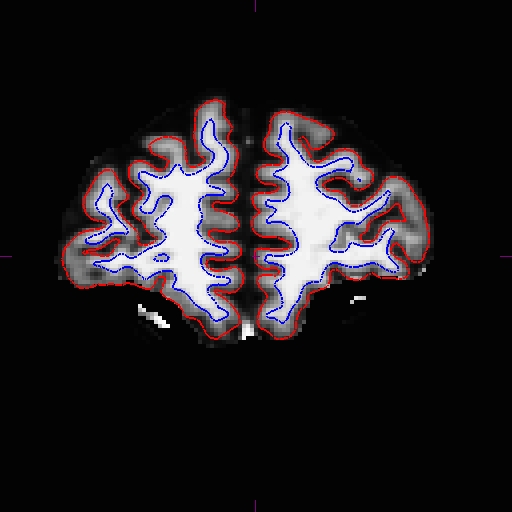
Compare the output volumes of the long with the before-edit versions in tkmedit.
tkmedit OAS2_0057_MR1.long.OAS2_0057 -brainmask.mgz -aux T1.mgz -surfs
tkmedit OAS2_0057_MR1.long.OAS2_0057_fixed -brainmask.mgz -aux T1.mgz -surfs
Here is the before image (left) of OAS2_0057_MR1.long.OAS2_0057 (slice 183) and the corresponding after image (right - slice 183).
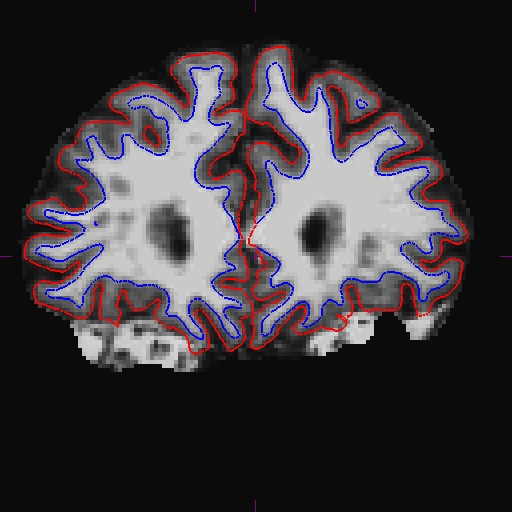
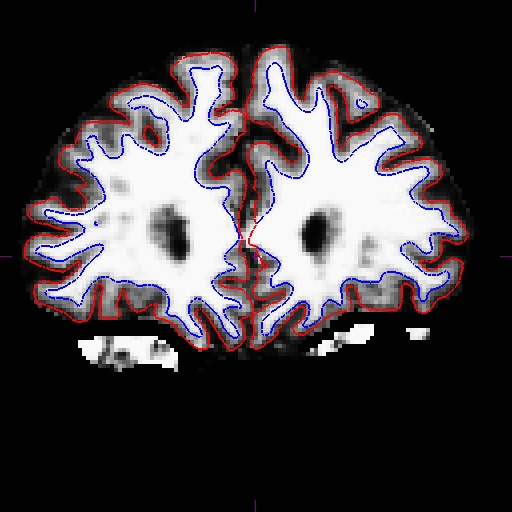
The same improvement should have occurred in OAS2_0057_MR2.long.OAS2_0057.
