| Deletions are marked like this. | Additions are marked like this. |
| Line 42: | Line 42: |
| Start adding the voxels to wm.mgz volume on coronal slice 53. Toggle between the brainmask.mgz and wm.mgz by unchecking the check box next to the wm.mgz in the volumes tab to hide and unhide it. Use brainmask.mgz as a guide while painting. Only add as many voxels as is needed to correct the error. Switch between the coronal, sagittal and horizontal views to check if you need to add more for the white matter to be labelled correctly. With more practice, it becomes easier to decide where to add voxels to correct the defect. | Start adding the voxels to wm.mgz volume on coronal slice 53. Toggle between the brainmask.mgz and wm.mgz by unchecking the check box next to the wm.mgz in the volumes tab or using 'ALT-V' while wm.mgz is highlighted to hide and unhide it. Use brainmask.mgz as a guide while painting. Only add as many voxels as is needed to correct the error. Switch between the coronal, sagittal and horizontal views to check if you need to add more for the white matter to be labelled correctly. With more practice, it becomes easier to decide where to add voxels to correct the defect. |
Correcting topological defects
To follow this exercise exactly be sure you've downloaded the tutorial data set before you begin. If you choose not to download the data set you can follow these instructions on your own data, but you will have to substitute your own specific paths and subject names.
Sometimes, the topological fixer fails which leads the white matter (WM) surface (yellow line) to exclude some voxels that are white matter. Simple edits to wm.mgz volume can correct this defect.
Editing the Volume
Subject topo_defect_before is an example of topological defect and this page will walk you through fixing it. Open topo_defect_before in freeview.
freeview -v topo_defect_before/mri/brainmask.mgz \
topo_defect_before/mri/wm.mgz:colormap=heat:opacity=0.4 \
-f topo_defect_before/surf/lh.white:edgecolor=yellow \
topo_defect_before/surf/lh.pial:edgecolor=red \
topo_defect_before/surf/rh.white:edgecolor=yellow \
topo_defect_before/surf/rh.pial:edgecolor=red \
Use the page up and page down keys to scroll through the volume to find the error in white matter surface. If you look at coronal slice 57, there is a defect in the left hemisphere closer to the midline, where some white matter voxels are segmented incorrectly. This type of topological defect is called a 'hole' which needs to be filled as opposed to a handle which needs to be cut.
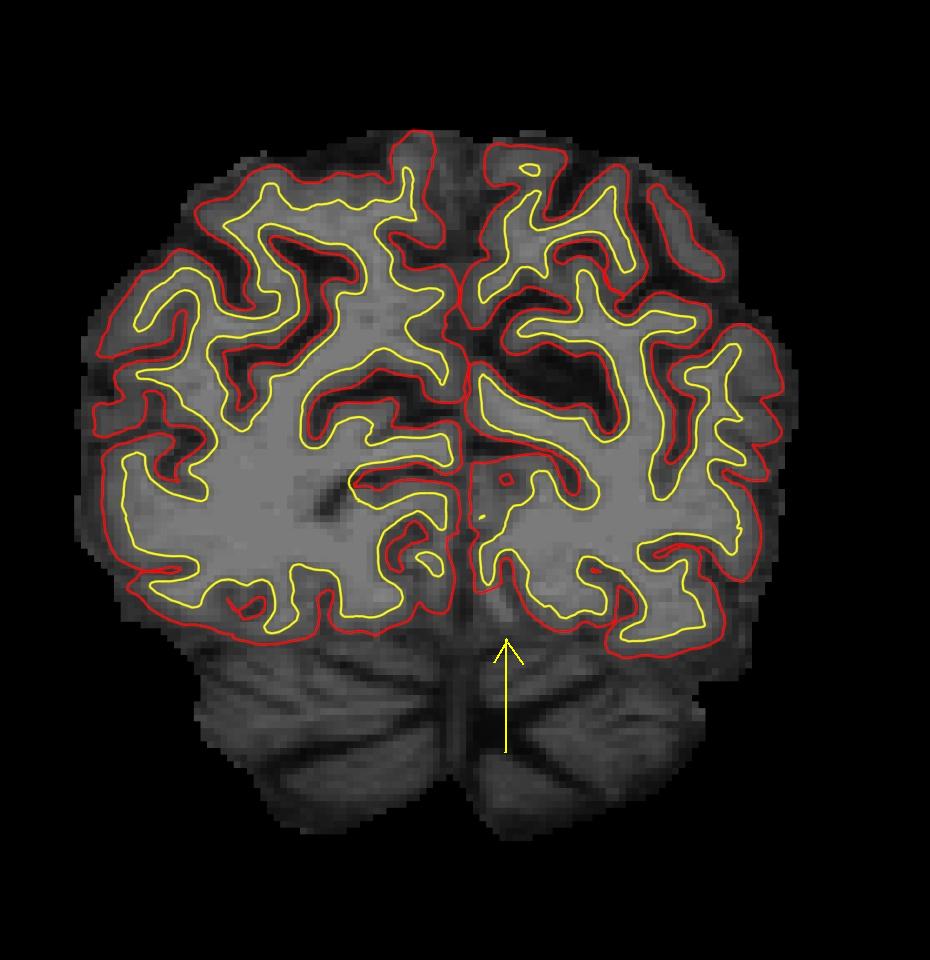
As you can see in wm.mgz, some white matter voxels are excluded from the white matter surface.
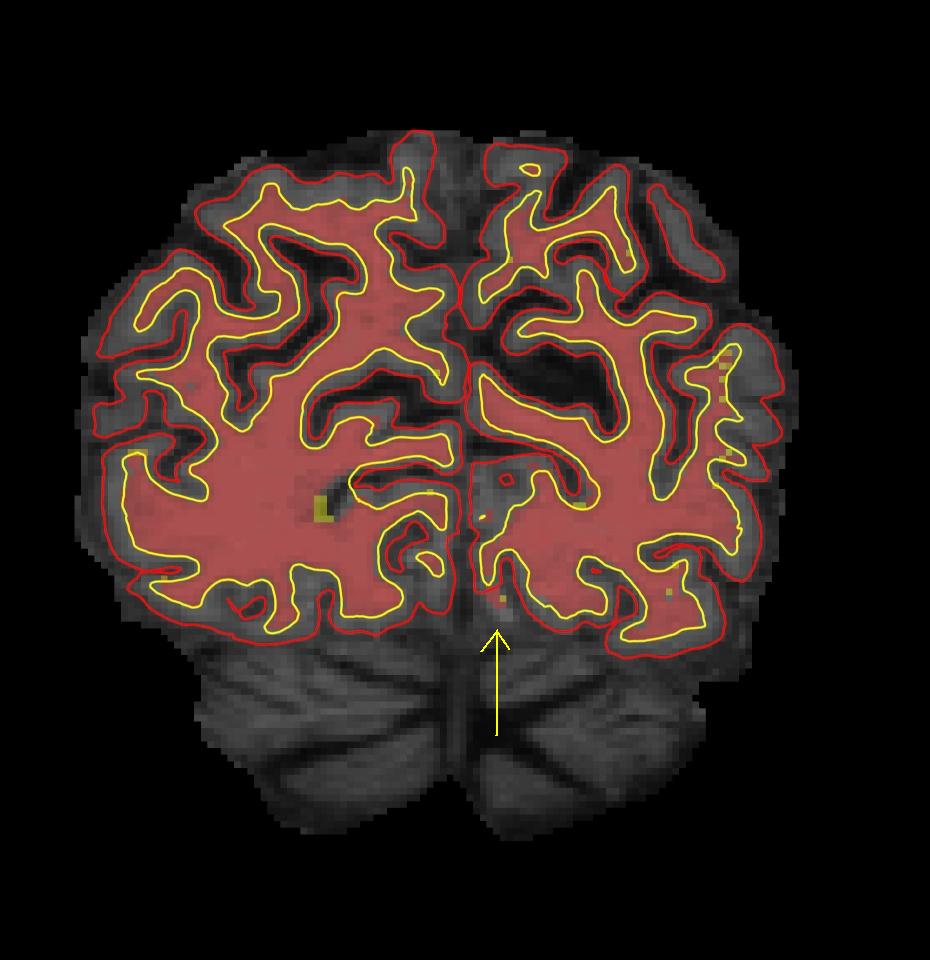
To view the defect in the surface viewer, first open another terminal:
tcsh
and then open the surface viewer:
tksurfer topo_defect_before lh smoothwm.nofix
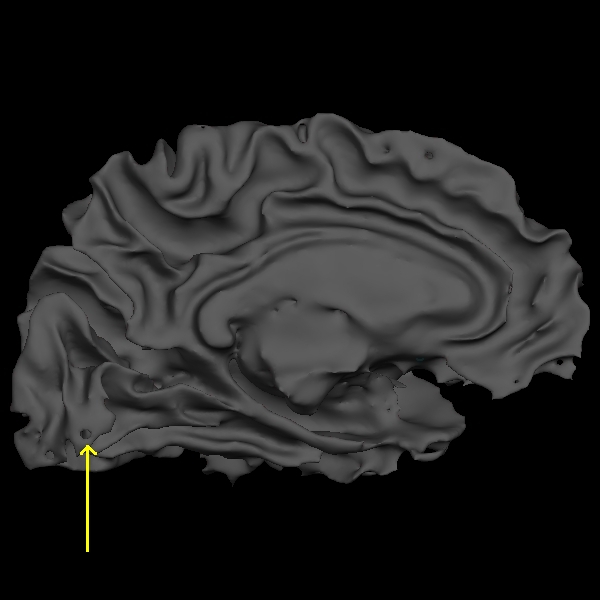
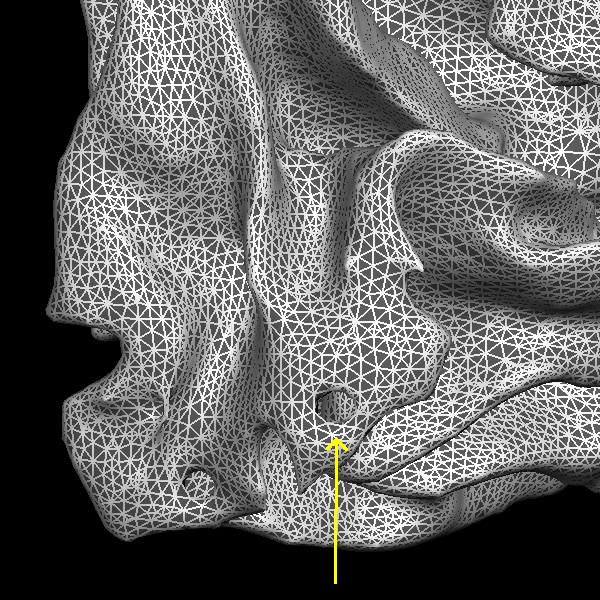
Below are couple of images of lh.smooth.nofix loaded in tksurfer and zoomed in image of lh.smooth.nofix with Wireframe Overlay turned on (View --> Wireframe Overlay), respectively. You can see the error as pointed by the yellow arrow, which is a hole that needs to be filled to correct this type of topological defect.
Now back to the freeview display, if you scroll through slice by slice, you'll notice that there is a small group of white matter voxels which disconnect and connect back again after a few slices. The white matter surface doesn't include these voxels when they are disconnected. This area is too thin to add control points to extend the WM surface. You'll need to add some white matter voxels to fix this error. But first scroll through the slices in the brainmask.mgz volume and make a note of where the white surface is just beginning to exclude voxels and where the problem ends. In this case, the problem starts at coronal slice 53 and goes on upto slice 60. To begin editing, click on the Edit Voxels Tool button on the freeview tool bar. In the Voxel Edit window that pops up, click the check box next to Recon editing, setting the brush value to 255 and eraser value to 1. Then double beck that the wm volume is on top of the brainmask and highlighted. Your viewing window should look like this:
![]()
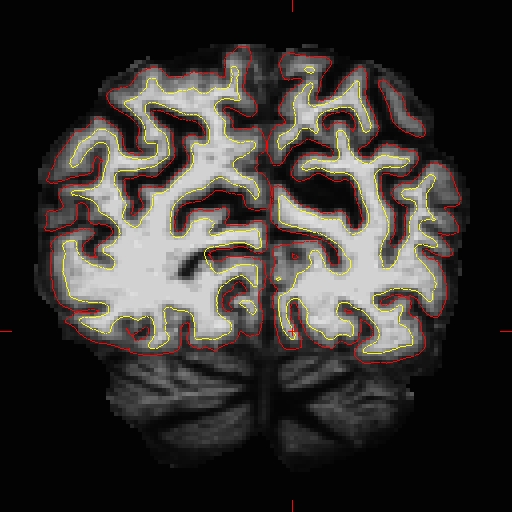
If the wm.mgz is not on top and highlighted in the Volumes tab, you will be editing the brainmask.mgz. Use the left mouse button to begin painting in the voxels. Hold down the shift key while clicking with the left mouse button to delete voxels. Start adding the voxels to wm.mgz volume on coronal slice 53. Toggle between the brainmask.mgz and wm.mgz by unchecking the check box next to the wm.mgz in the volumes tab or using 'ALT-V' while wm.mgz is highlighted to hide and unhide it. Use brainmask.mgz as a guide while painting. Only add as many voxels as is needed to correct the error. Switch between the coronal, sagittal and horizontal views to check if you need to add more for the white matter to be labelled correctly. With more practice, it becomes easier to decide where to add voxels to correct the defect. At any time, you can save the changes you've made to the wm volume by selecting the 'Save Volume' button  or going to File --> Save Volume while the wm.mgz is highlighted You can look at wm.mgz volume of topo_defect_after to compare your edits with the tutorial data. Coronal slice 57 in brainmask.mgz looks like this after correction.
Regenerating the Surface
Once you have made all the edits to the wm.mgz volume, you can run the following command to regenerate the surfaces:
recon-all -autorecon2-wm -autorecon3 -subjid topo_defect_before
Do not run this command if you are conducting the tutorial!
