| Deletions are marked like this. | Additions are marked like this. |
| Line 2: | Line 2: |
|
<<TableOfContents(4)>> |
|
| Line 16: | Line 18: |
| Depending on your platform, the relevant VirtualBox binary is found [[http://www.virtualbox.org/wiki/Downloads|here]]. Installing it usually is just a matter of double-clicking the installer and following the steps. | Depending on your platform, the relevant !VirtualBox binary is found [[http://www.virtualbox.org/wiki/Downloads|here]]. Installing it usually is just a matter of double-clicking the installer and following the steps. |
| Line 24: | Line 26: |
|
VirtualBox Software is run. It looks like this. {{attachment:1.tiff}} |
!VirtualBox Software is run. It looks like this. {{attachment:1.png}} |
| Line 30: | Line 34: |
| {{attachment:4.tiff}} |
{{attachment:4.png}} |
| Line 32: | Line 38: |
| {{attachment:5.tiff}} |
{{attachment:5.png}} |
| Line 36: | Line 44: |
|
You are back in the main screen. Click on "New" and click on "Continue". In the next screen, VirtualBox asks for the name of the virtual machine and the Type of OS and the version. You can type any name but it should look like this. Click "Continue". {{attachment:2.tiff}} |
You are back in the main screen. Click on "New" and click on "Continue". In the next screen, !VirtualBox asks for the name of the virtual machine and the Type of OS and the version. You can type any name but it should look like this. Click "Continue". {{attachment:2.png}} |
| Line 40: | Line 49: |
|
VirtualBox asks the amount of base memory you want to allocate. Make sure it's not too low and tending somewhere near the upper limit. If you have 8 GB of memory, allocate atleast 2 GB. {{attachment:3.tiff}} |
!VirtualBox asks the amount of base memory you want to allocate. Make sure it's not too low and tending somewhere near the upper limit. If you have 8 GB of memory, allocate atleast 2 GB. {{attachment:3.png}} |
| Line 45: | Line 55: |
| {{attachment:6.tiff}} |
{{attachment:6.png}} |
| Line 47: | Line 59: |
| {{attachment:7.tiff}} |
{{attachment:7.png}} |
| Line 51: | Line 65: |
|
Your VirtualBox app should look like this now {{attachment:8.tiff}} |
Your !VirtualBox app should look like this now {{attachment:8.png}} |
| Line 55: | Line 70: |
| {{attachment:9.tiff}} |
{{attachment:9.png}} |
| Line 58: | Line 74: |
| {{attachment:10.tiff}} | |
| Line 60: | Line 75: |
|
If you open up Xterm, you'd see the FreeSurfer environment starting up. Test the installation to your heart's content. Here I've given `tksurfer bert lh inflated -annotation aparc` just to see `tksurfer` works. {{attachment:11.tiff}} |
{{attachment:10.png}} If you open up Xterm, you'd see the !FreeSurfer environment starting up. Test the installation to your heart's content. Here I've given `tksurfer bert lh inflated -annotation aparc` just to see `tksurfer` works. {{attachment:11.png}} |
Contents
What is a Virtual Disk Image?
A Virtual Disk Image is copy of an operating system ( called Guest Operating System ) which can run in your machine ( called Host Operating System). Usually, the Guest OS is customized with custom programs installed on top of it. This customized Guest OS is basically a disk image. A virtualization software enables you to seamlessly boot the disk image ( customized Guest OS ) in the Host OS. This system enables one to test another OS without the need for physically installing it in the disk or it enables one to execute certain programs which are available only for the guest OSes.
As an example, the FreeSurfer disk image provided here has the entire FreeSurfer v5.0.0 on top of a Xubuntu Linux distribution. ( Xubuntu is a lightweight Ubuntu distribution). So, to boot this disk image up and execute it, you need a virtualization software for your platform. In this tutorial, we use VirtualBox.
In effect,
- Host OS - your OS. ( for example, Windows )
- Virtualization Software - Virtualbox ( for Windows if your Host OS is Windows )
Guest OS - Xubuntu 9.10 ( customized because it has FreeSurfer v5.0.0 already installed )
Download and Install VirtualBox
Depending on your platform, the relevant VirtualBox binary is found here. Installing it usually is just a matter of double-clicking the installer and following the steps.
How to get the FreeSurfer Disk Image Running?
Download the disk image
First the disk image is downloaded from here. It is saved to a meaningful location which cannot be deleted by accident. Like C://Program Files/VirtualBoxImages for Windows, /home/<username>/VirtualBoxImages/ for Linux-es, /Users/<username>/VirtualBoxImages for Macs.
Running the VirtualBox for the first time
VirtualBox Software is run. It looks like this.
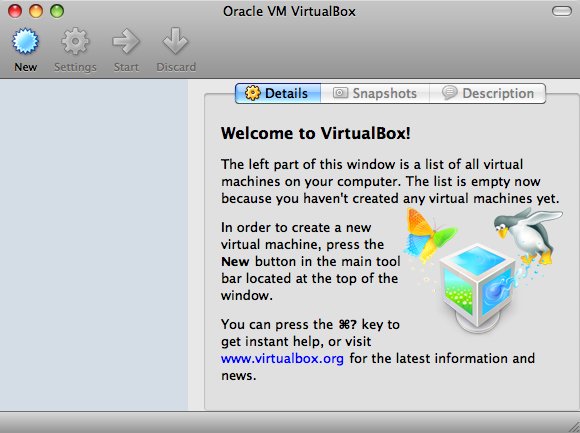
The left part of the window is empty because we haven't created any virtual machine.
Adding the downloaded hard disk image
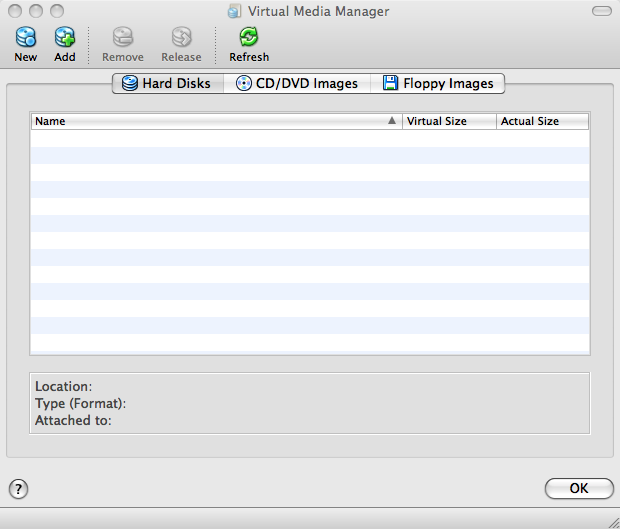
From the main menu, select the Virtual Media Manager option under the "File" menu. It should look like below.
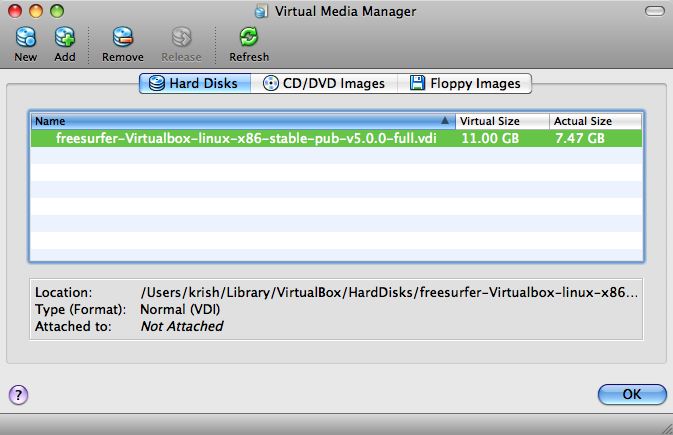
Click on "Add". This should bring up a file dialog where you'll navigate to where you saved the disk image and select it and click "Open". After which you'd see the name of the disk image in the Hard Disks tab. Like following..
Click "OK" to end the wizard.
Creating a New Virtual Machine
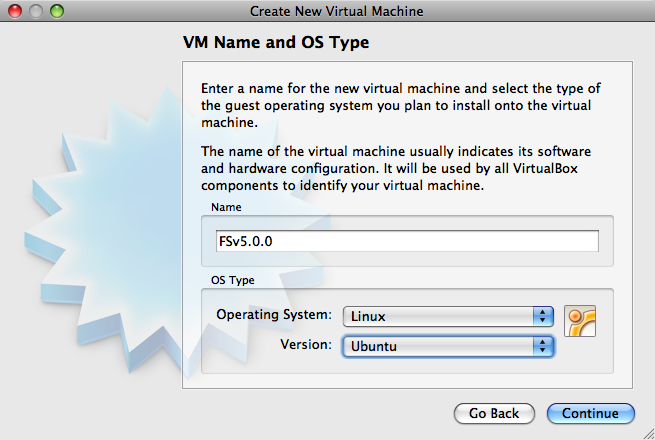
You are back in the main screen. Click on "New" and click on "Continue". In the next screen, VirtualBox asks for the name of the virtual machine and the Type of OS and the version. You can type any name but it should look like this. Click "Continue".
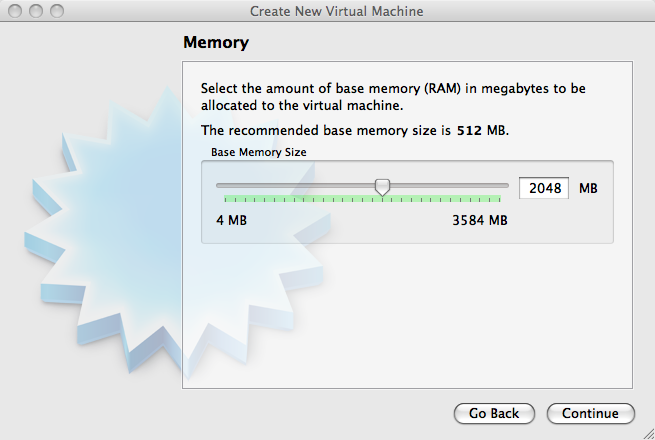
VirtualBox asks the amount of base memory you want to allocate. Make sure it's not too low and tending somewhere near the upper limit. If you have 8 GB of memory, allocate atleast 2 GB.
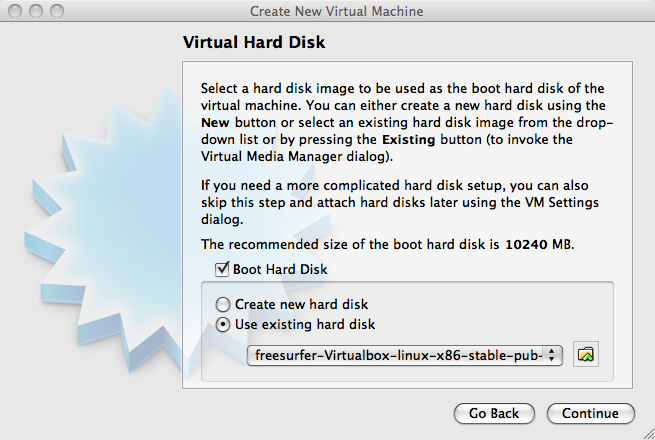
In the resulting "Virtual Hard Disk" page, enable Boot Hard Disk and select the Use existing hard disk option.
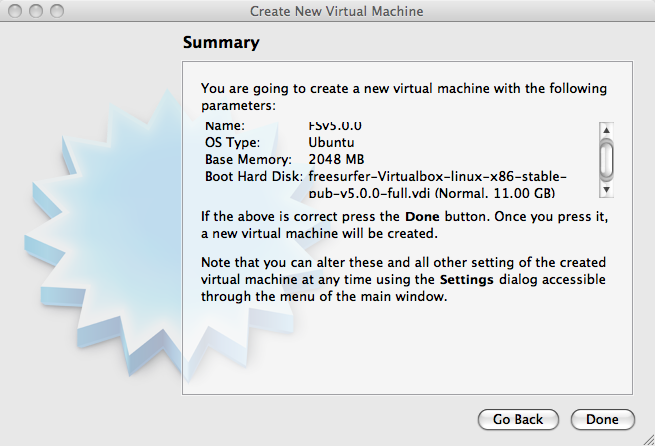
Click on "Continue" after which you'll be presented with a Summary. After verifying the information. Click on "Done".
Running the virtual machine
Your VirtualBox app should look like this now
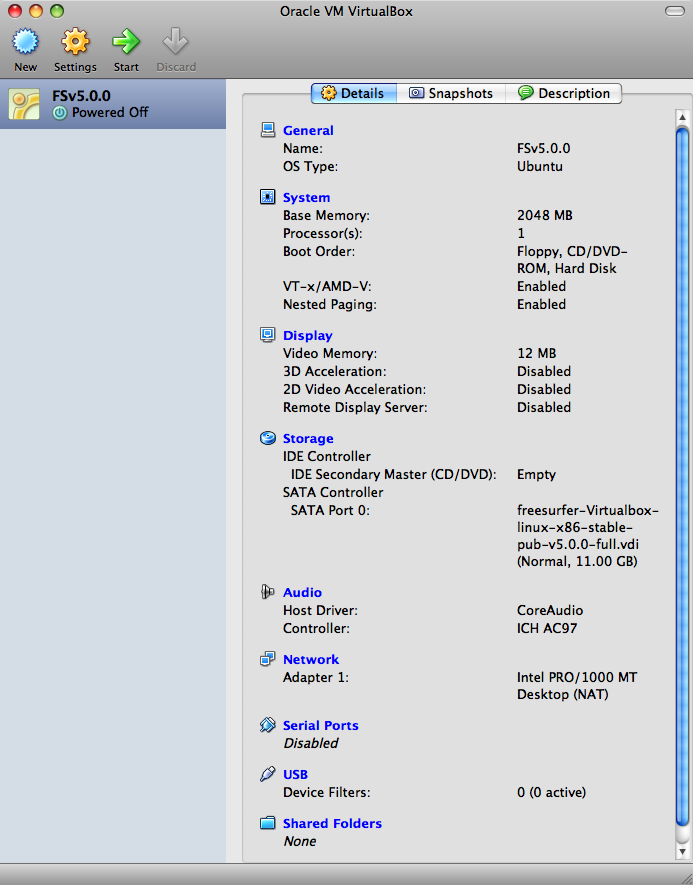
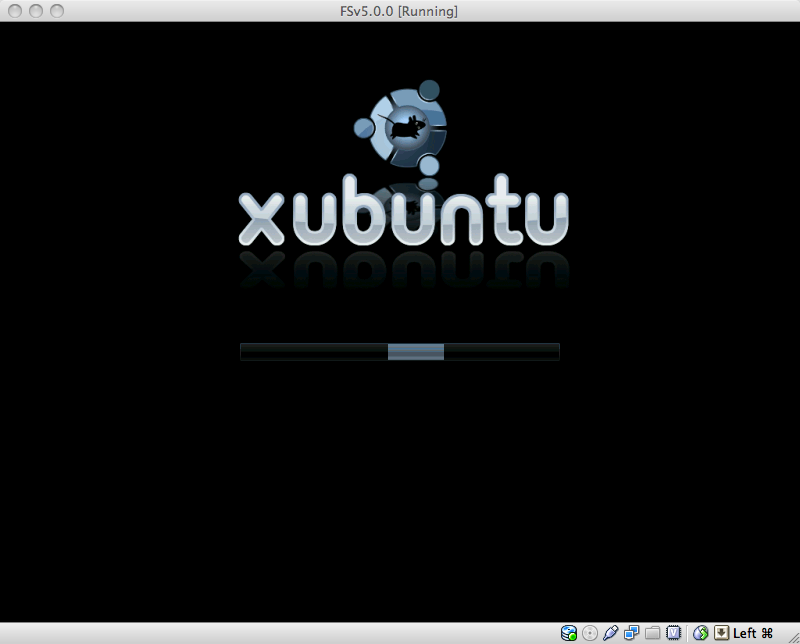
Click on Start to start the virtual machine. As you can see in the following screenshot, Xubuntu is booting up.
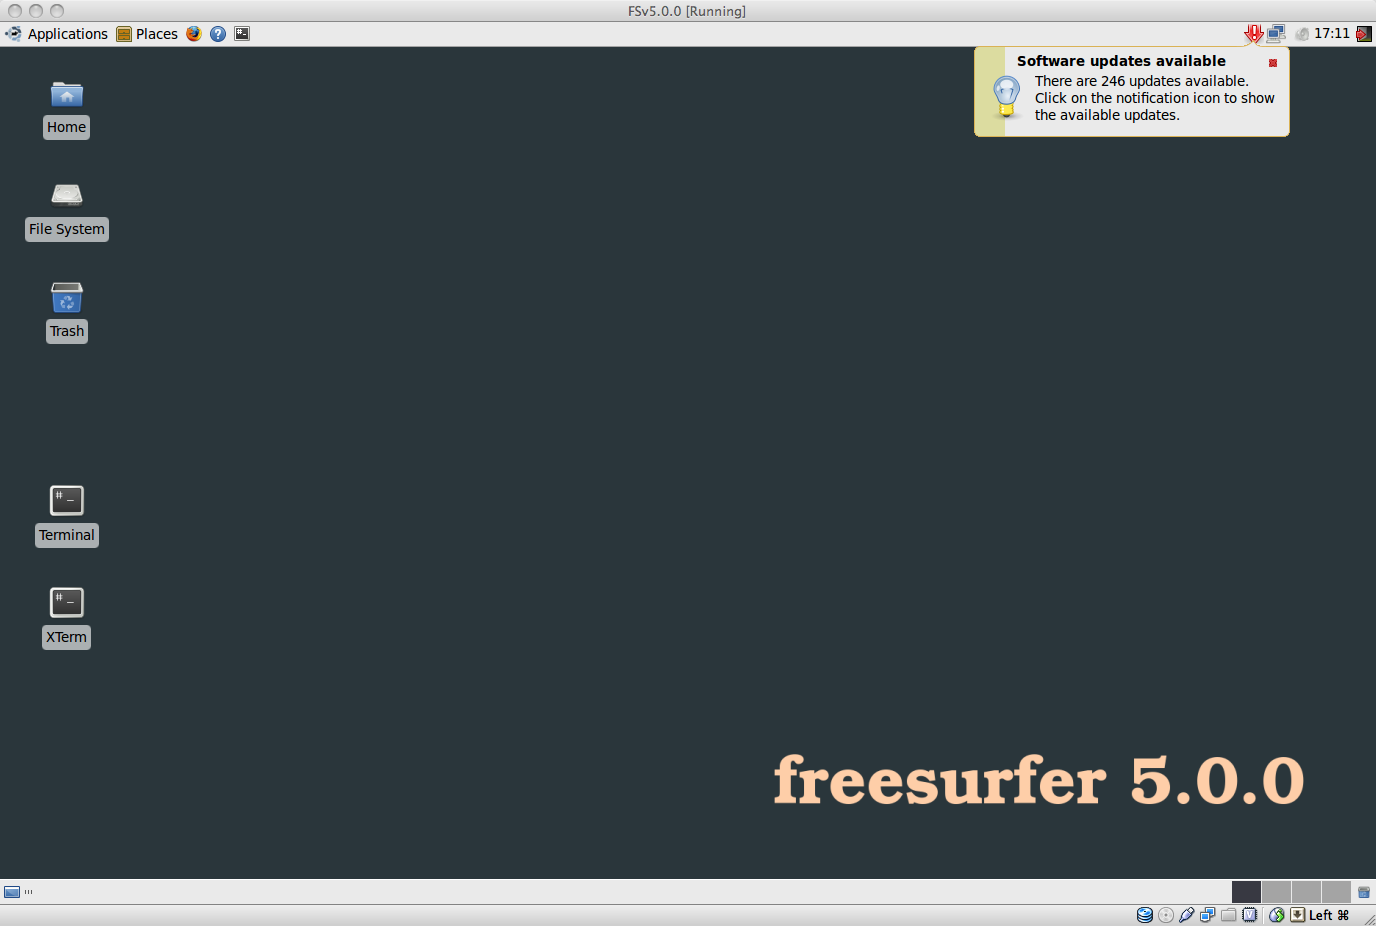
You'll be presented with a desktop which looks like below. Don't worry about installing software updates right away, but you can do so if you want to.
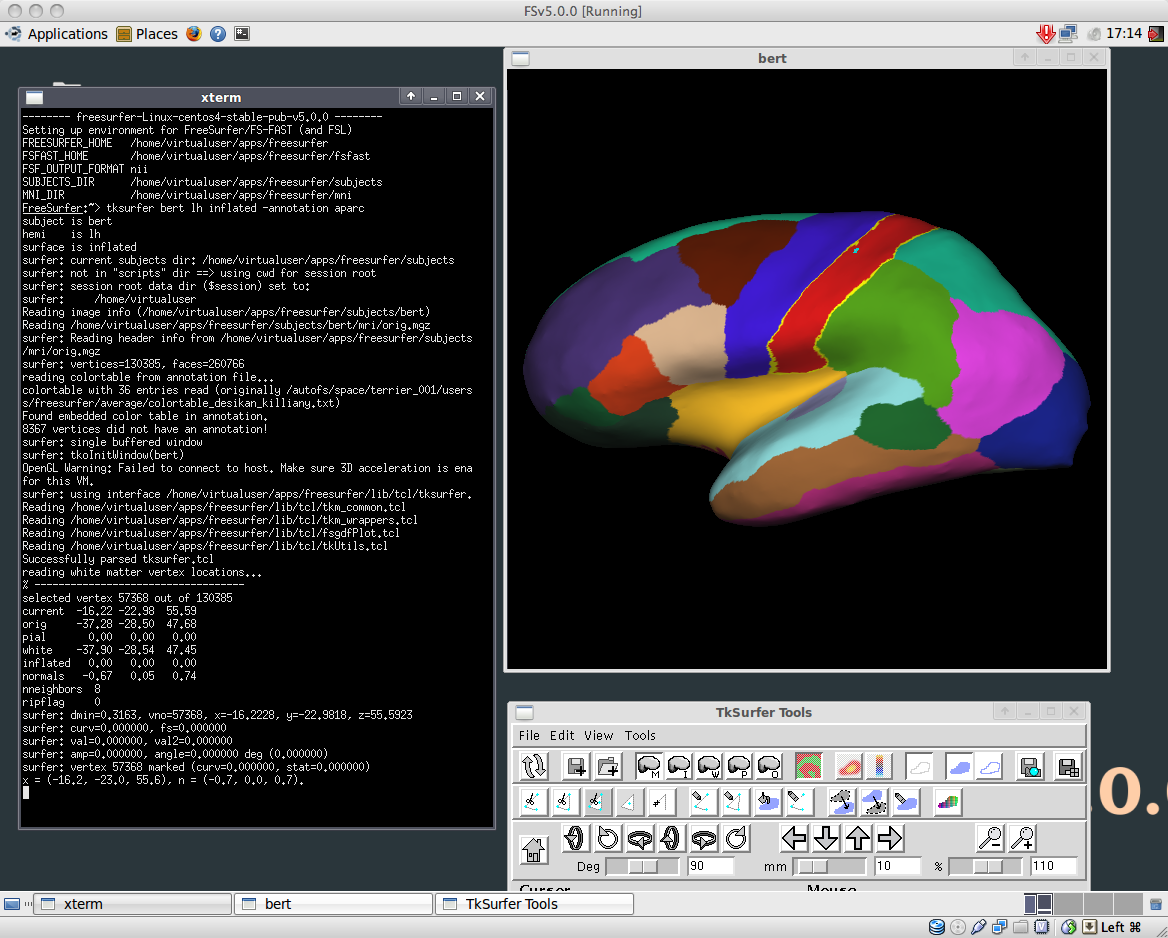
If you open up Xterm, you'd see the FreeSurfer environment starting up. Test the installation to your heart's content. Here I've given tksurfer bert lh inflated -annotation aparc just to see tksurfer works.
Advanced Steps ( Recommended )
Installing the Guest Additions
Guest additions enable one to do cool stuff like running the Guest OS in full screen, have a common clipboard etc. To do this, click on Devices in your main menu and then click on Install Guest Additions. Follow the instructions in the booted up FSv5.0.0 image.
Sharing drives
Not yet written.
