mideface - a tool for minimally invasive defacing MRI images
Contents
Introduction
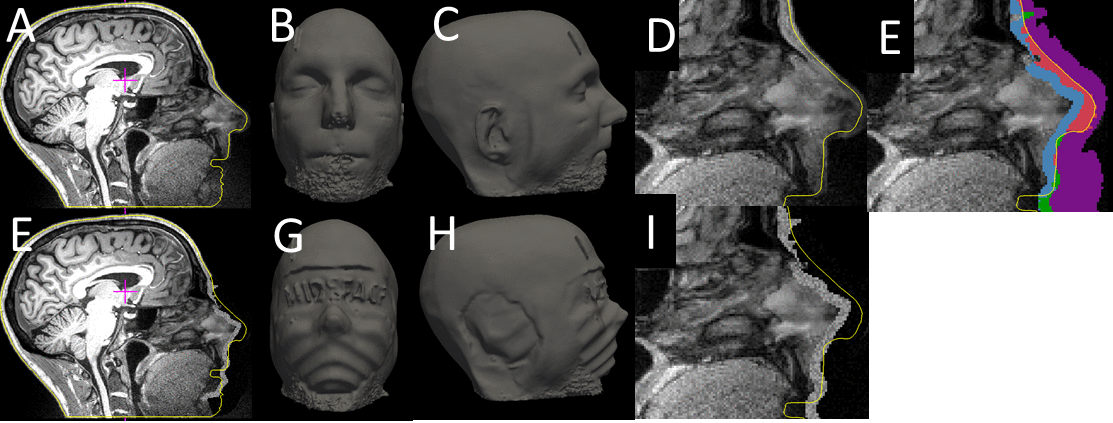
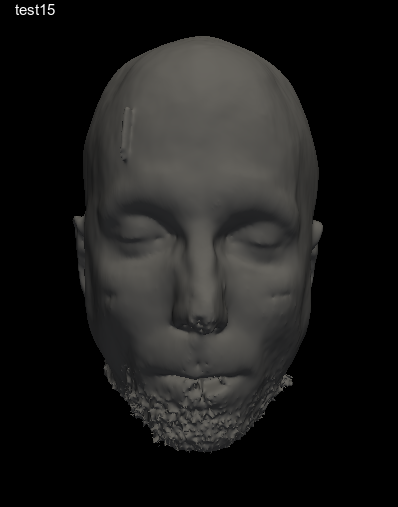
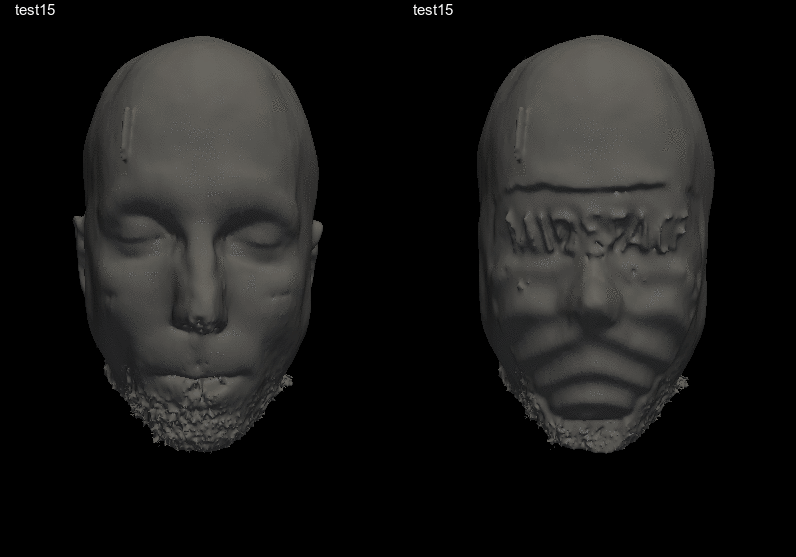
MRI images of the brain inevitably include the head and so the face. These images can be processed in a way to reconstruct the outside of the head which can often yield a near-photo quality image of the face (see image; displayed with permission of the subject). Before sharing such MRIs, it is usually a good idea to remove the information about the face so as to protect the subject's privacy. However, removing too much information could degrade the utility of the MRIs. This page describes a tool for defacing MRI images in a way that is both minimally invasive and achieves goals of privacy. Here, "minimally invasive" means changing the image in the smallest way to still be private.

Algorithm
First, the head is segmented from the input volume and a head surface created. mideface then runs Samseg on the input image. Samseg will register to a template as well as segment the brain, skull, eyeballs, and other structures. An average face surface in the template space is then mapped into the native space. The average face has several labels including lower face, upper face without eyes, eyes, forehead, ears, and back of head. The average face surface within a label is projected inwards by a distance until it intersects with at least 95% of the true face in that area. The average face is also projected outwards by a constant distance far enough to include all of the true face. The distance is the same for all vertices within a label. Voxels in the input volume are segmented into four labels: (1) inside both the true and average faces, (2) outside the true face but inside the average face, (3) inside the true face but outside the average face, (4) outside both the true and average face. By default, voxels in #1 and #2 are replaced with random intensities set to the mean of voxels in #1 and voxels in #3 and #4 are replaced with random intensities with mean equal to the mode of voxels in #4.
Basic Usage
In the basic usage, one passes the MRI volume to mideface and specifies an output volume
mideface --i volume.mgz --o volume.defaced.mgz --samseg-fast
This should take roughly 15min to run. The original and defaced volumes can be viewed with freeview:
freeview volume.mgz volume.defaced.mgz
Quality Assurance (QA)
One can run the above freeview command to verify that the voxels of the face have been replaced with random values, but a more extensive QA is possible by adding and output folder:
mideface --i volume.mgz --o volume.defaced.mgz --samseg-fast --odir qa
The qa folder will have many files in it that can be used for QA, but the most important will be head.surf and head.defaced.surf which can be viewed with
freeview volume.mgz volume.defaced.mgz -f qa/head.surf:edgecolor=yellow -f qa/head.defaced.surf:edgecolor=red:visible=0
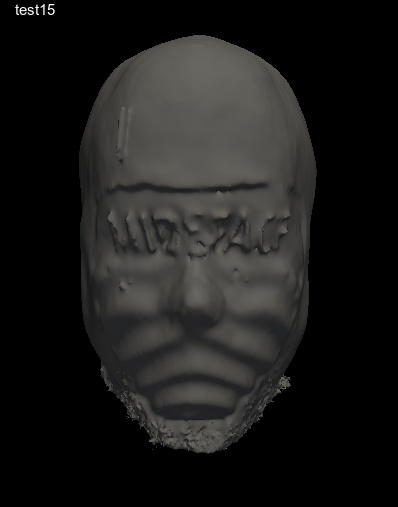
In the surface view, you will see head.surf. This is a rendering of the entire original head, including the face. Hit the Alt-C button to turn off head.surf and display head.defaced.surf. This is the head after defacing. You should see something like image where the face now has a wave in it and you may be able to read the "MIDEFACE" watermark across the eyes. This is the replacement face. If you see the wave and the watermark, then you know that the face has been replaced. Hit Alt-C a few times to switch back and forth. Rotate the head to verify that the ears have been removed.
Creating Pictures for Quality Assurance
Viewing the face surfaces above can be quite tedious if the number of subjects to deface is large. To make QA easier, mideface has the ability to take snapshots which can then be arranged in a slide show or animation or movie.
mideface --i volume.mgz --o volume.defaced.mgz --samseg-fast --odir qa --pics --code codename
Adding --pics will trigger the taking of pictures which will be saved as codename.face-before.png, codename.face-after.png, and codename.before+after.gif, where codenmae is a unique codename for this case. There are several practical details that may need to be addressed. mideface will call freeview to take the picture. This may result in freeview appearing and disappearing from your display, which can be quite annoying. If you have Xvfb installed, it will try to use that. Xvfb is a frame buffer virtual display, meaning that a freeview window will not show up on your display. mideface will use the ImageMagik convert program to crop the images, add the codename to the image, and create the gif. mideface expects this program to be in /usr/bin/convert. If it is not there, you can pass it the path with --imconvert /path/to/convert. If convert is not found or specified, then just the pngs are created. If a codename is not supplied, then the file names and the images will not have the codename. The codename.before+after.gif file is an animated gif switching between the true face and the defaced. To create a slide show, just copy the pngs or the gifs to a folder and go to that folder with your slide viewing program (note that you will need to specify a codename for this otherwise all the files will have the same name).


