| Deletions are marked like this. | Additions are marked like this. |
| Line 22: | Line 22: |
| Decrypting and expanding the FS_7_2_0_Ubuntu_18_04_06.ova.7z will generate a new file without the .7z extension, i.e., FS_7_2_0_Ubuntu_18_04_06.ova will be created. This is the file to import directly into VirtualBox. If the archive program creates the FS_7_2_0_Ubuntu_18_04_06.ova file inside a parent subdirectory with the same name as the file, then rename the subdirectory to be something different. Be aware that some archive programs may delete the original 7zip file. | Decrypting and expanding the FS_7_2_0_Ubuntu_18_04_06.ova.7z will generate a new file without the .7z extension, i.e., FS_7_2_0_Ubuntu_18_04_06.ova will be created. This is the file to import directly into VirtualBox. If the archive program creates the FS_7_2_0_Ubuntu_18_04_06.ova file inside a parent subdirectory with ''the same name as the file'', then rename the subdirectory to be something different. Be aware that some archive programs may delete the original 7zip file. |
FreeSurfer VitrualBox VM Images
System Requirements:
Tested running on hosts: Windows 10, Mac OS 11.6 (Intel Mac) with VirtualBox 6.1.30.
VM: minimum of 8 GB free RAM from the host, i.e., apart from RAM already in use by the host OS and other applications.
VM: minimum of 2 CPU's/cores from the host.
Host Graphics card: 3D graphics card with its own graphics memory & accelerated OpenGL drivers.
Host Disk Space: ~8GB for virtual image download (compressed *.ova file), ~30G for expanded VM image.
Host: A working network connection.
Suggested Experience Level:
Some familiarity with downloading files, e.g., via a web browser or using commands such as wget, curl from the linux terminal.
Some familiarity with the linux terminal running bash shell including removing, copying, editing files and setting/unsetting environment variables.
Some familiarity with simple bash commands/scripting, e.g., as found in the shell initialization file.
Install VirtualBox on your Machine:
VirtualBox install on Windows OS host: Vbox_Windows_install.pdf
VirtualBox install on MacOS host: Vbox_MacOS_install.pdf
VirtualBox install on linux OS host: linux downloads
Setup and Run the Virtual Image:
Once VirtualBox is installed on your host machine, you can download a 7zip file containing an image with Freesurfer and its shell environment pre-installed. The currently available images are:
Freesurfer 7.2.0 release in Ubuntu 18.04.06: FS_7_2_0_Ubuntu_18_04_06.ova.7z
Decryption of the 7zip file requires a pass code which you can obtain by sending an email to the freesurfer mail list. Once you have received the pass code, you can right click on the FS_7_2_0_Ubuntu_18_04_06.ova.7z file and see what options you have under the choices for "Open with". If your current program choices cannot open a 7zip file and/or accept a pass code, then try one of the following utilities:
For decryption on Windows try the free version of WinRAR to expand the 7zip file.
For decryption on MacOS try the free Unarchiver to expand the 7zip file.
For decryption on linux try the package manager programs, e.g., yum, dnf, apt, to download and install a 7z or 7za binary.
Decrypting and expanding the FS_7_2_0_Ubuntu_18_04_06.ova.7z will generate a new file without the .7z extension, i.e., FS_7_2_0_Ubuntu_18_04_06.ova will be created. This is the file to import directly into VirtualBox. If the archive program creates the FS_7_2_0_Ubuntu_18_04_06.ova file inside a parent subdirectory with the same name as the file, then rename the subdirectory to be something different. Be aware that some archive programs may delete the original 7zip file.
Screenshots to setup the VM were taken from VirtualBox running on MacOS and Windows, but apart from some variations in the GUI on different hosts, the menus options are the same on MacOS, Windows and Linux. Please refer to the document: Vbox_load_image.pdf
See this post about how to share a subdirectory from Windows inside the Ubuntu VM.
This document describes how to access (share) an external drive plugged into the Windows machine in the Ubuntu VM:<<BR>> Vbox_Windows_mount_external_drive.pdf
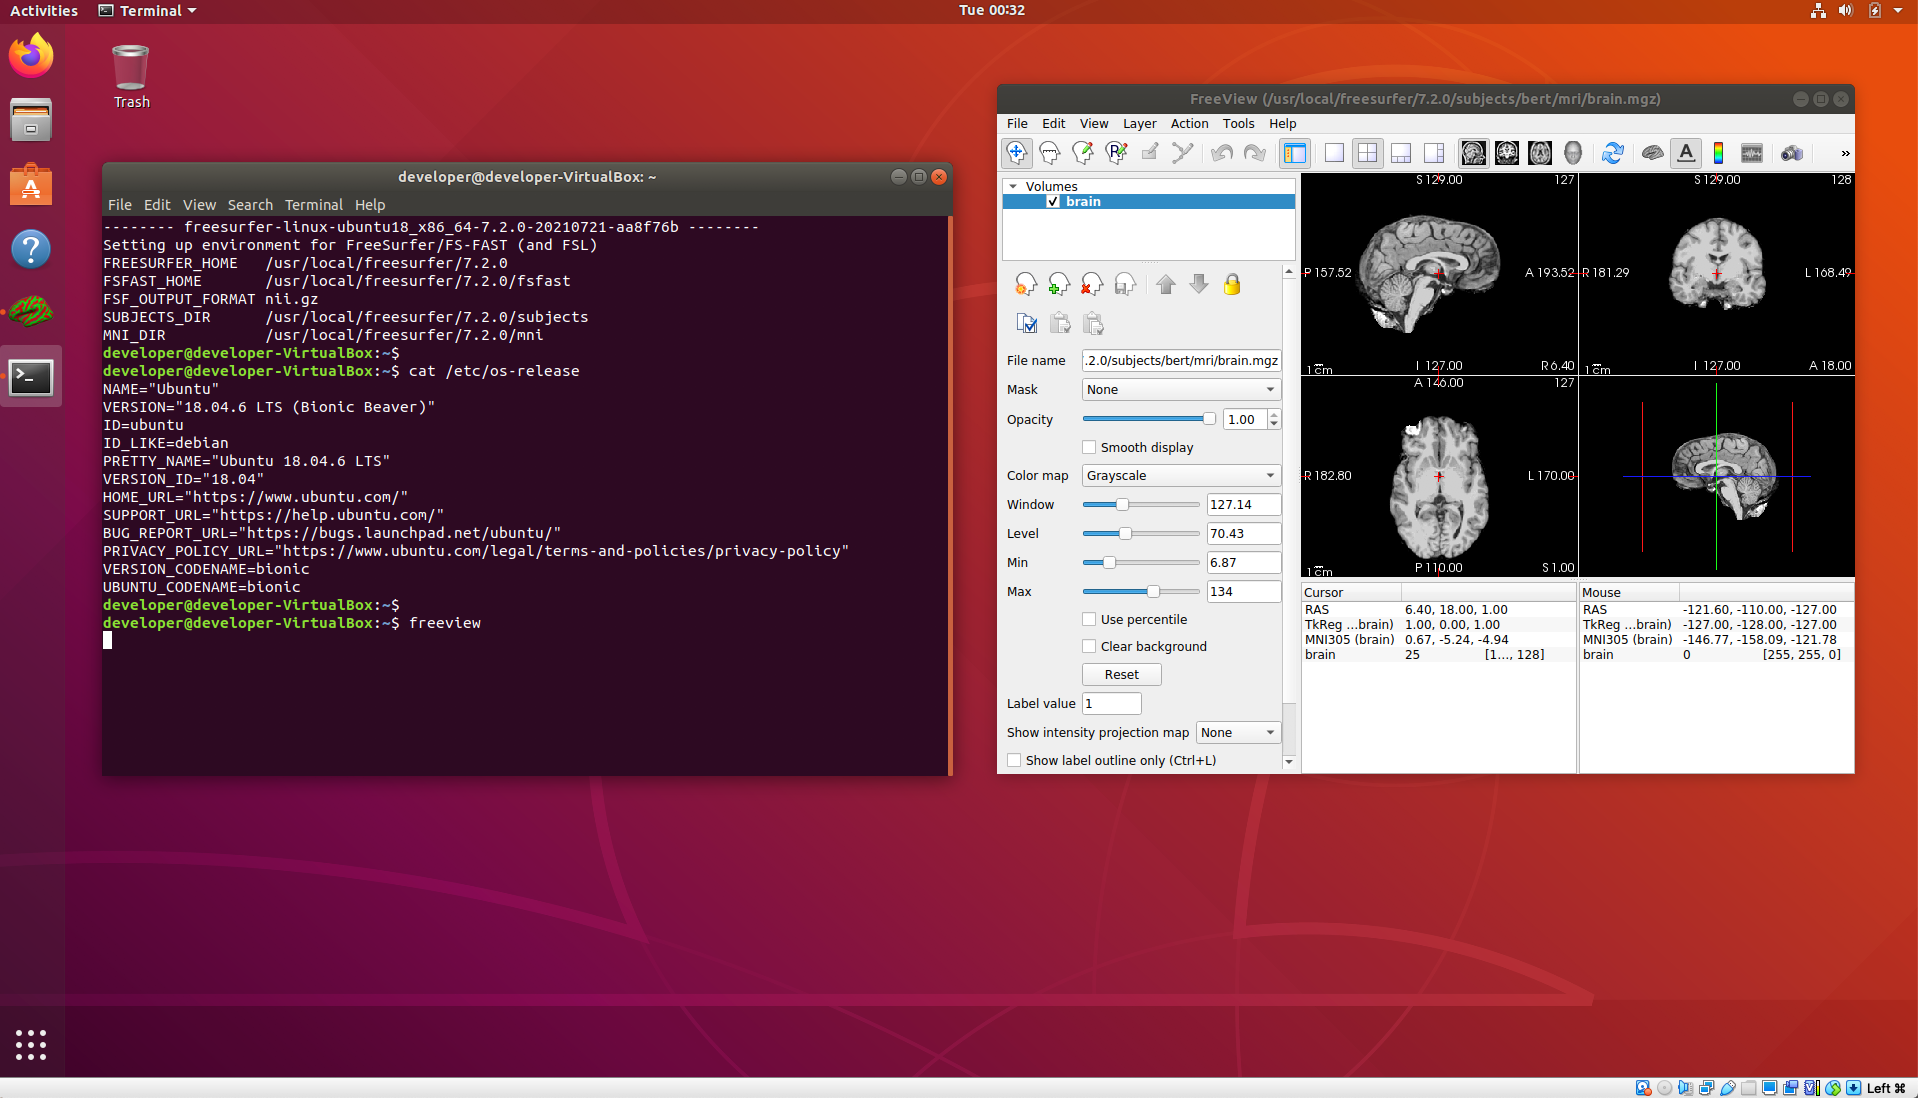
Example screenshot of VM up and running:
Once the VM starts and you have added your Freesurfer license file, you can start a terminal and it should come up with the environment set to run the 7.2.0 release.

