FreeSurfer VirtualBox VM Images
FREESURFER COURSE INFO:
The course specific instructions are after the general information, starting with the detailed Windows and Mac downloading instructions. The general information will likely not be helpful, as this course uses simplified methods of downloading and verifying FreeSurfer.
System Requirements:
Tested running on hosts: Windows 10, Mac OS 11.6 (Intel Mac) with VirtualBox 6.1.30.
VM: minimum of 8 GB free RAM apart from RAM already in use by the host OS and other applications.
VM: minimum of 2 CPU's/cores from the host.
Host Graphics card: 3D graphics card with its own graphics memory & accelerated OpenGL drivers.
Host Disk Space (required): ~8GB for virtual image download (compressed *.ova file), ~30G for expanded VM image.*
Host Disk Space (optional): ~8GB for tutorial data download (compressed *.tgz file), ~14G for expanded tutorial data.*
Host: A working network connection.
Additionally see the Freesurfer Release 7 System Requirements.
* To accommodate the VM, the tutorial data, and other data, please locate the VM on a disk partition with at least 60G of free space.
Suggested Experience Level:
Some familiarity with downloading files, e.g., via a web browser or using commands such as wget, curl from the linux terminal.
Some familiarity with the linux terminal running bash shell including removing, copying, editing files and setting/unsetting environment variables.
Some familiarity with simple bash commands/scripting, e.g., as found in the shell initialization file.
Install VirtualBox on your Host Machine:
VirtualBox install on Windows OS host: Vbox_Windows_install.pdf
VirtualBox install on MacOS host: Vbox_MacOS_install.pdf *
VirtualBox install on linux OS host: linux downloads
* We are aware that VirtualBox may crash on Intel or M1 Macs running MacOS 12.x (Monterey).
Download and Run the Virtual Machine:
Ubuntu 18.04.06 compressed image with the Freesurfer 7.2.0 release installed: FS_7_2_0_Ubuntu_18_04_06.ova.7z
Right click on the <file name>.ova.7z file and see what options you have under the choices for "Open with". If your current archive program choices cannot open a 7zip file, then try installing one of the utilities listed below. You will be prompted for a pass code when the archive is successfully opened. If you do not have the pass code to open the image, then send an email to the Freesurfer help list to receive it.
For 7zip on Windows try the free version of WinRAR to expand the 7zip file.
For 7zip on MacOS try the free Unarchiver to expand the 7zip file.
For 7zip on linux try the package manager programs, e.g., yum, dnf, apt, to download and install a 7z or 7za binary.
Expanding the <file name>.ova.7z will generate a new file without the .7z extension, i.e., <file name>.ova will be created. This is the file to import directly into VirtualBox. If the archive program creates the <file name>.ova file under a subdirectory with the same <file name>.ova name, then rename the subdirectory to be something different. Be aware that some archive programs may delete the original <file name>.ova.7z file after it is expanded.
This document will take you through the steps to setup and run the VM. Screenshots to setup the VM were taken from VirtualBox running on MacOS and Windows. Apart from some variations in the GUI on different hosts, the menus options are the same on MacOS, Windows and Linux. See: Vbox_load_image.pdf
See this post about how to share a subdirectory from Windows inside the Ubuntu VM.
This document describes how to access (share) an external drive plugged into the Windows machine in the Ubuntu VM:
Vbox_Windows_mount_external_drive.pdf
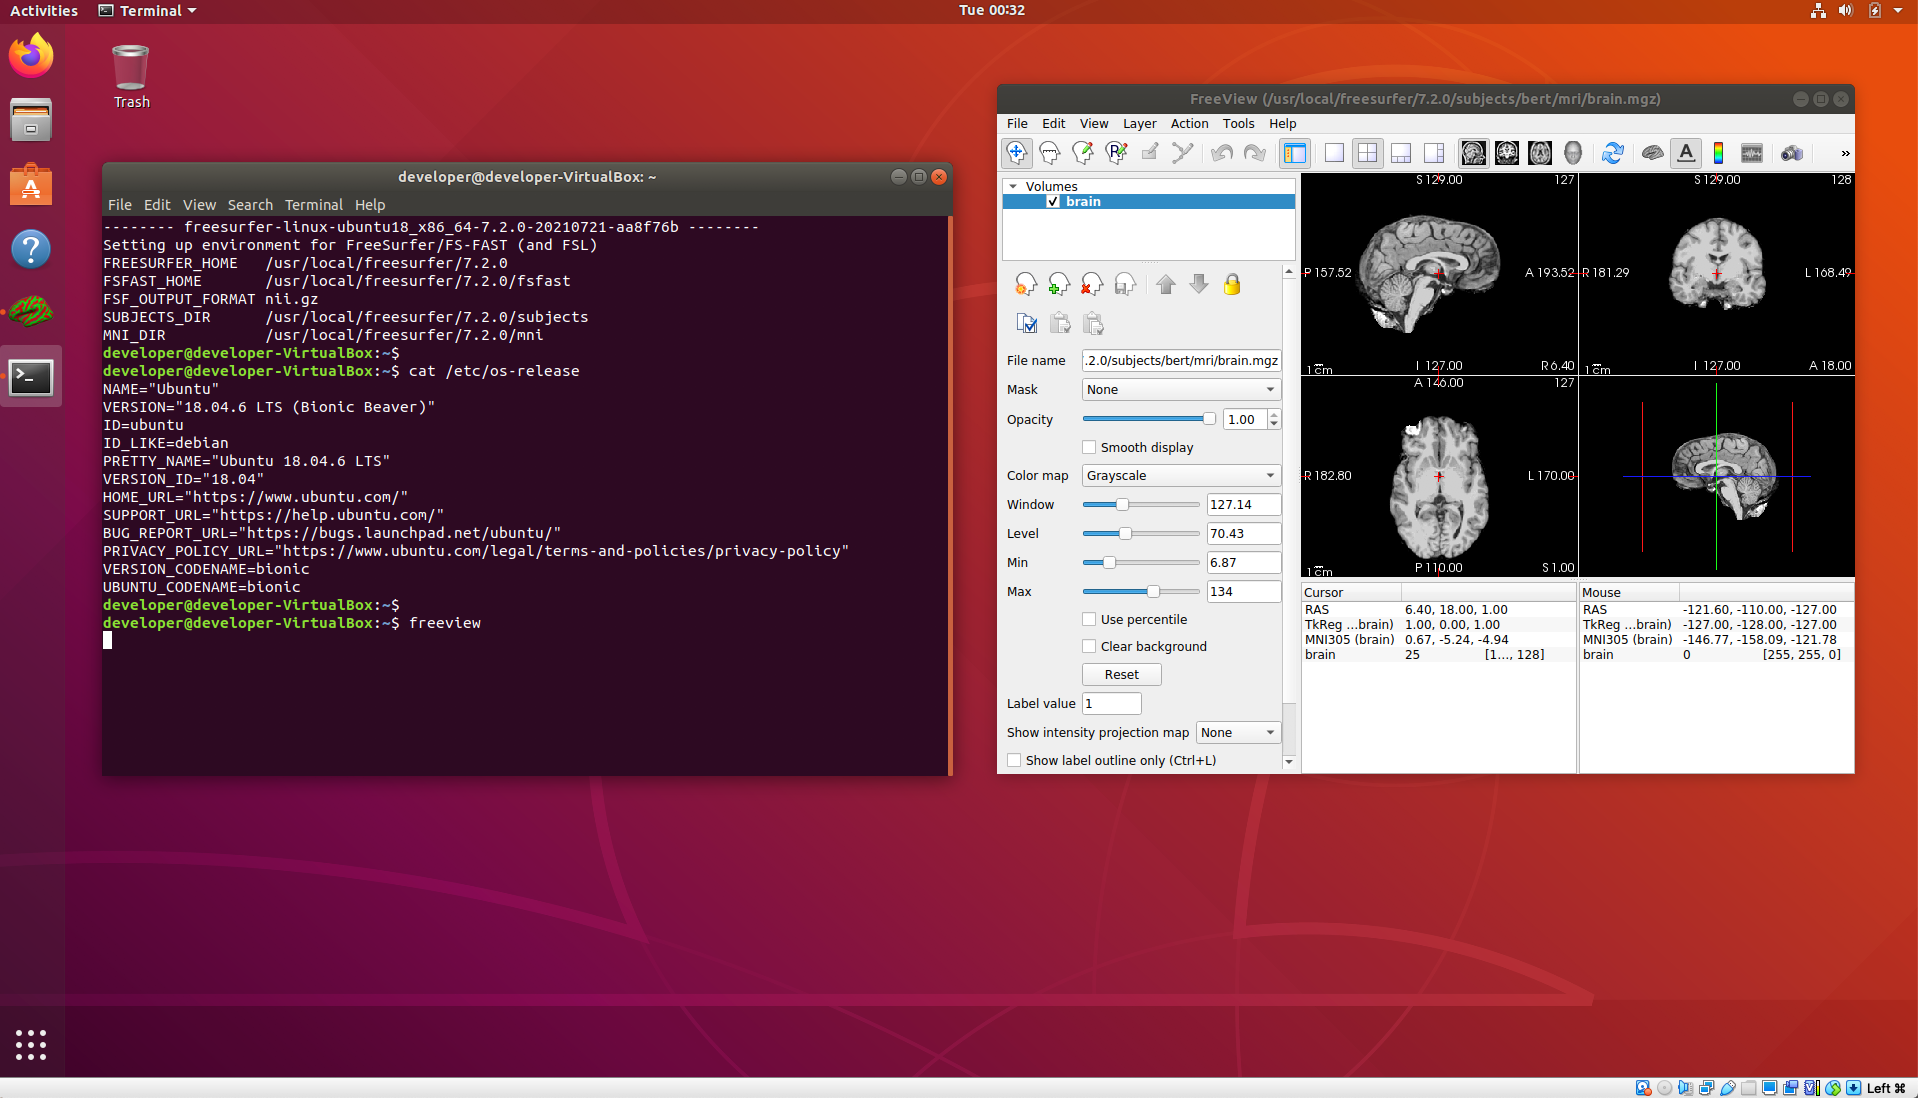
Example screenshot of VM up and running:
Once the VM starts and you have added your Freesurfer license file, you can start a terminal and it should come up with the environment set to run the 7.2.0 release.
Adding the tutorial data to the VM:
This document describes how to setup, run and test the VM using commands from the Freesurfer course tutorial data; the primary focus is on the Freeview command.
setup_tutorial_data.pdf
FreeSurfer Course Install Instructions
Downloading & Installing Virtualbox
The first step in getting ready for the FreeSurfer Course is downloading VirtualBox. It is a virtual machine software, able to easily replicate the environment and user interface of another computer, in this case one with FreeSurfer preinstalled. First you will need to download the file that contains the Image (more information forthcoming), and then follow the instructions on how to set up the virtual machine. These steps differ for MacOS and Windows, so instructions for both are below.
Installing On Windows
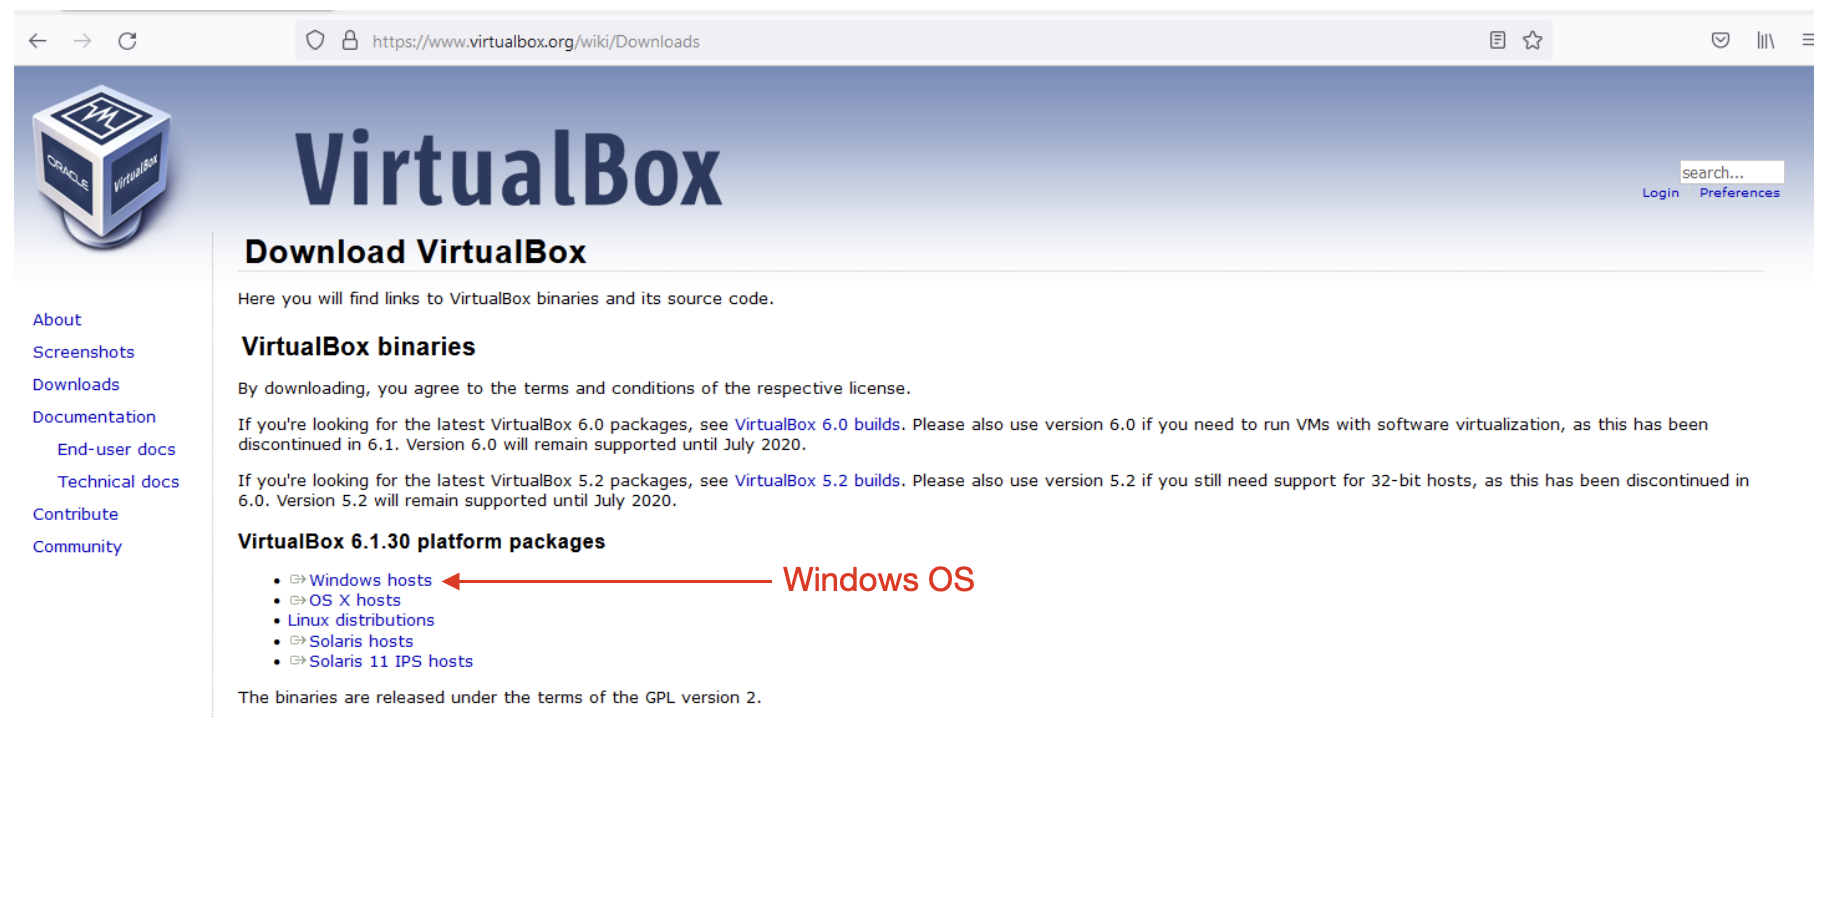
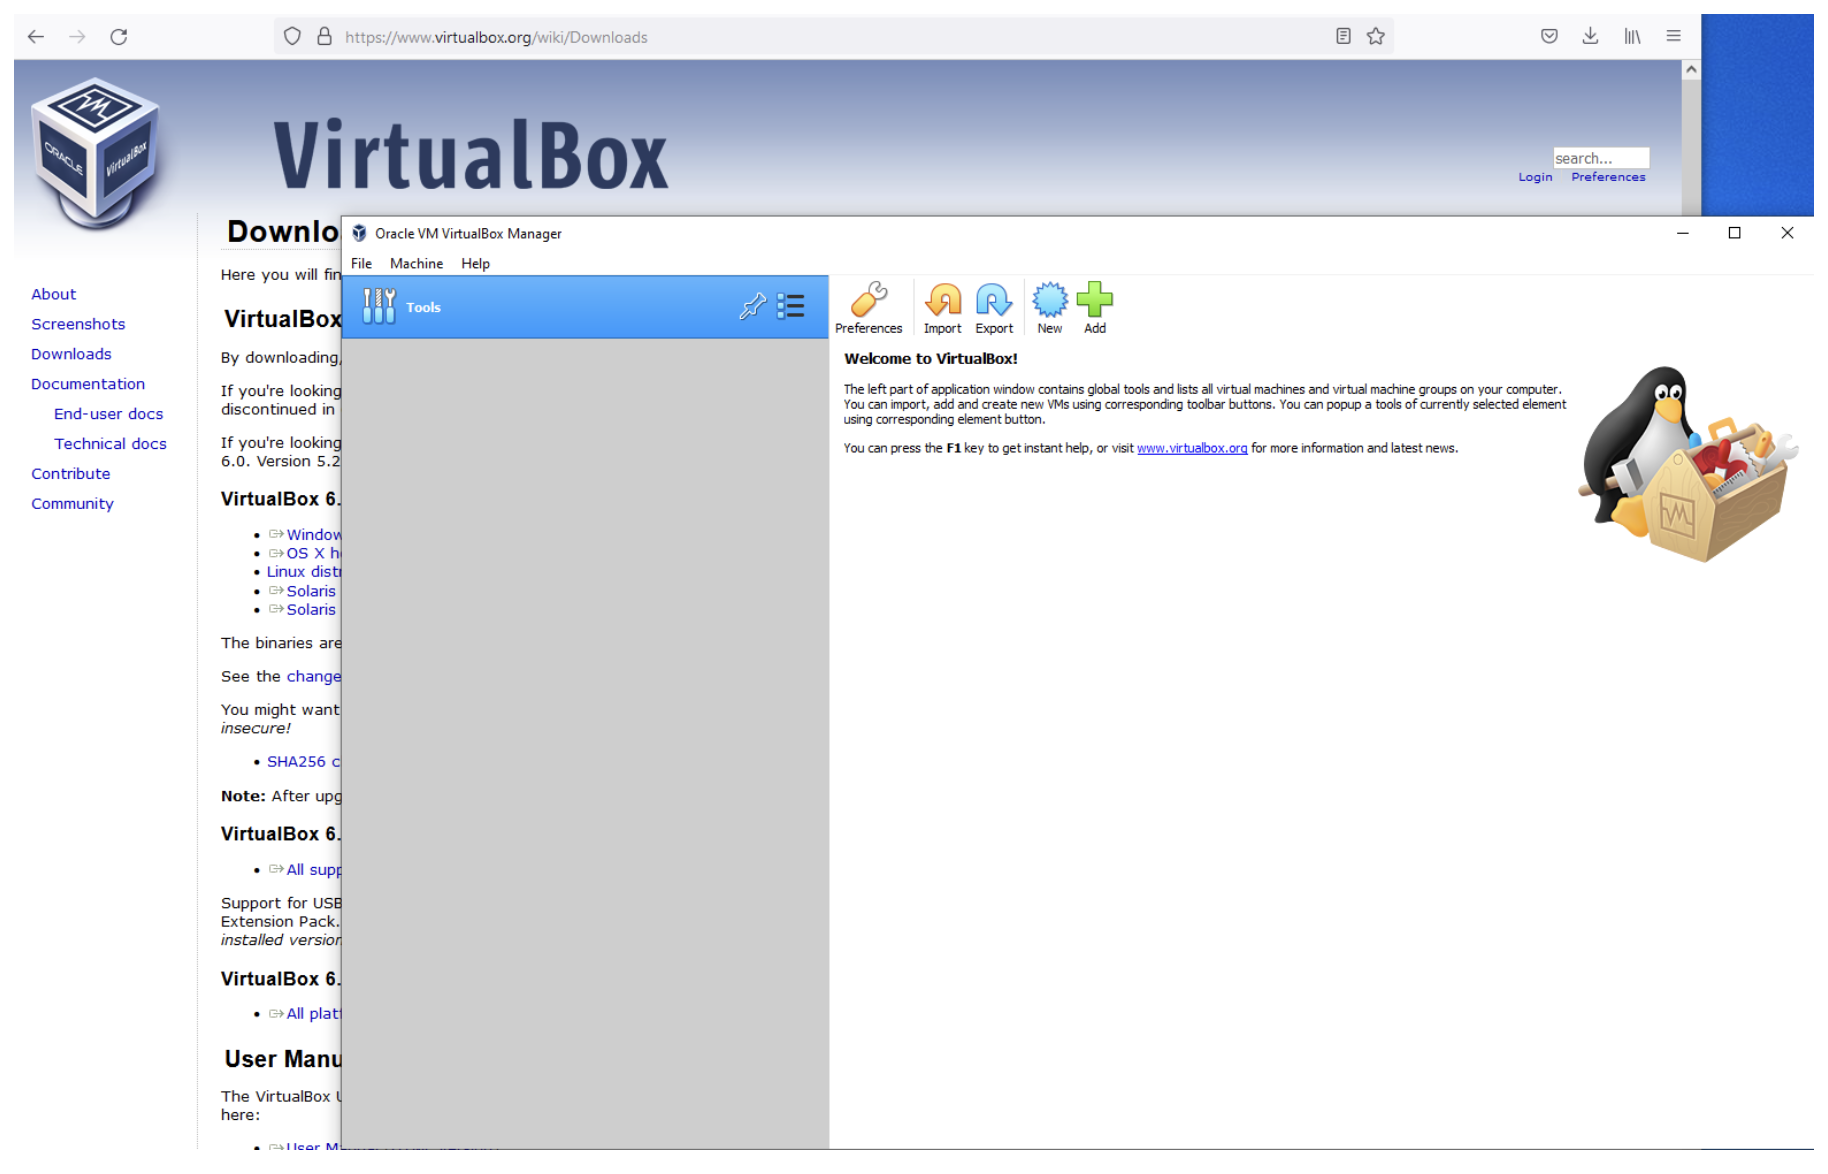
Navigate to the VirtualBox website, https://www.virtualbox.org/wiki/Downloads, and download the latest version of VirtualBox.
Save the installer and wait for the download to finish.
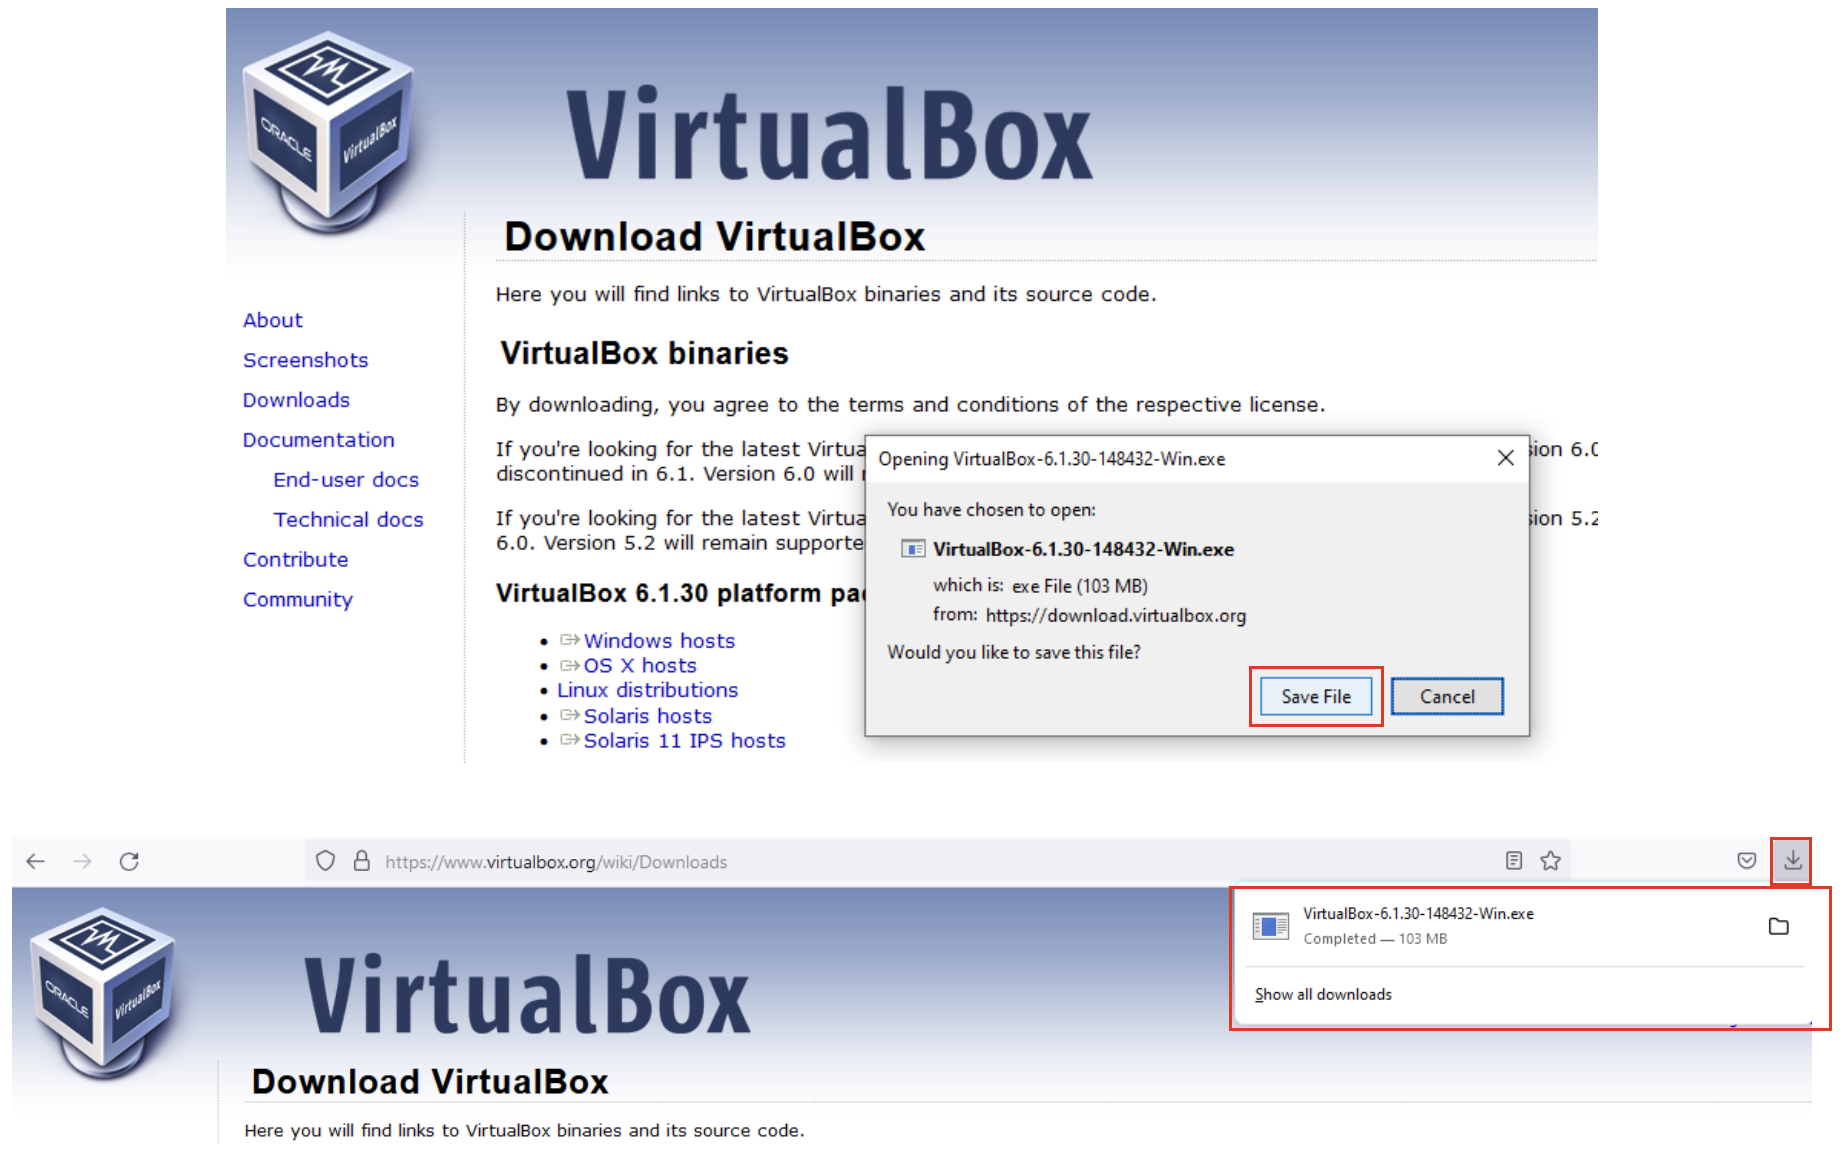
Locate the installer in the Downloads folder and double click on it to launch it.
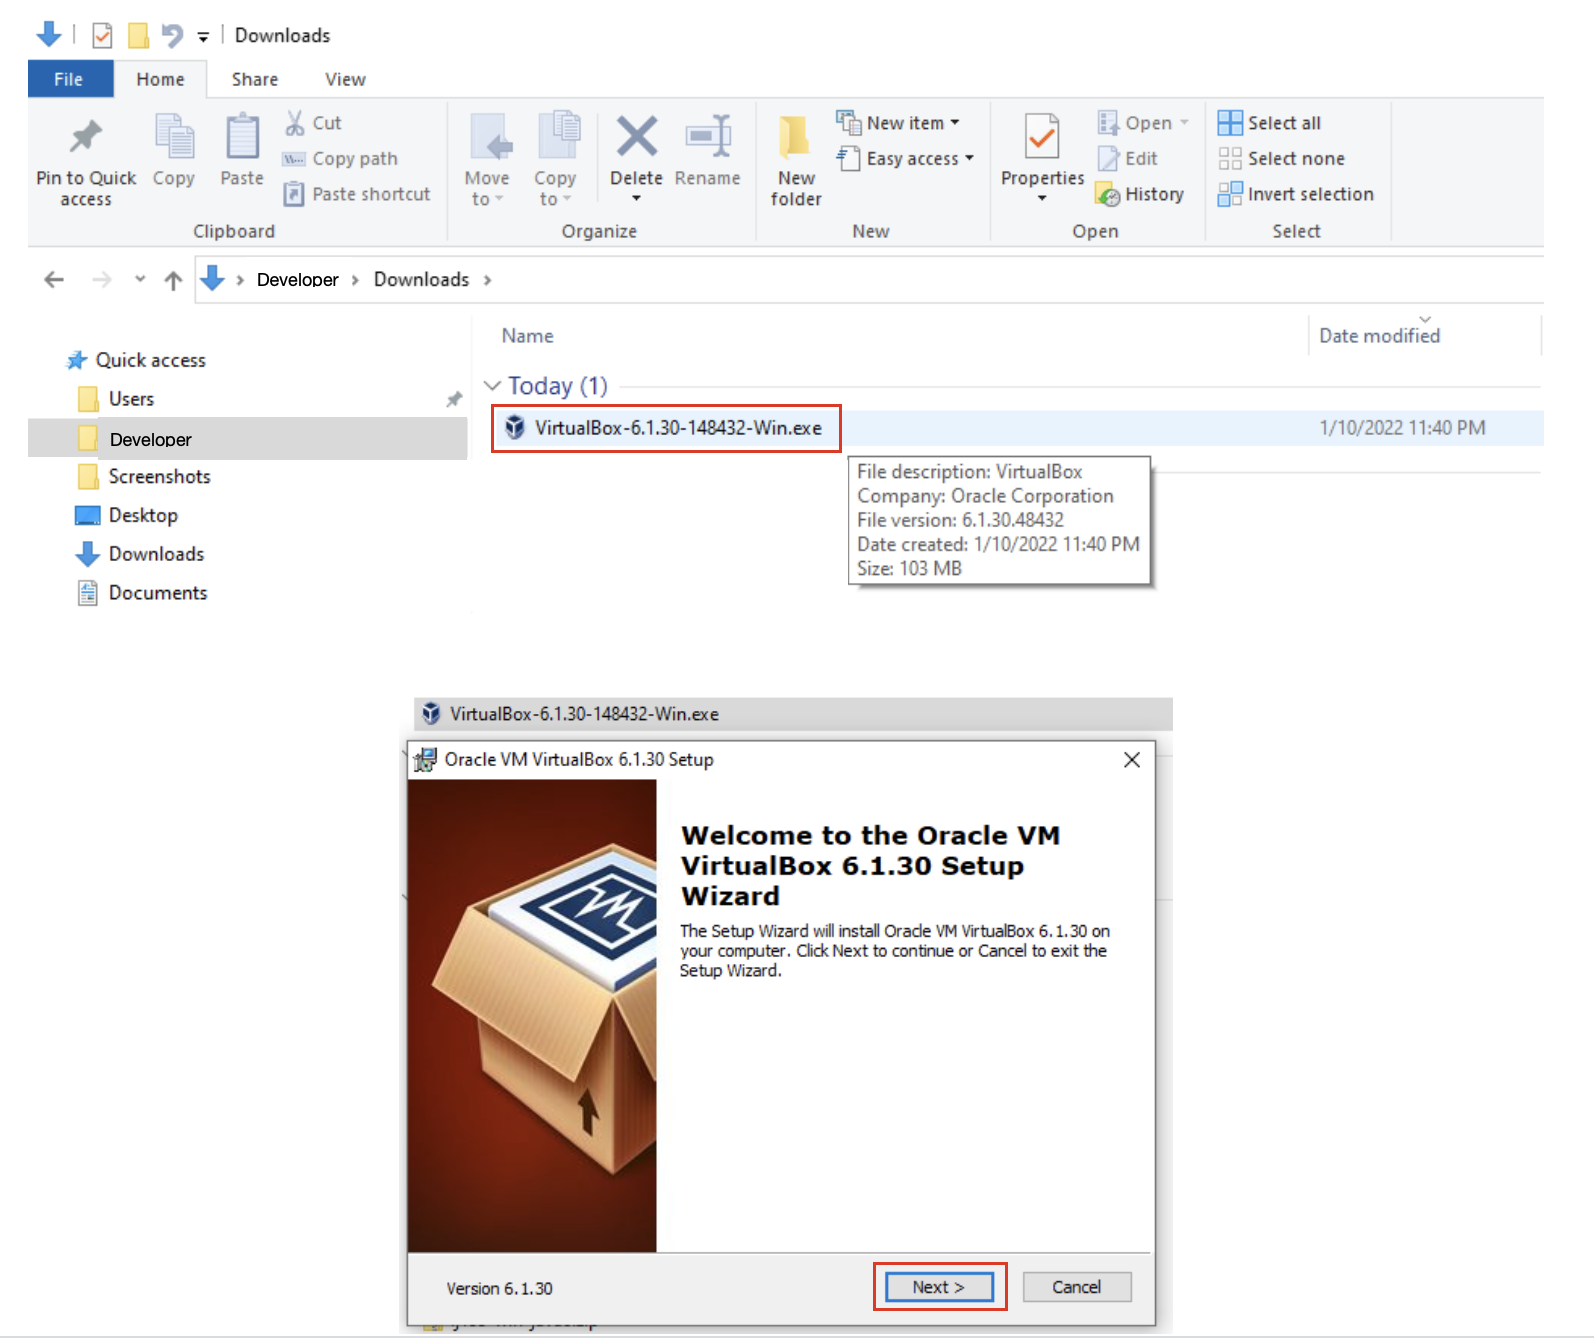
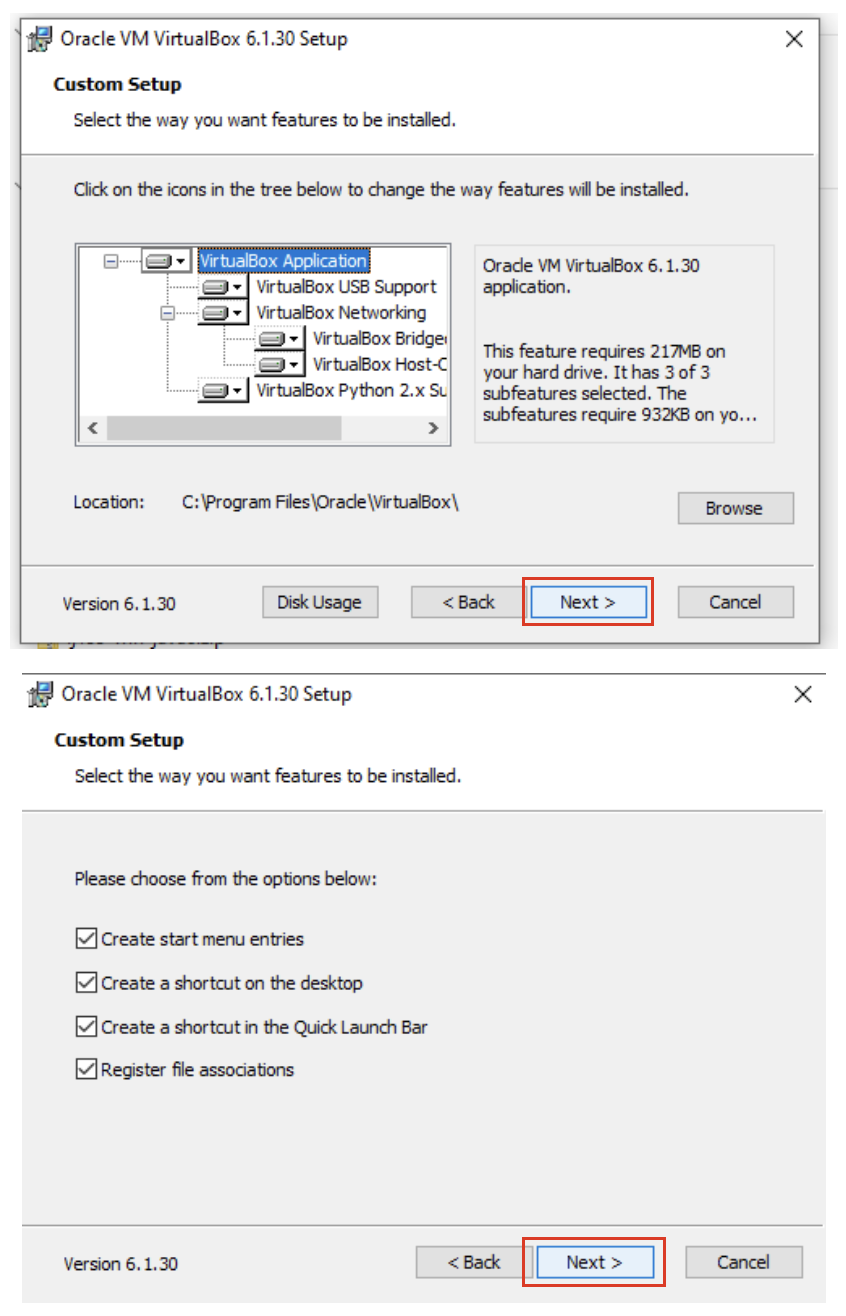
Choose to install the default setup/configuration with the default options
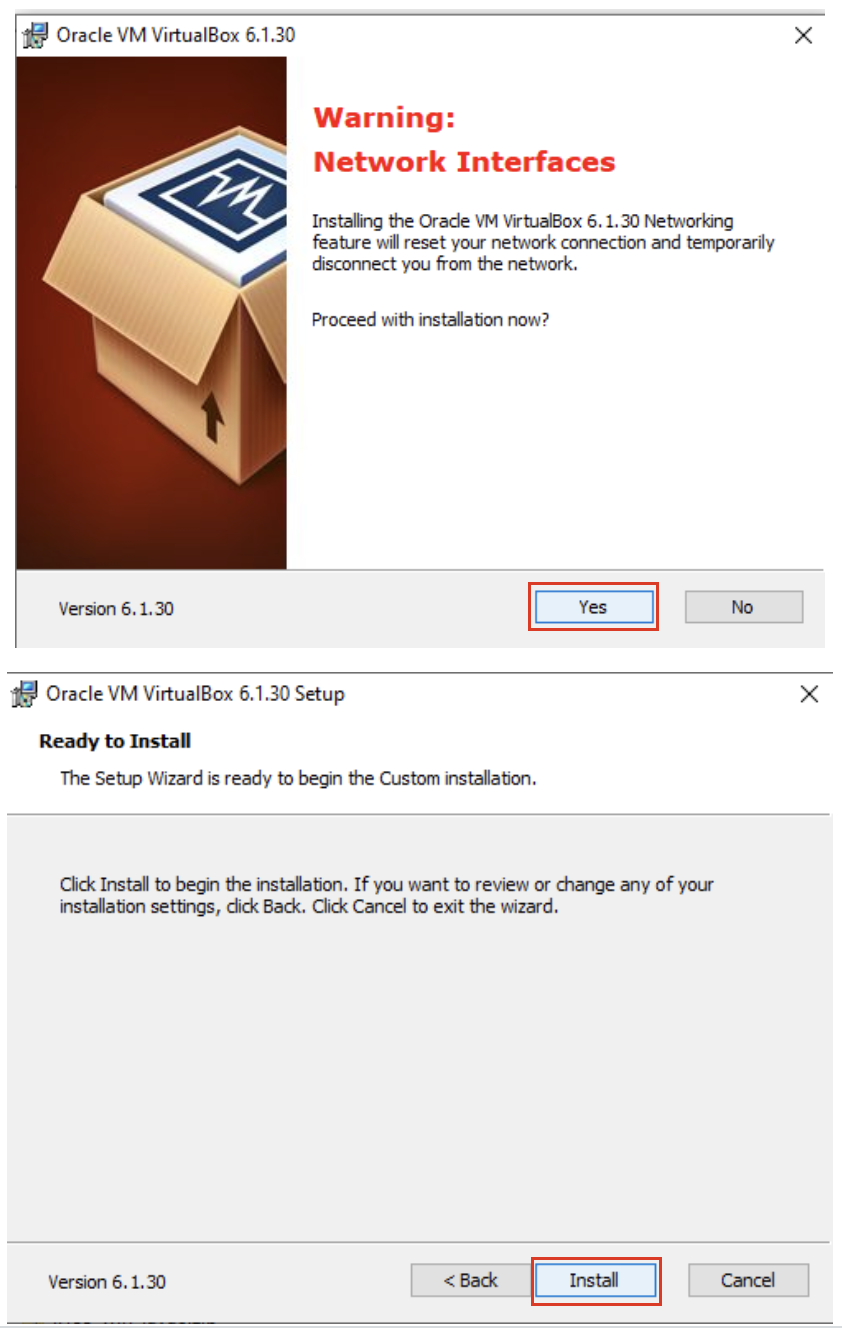
Allow the network connection to be reset and start the installation.
Allow the installation to progress and complete. Then click the finish button.
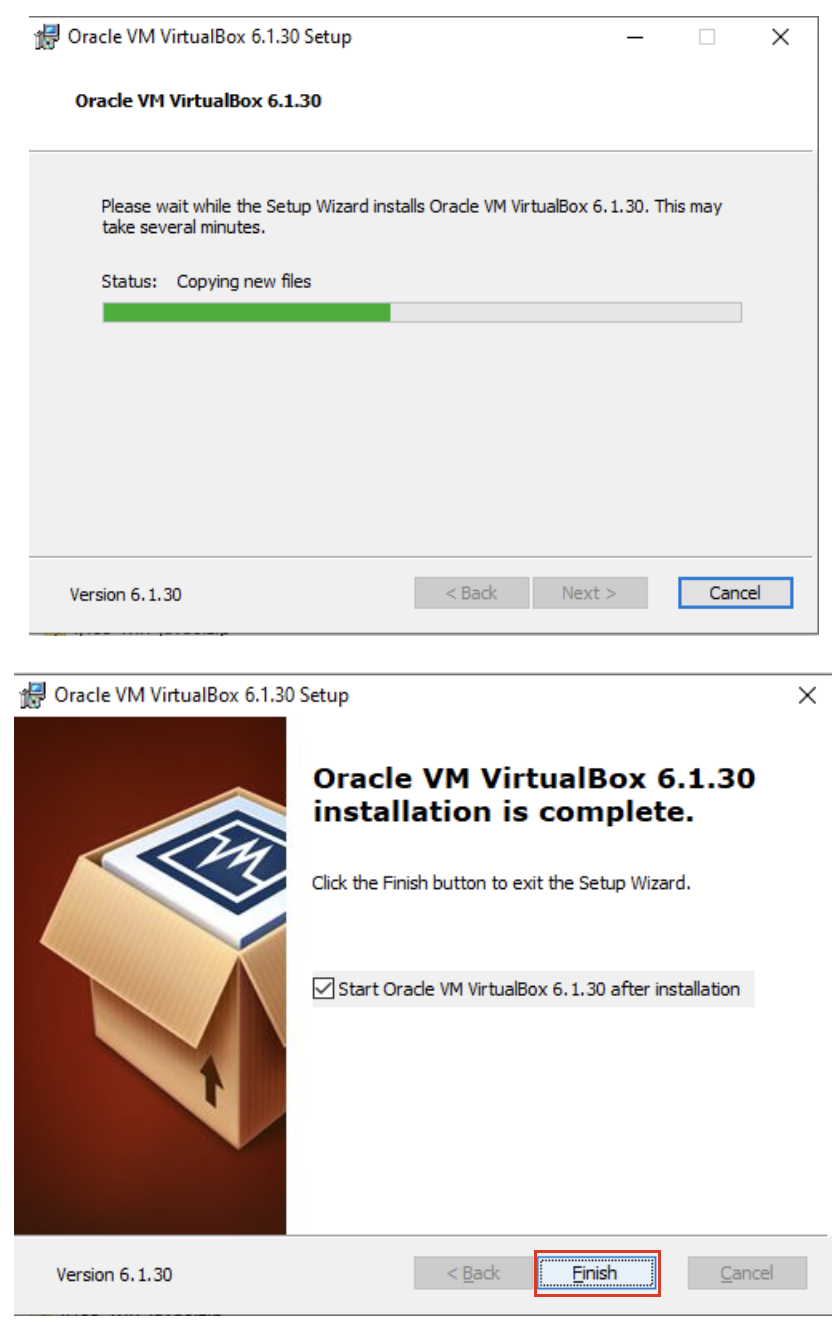
VirtualBox should automatically launch and display an empty window (containing no virtual machines).
Installing on MacOS
Reminder: Any ARM based computers, including M1 and M2 Macs, will not work with VirtualBox, or our planned course.
Navigate to the VirtualBox website, https://www.virtualbox.org/wiki/Downloads, and download the latest version of VirtualBox.
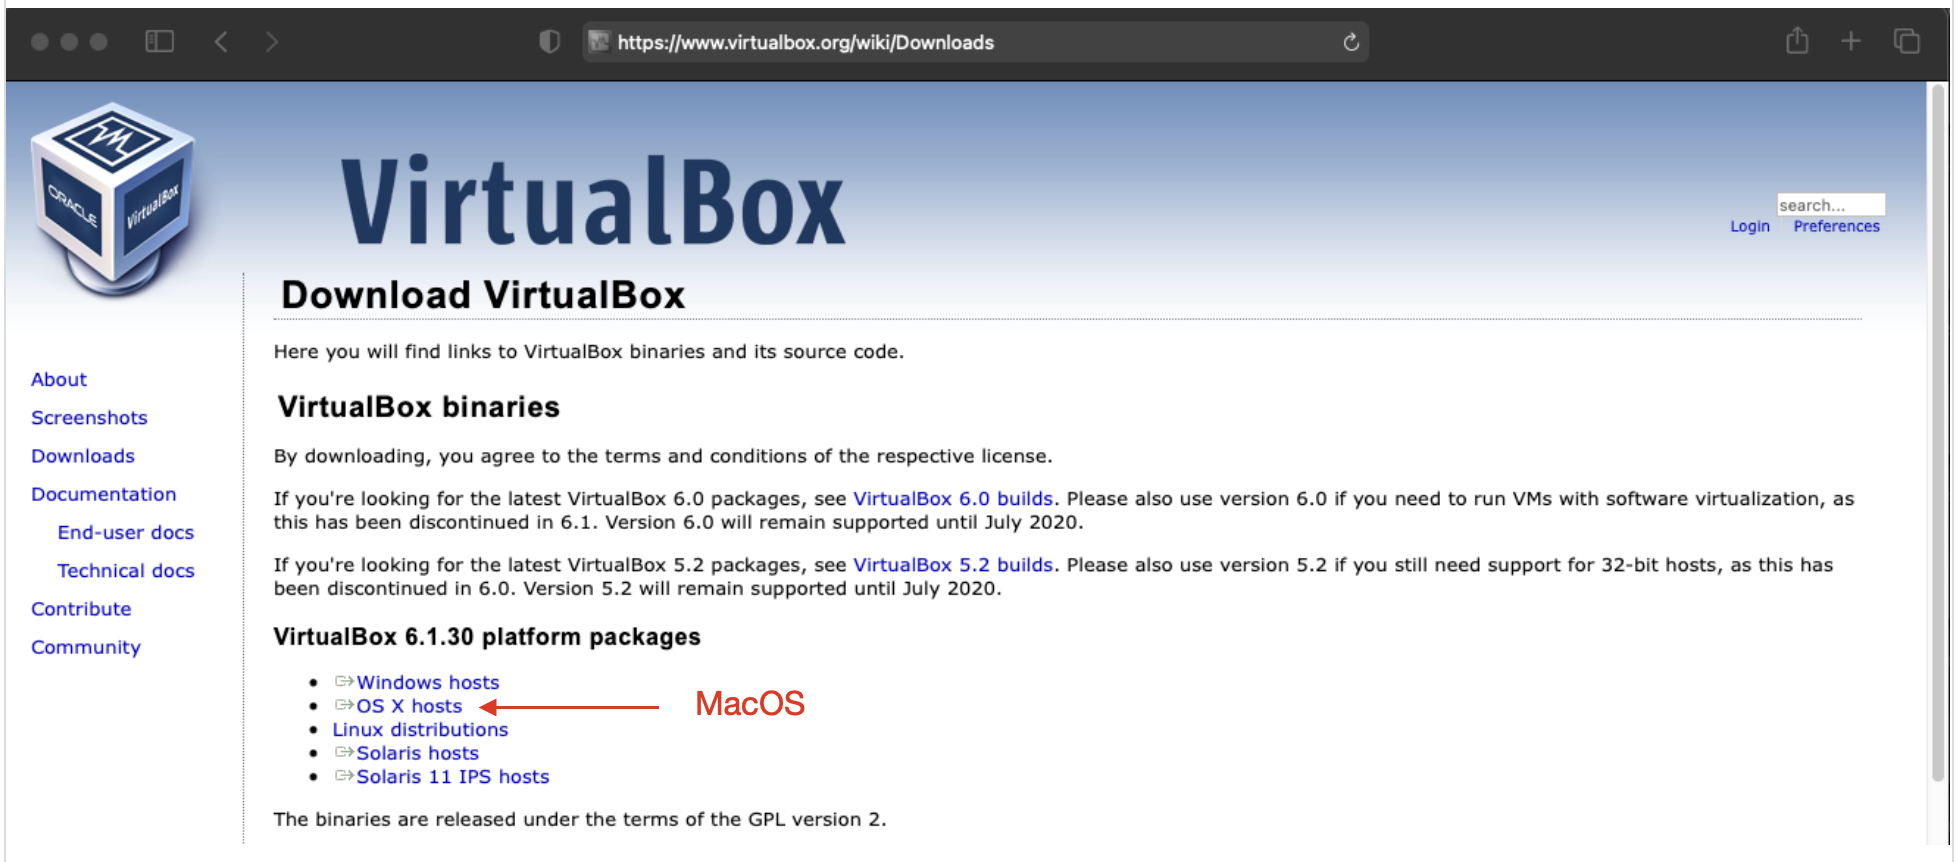
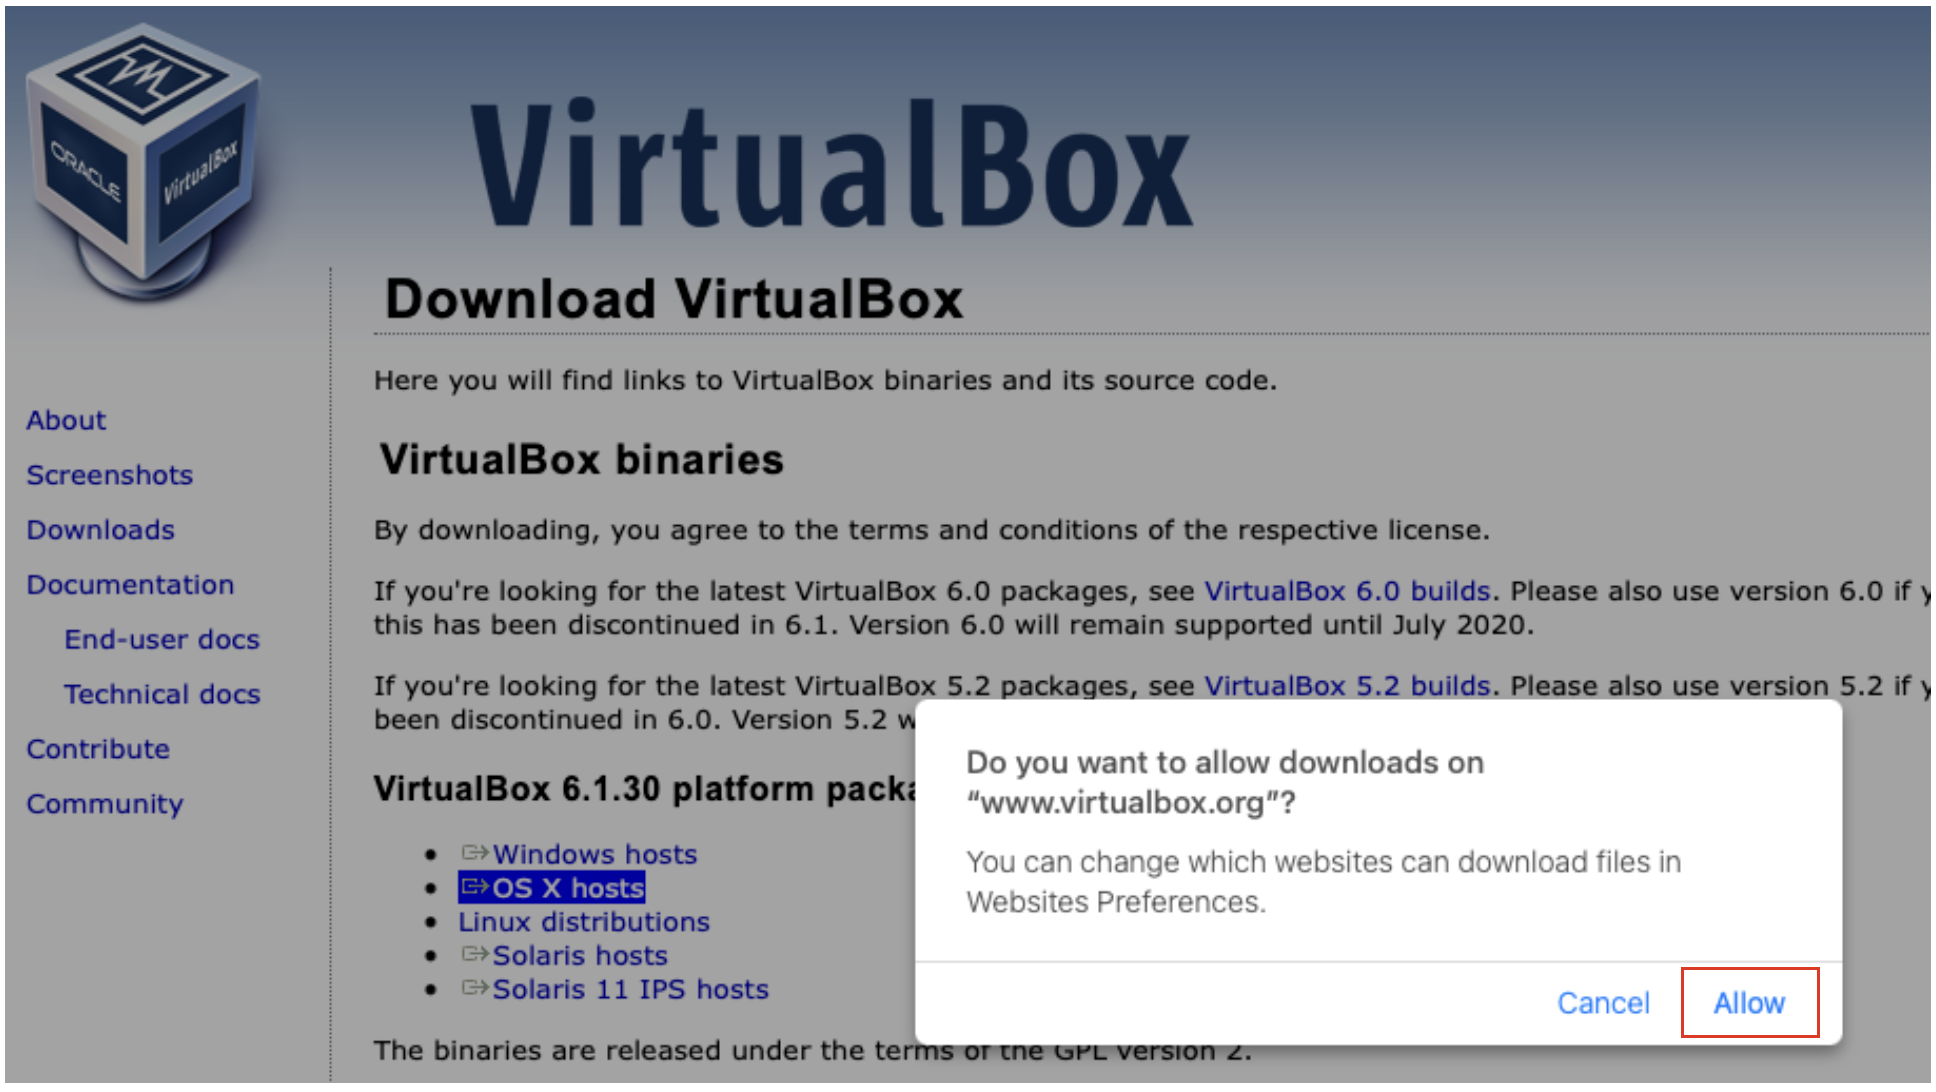
Allow downloads from the VirtualBox web site.
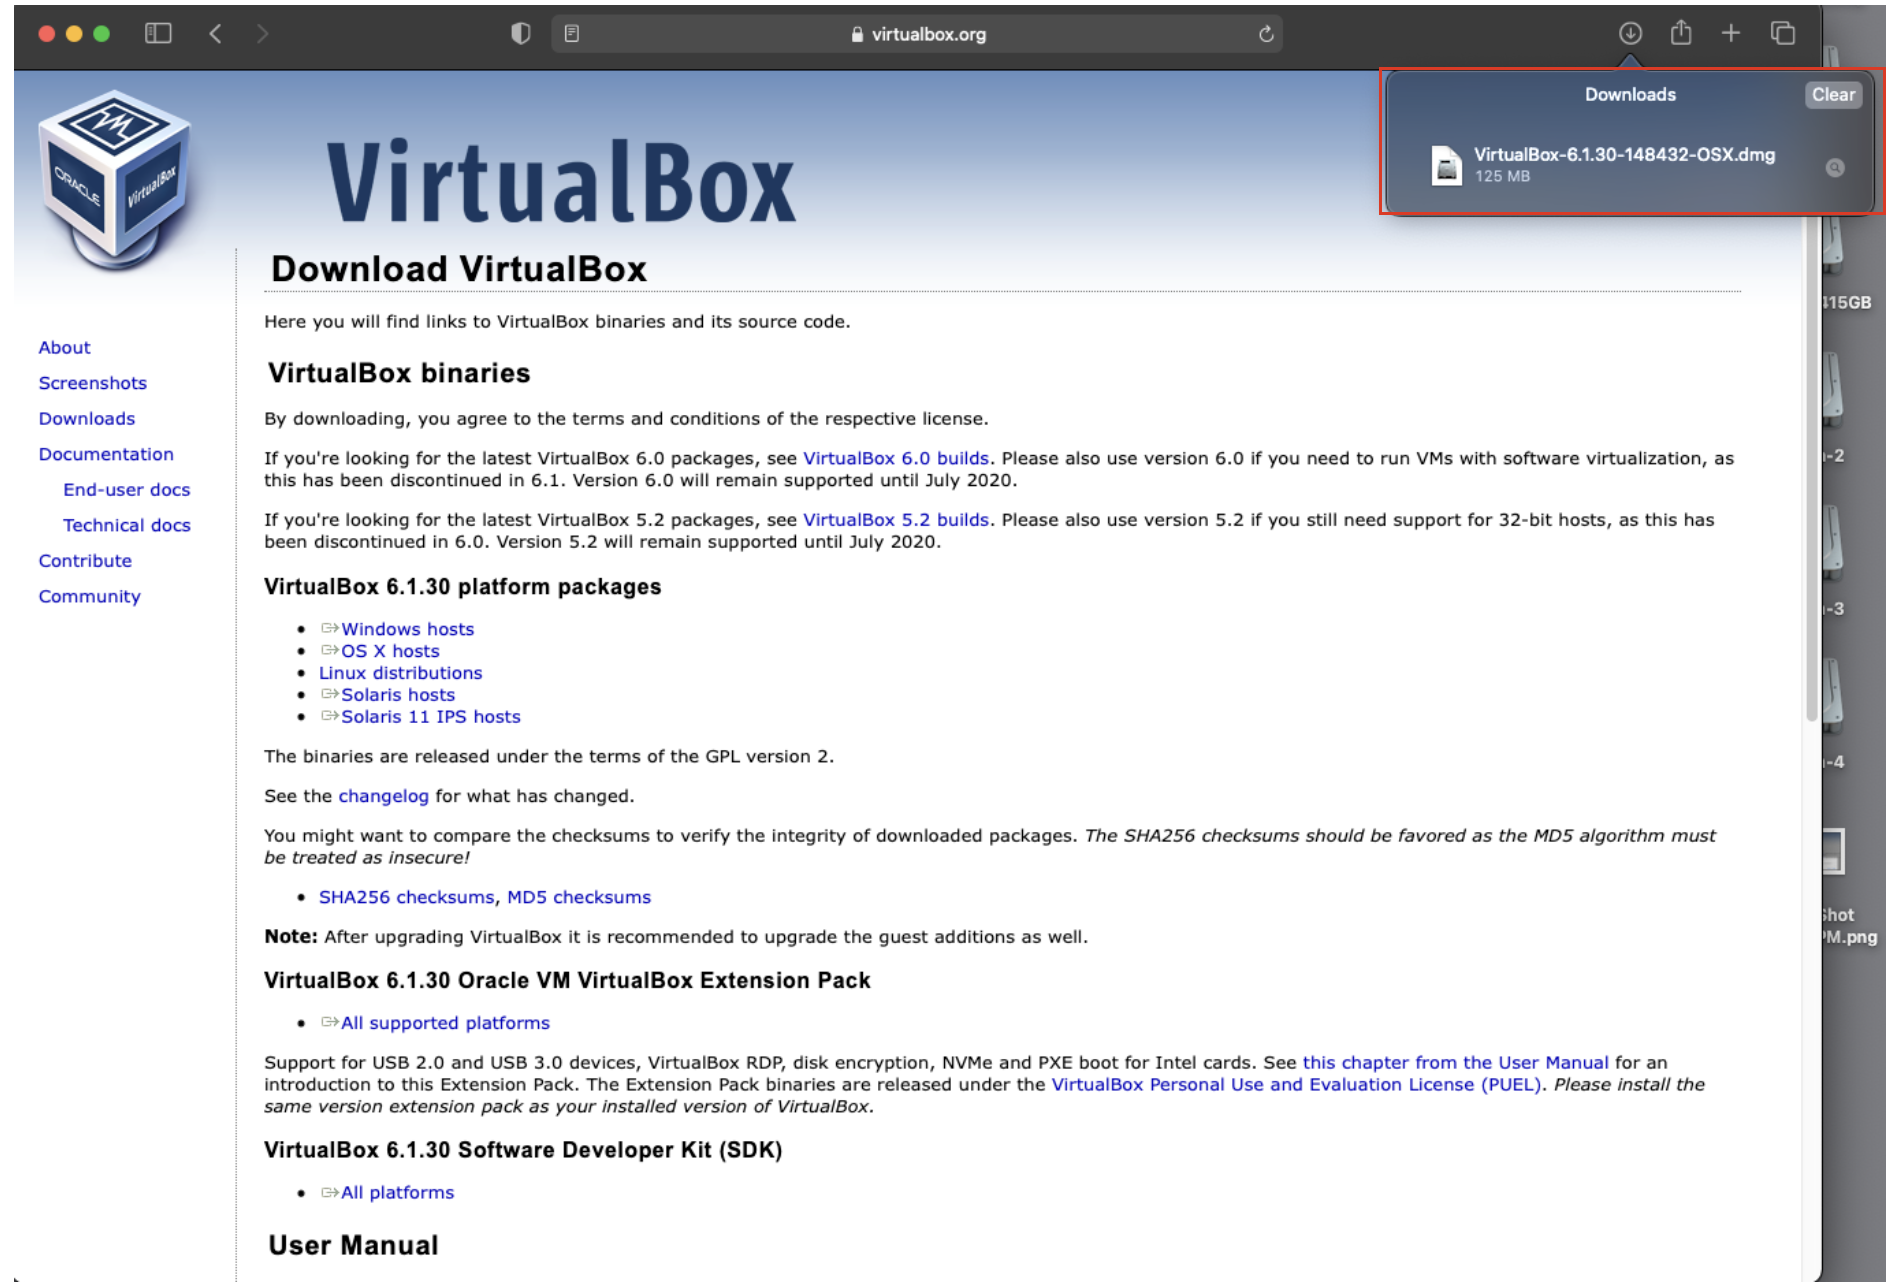
Open the download archive when it finishes.
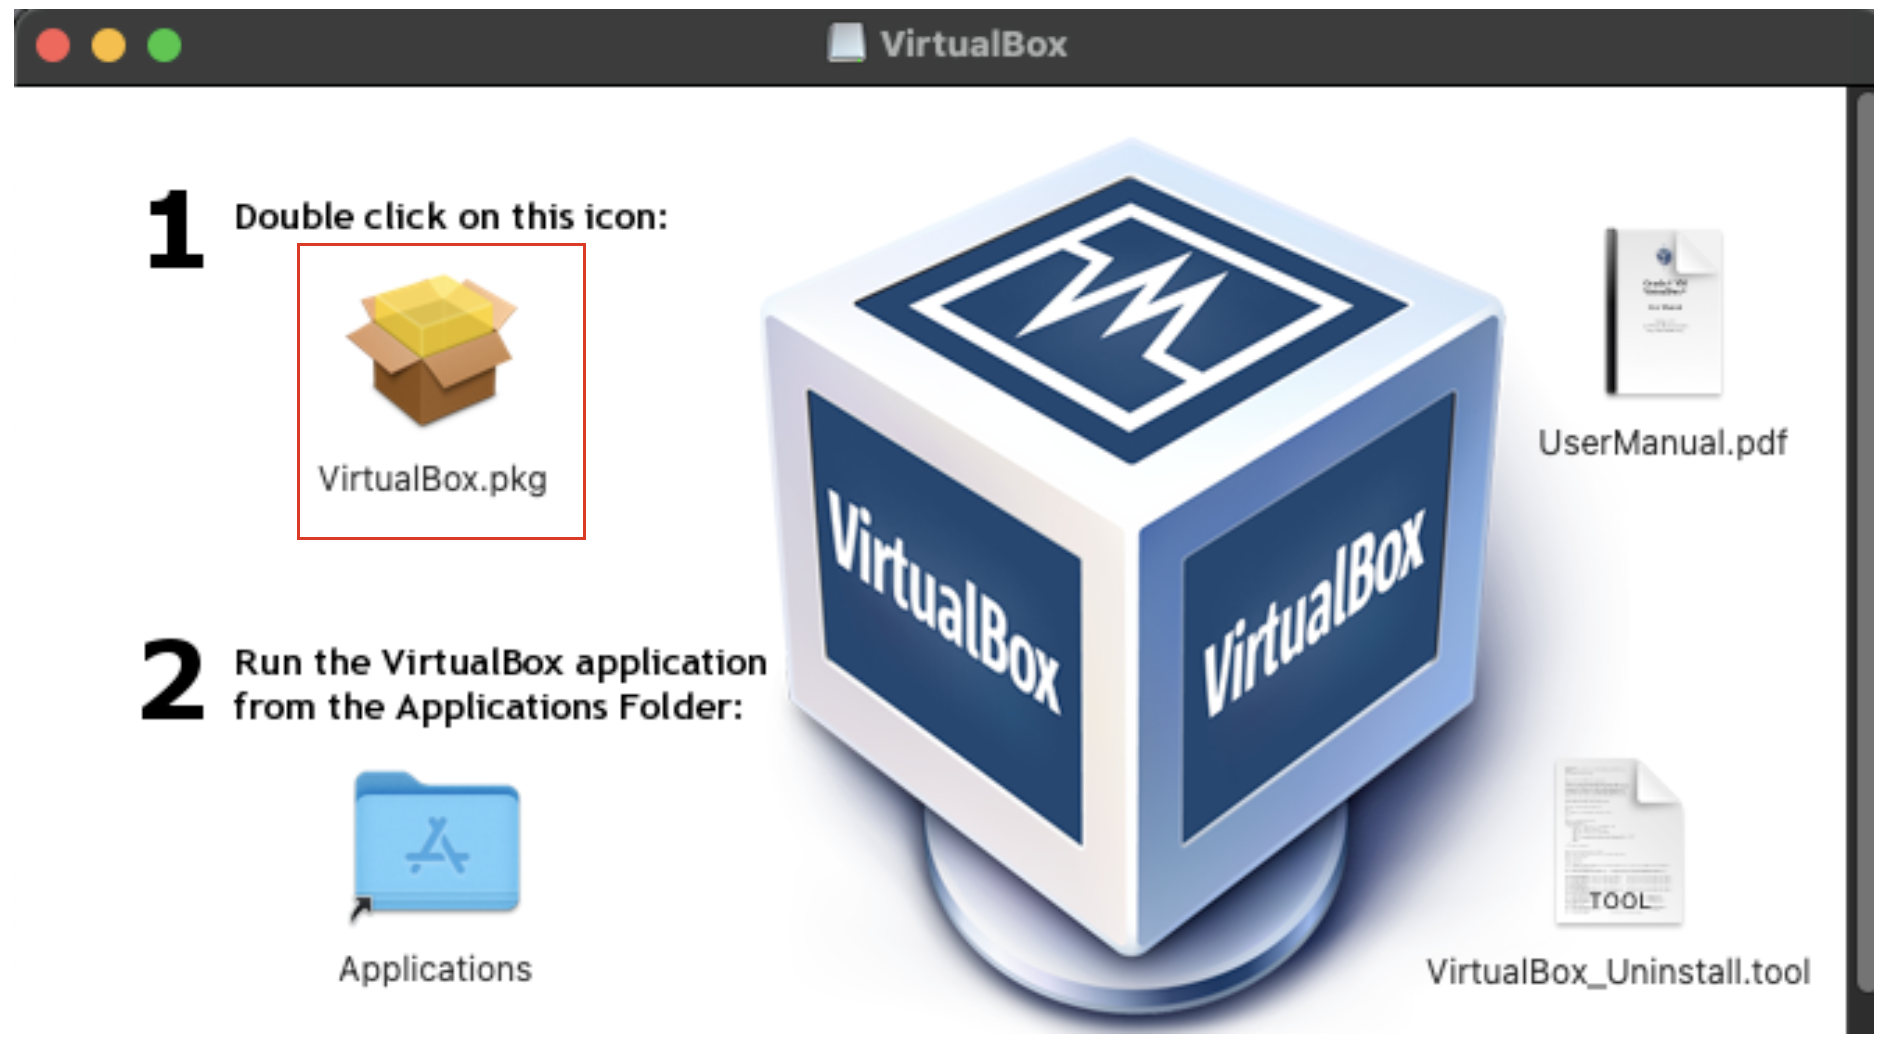
Double click on the VirtualBox package installer
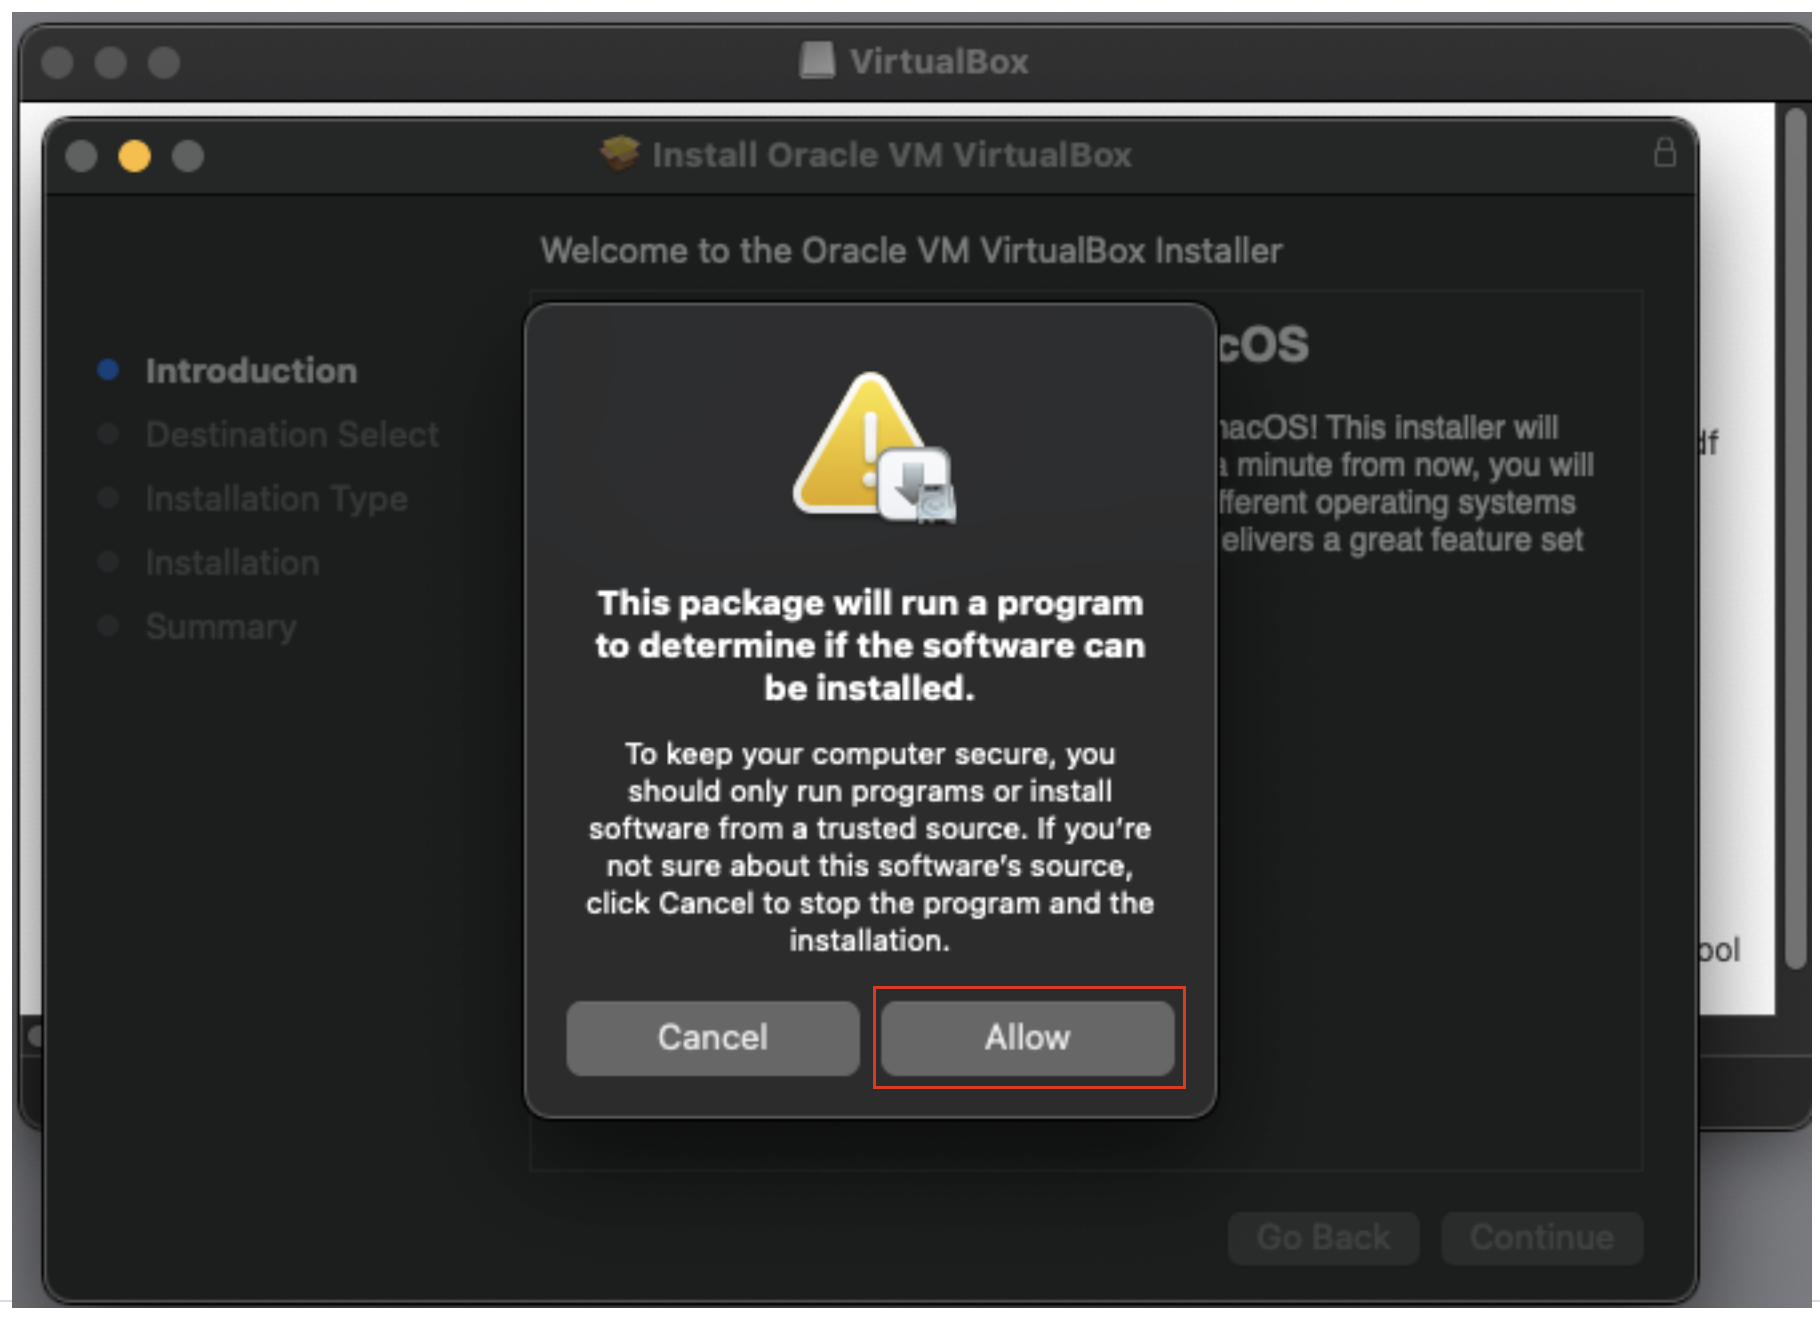
Give the installer permission to run scripts.
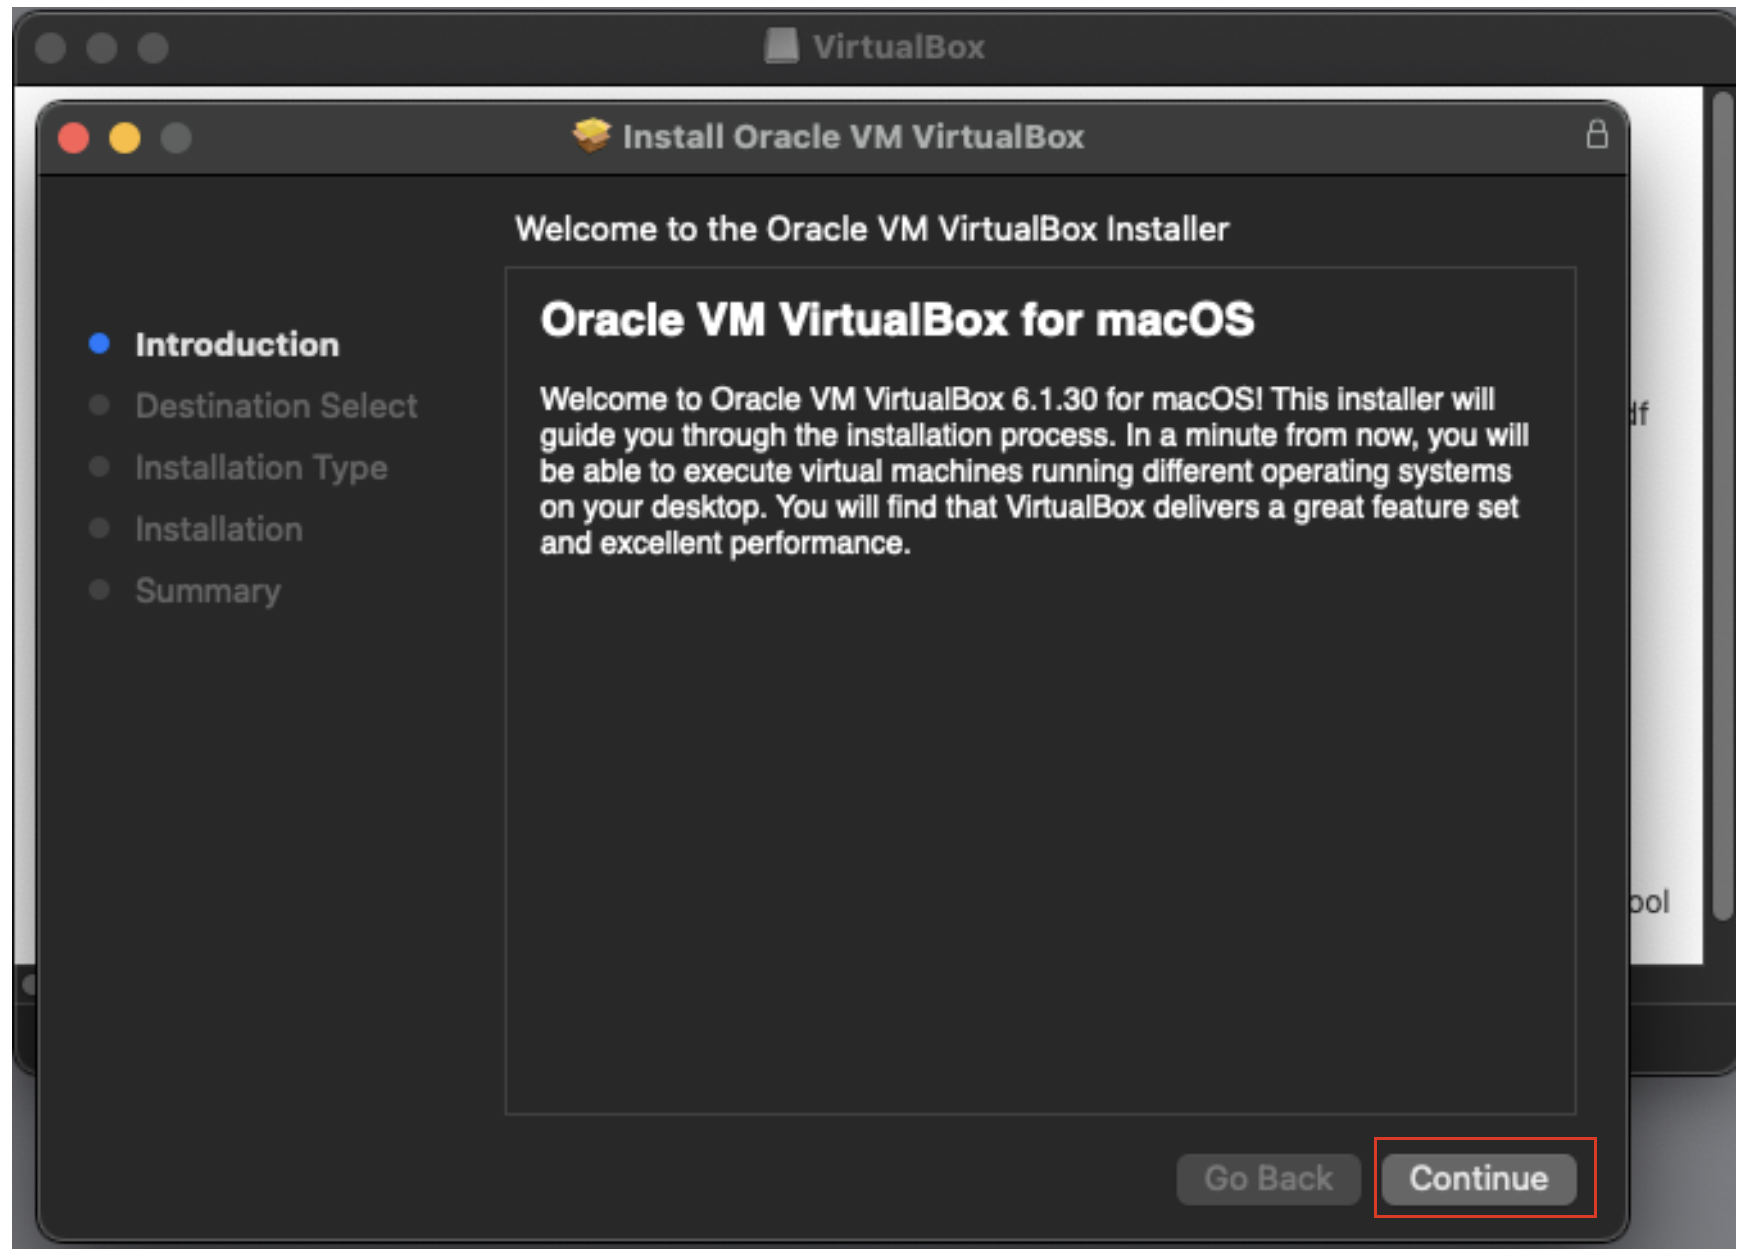
Allow the installer to continue.
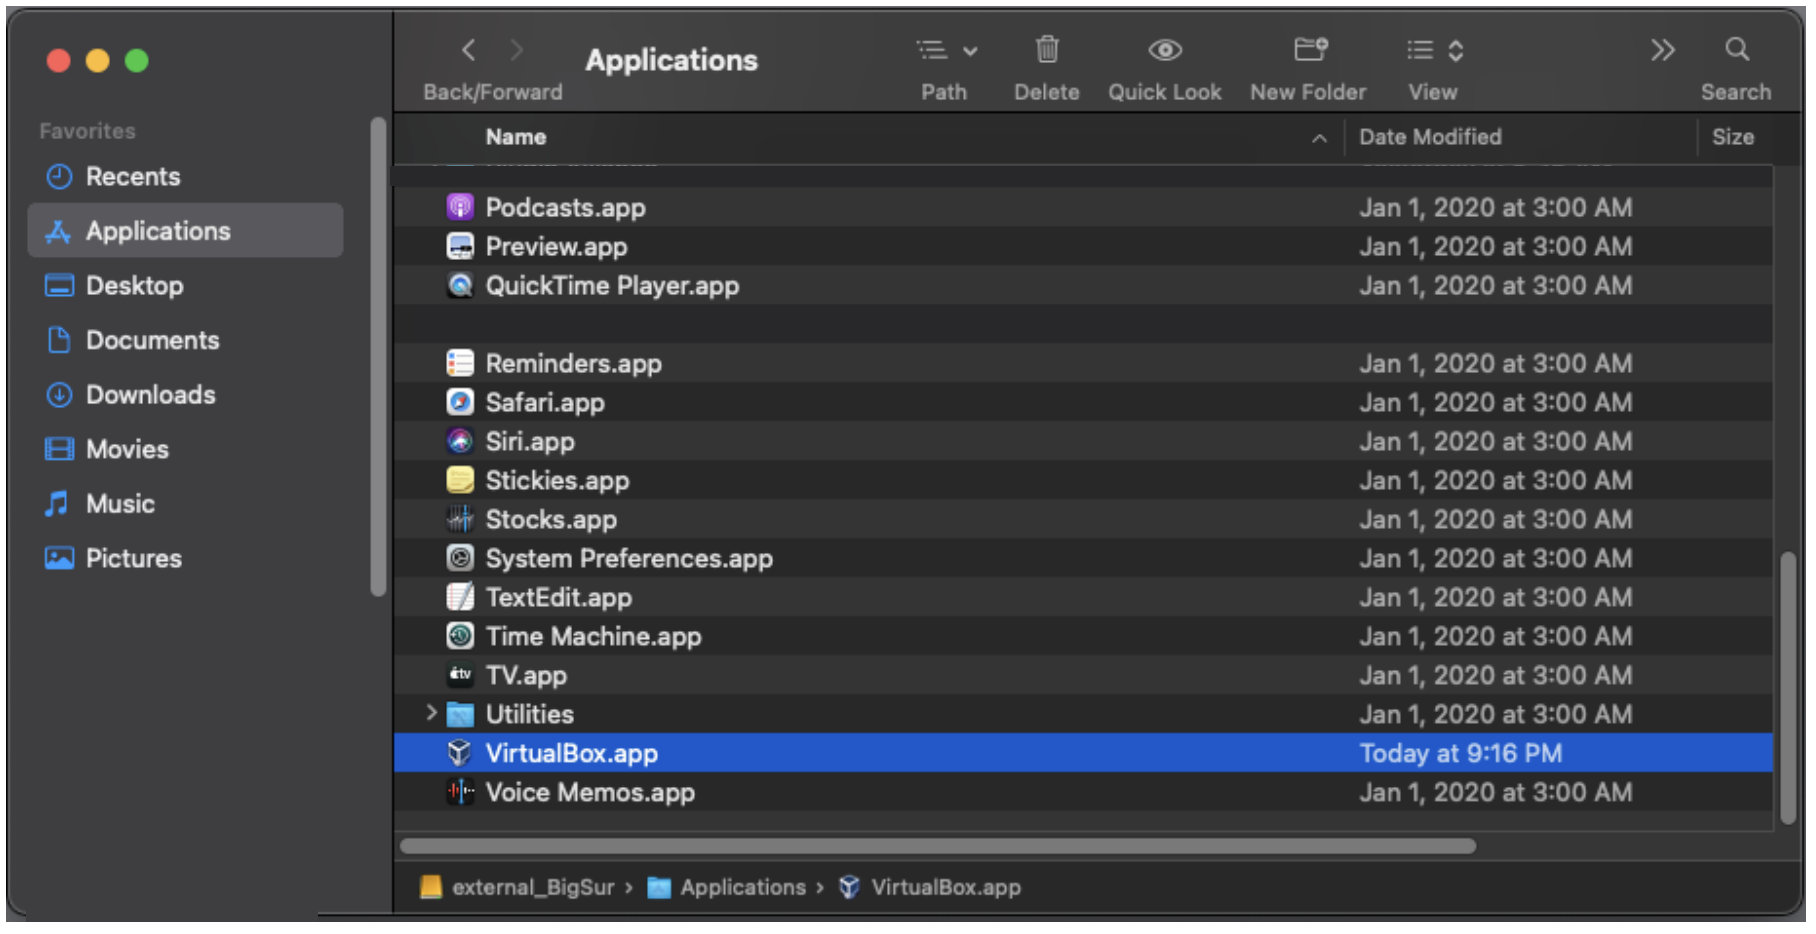
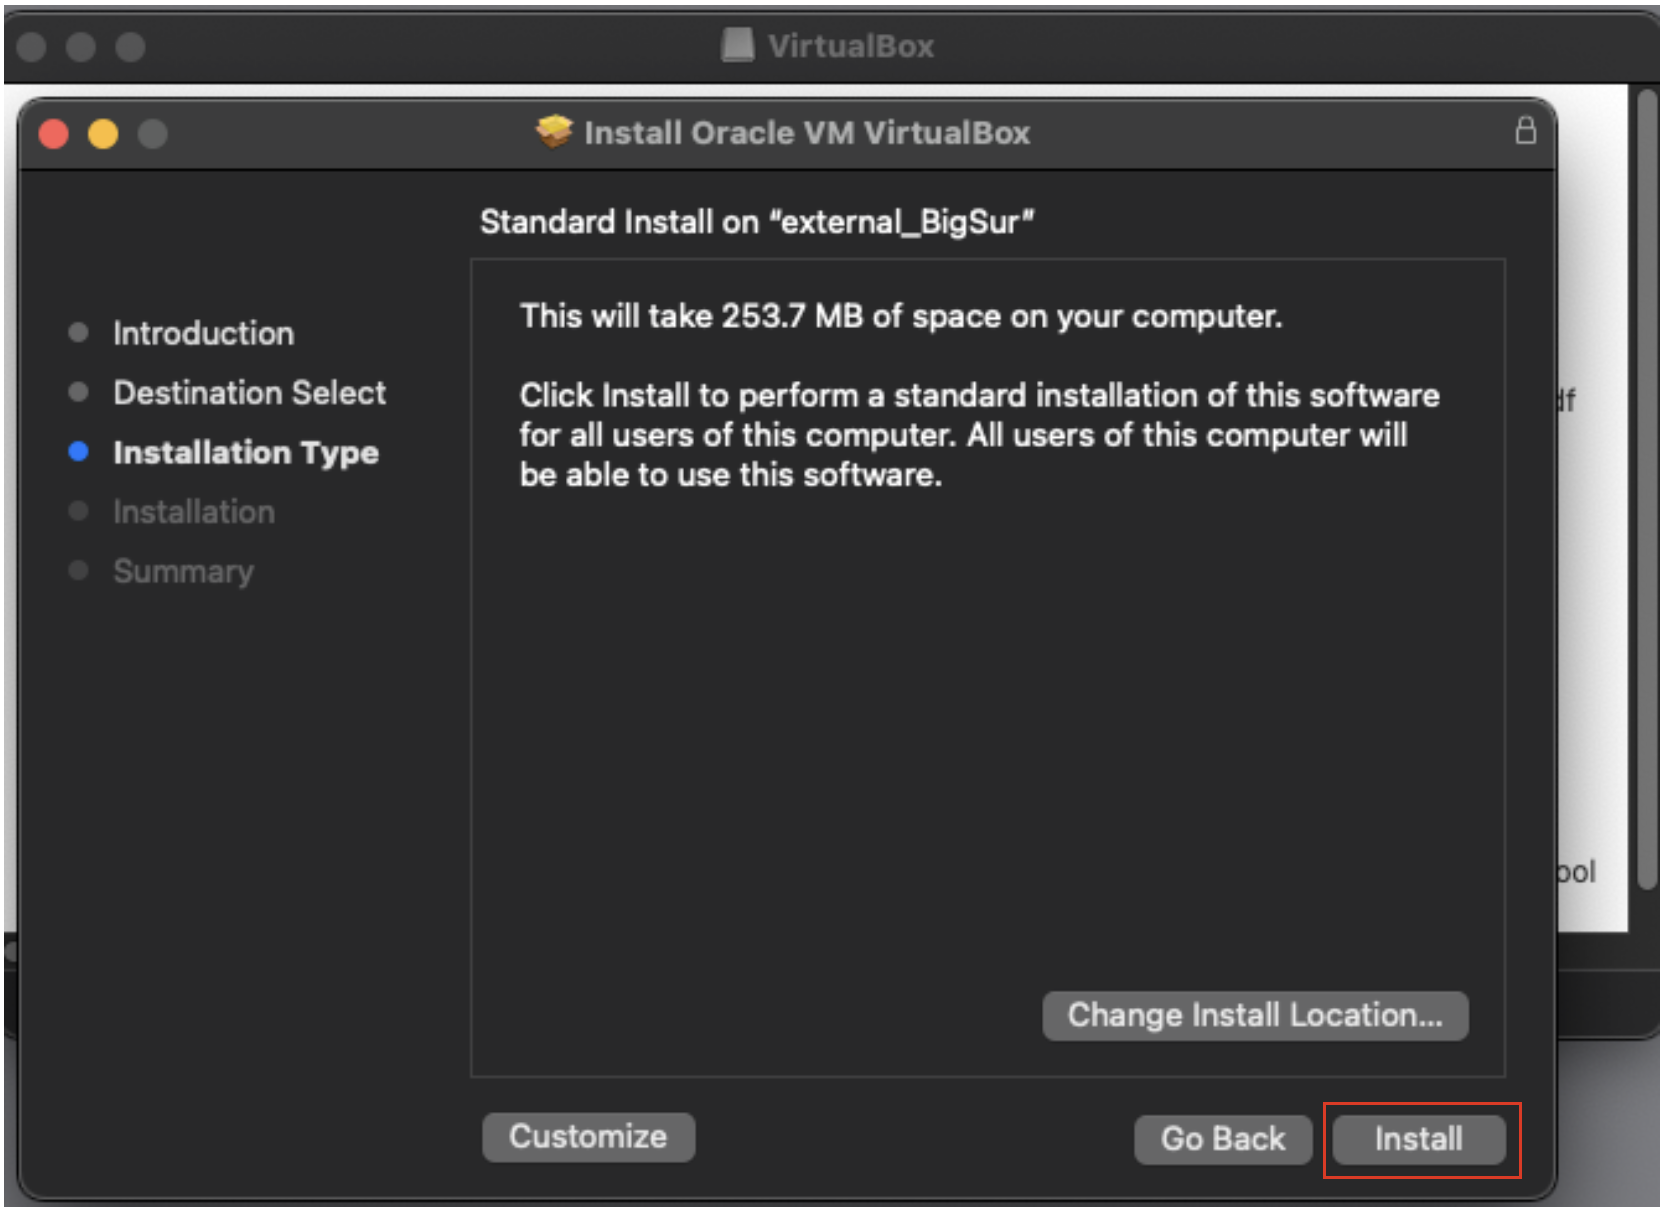
Pick a destination for the VirtualBox application. The default install location in the Applications folder on the boot partition should be fine (here an external disk named “external_BigSur)”. Your boot partition will be named differently, e.g., Macintosh HD, etc.
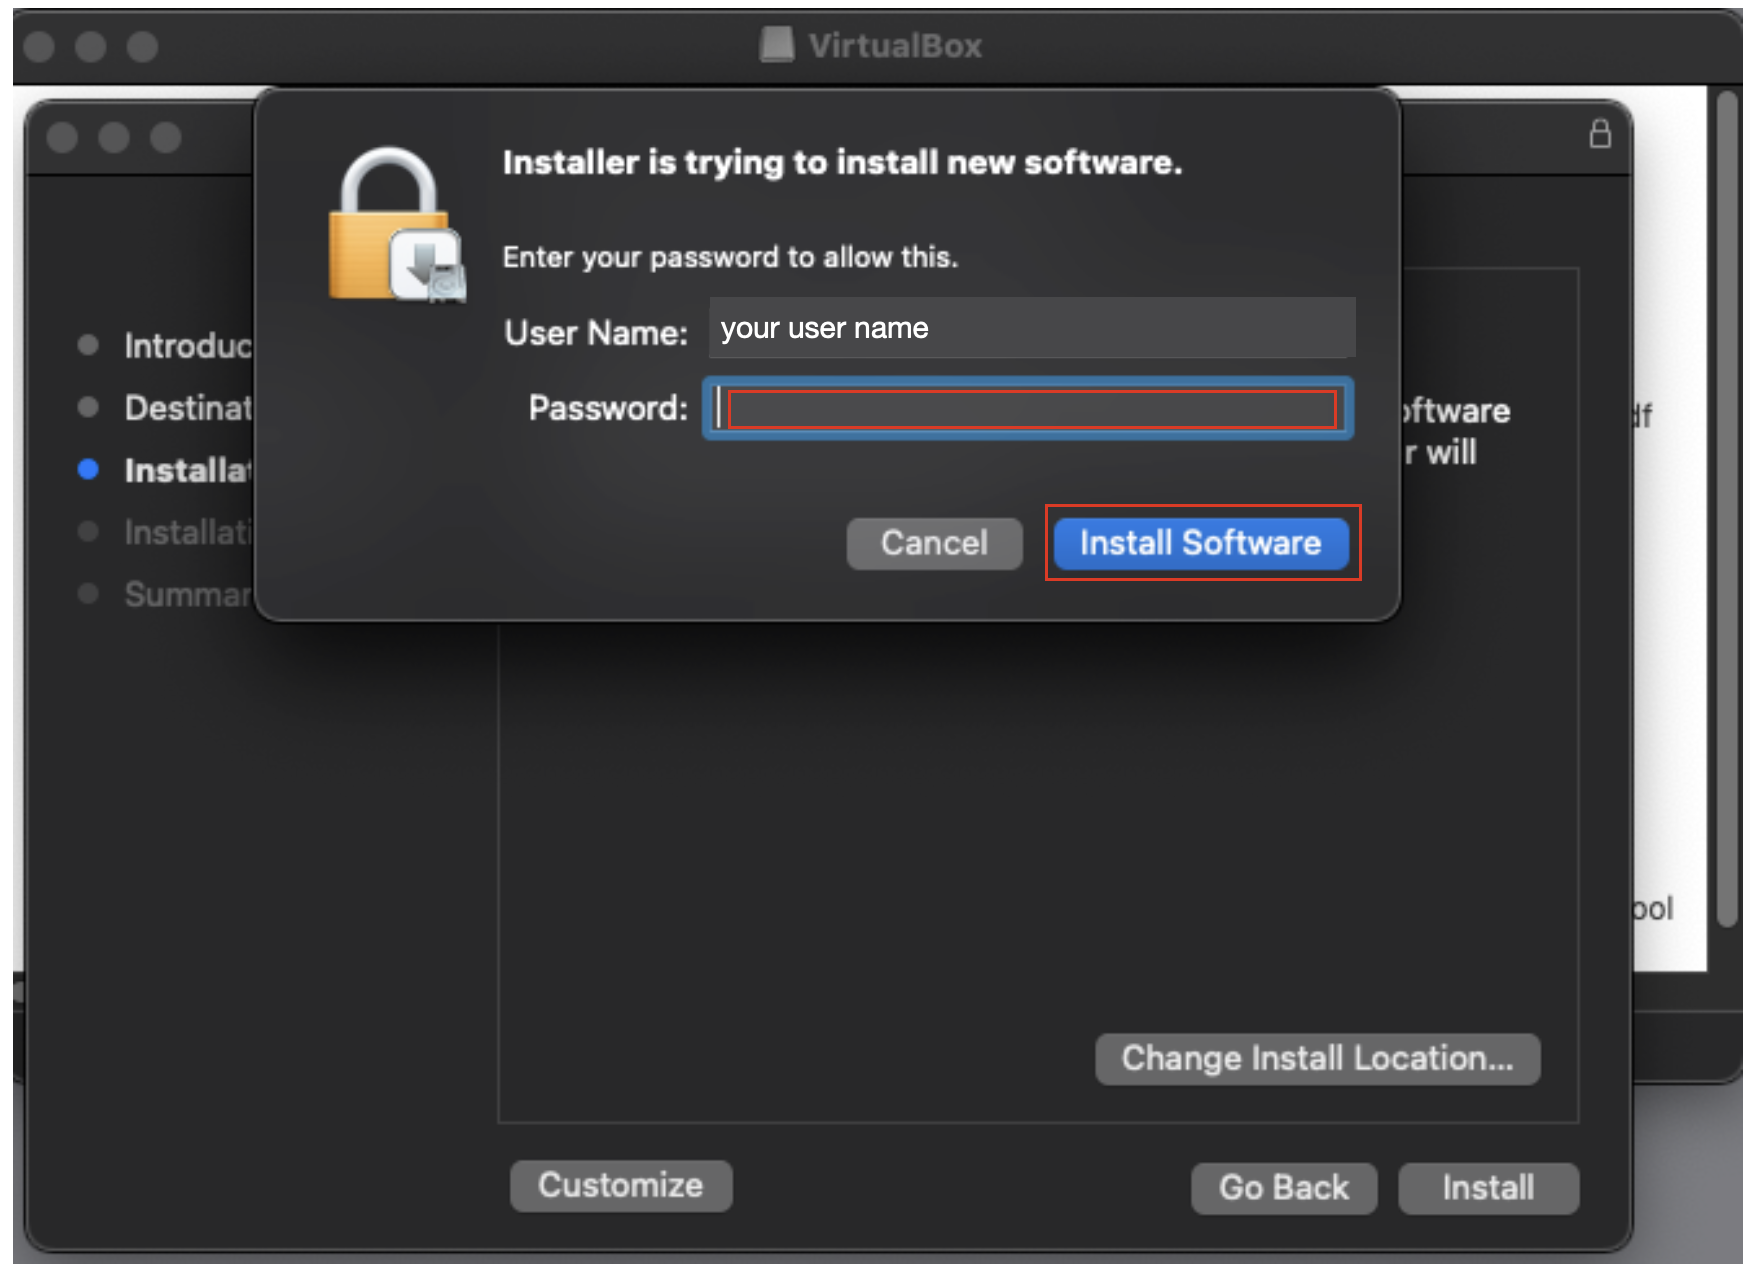
Authenticate using your login credentials to allow the installation.
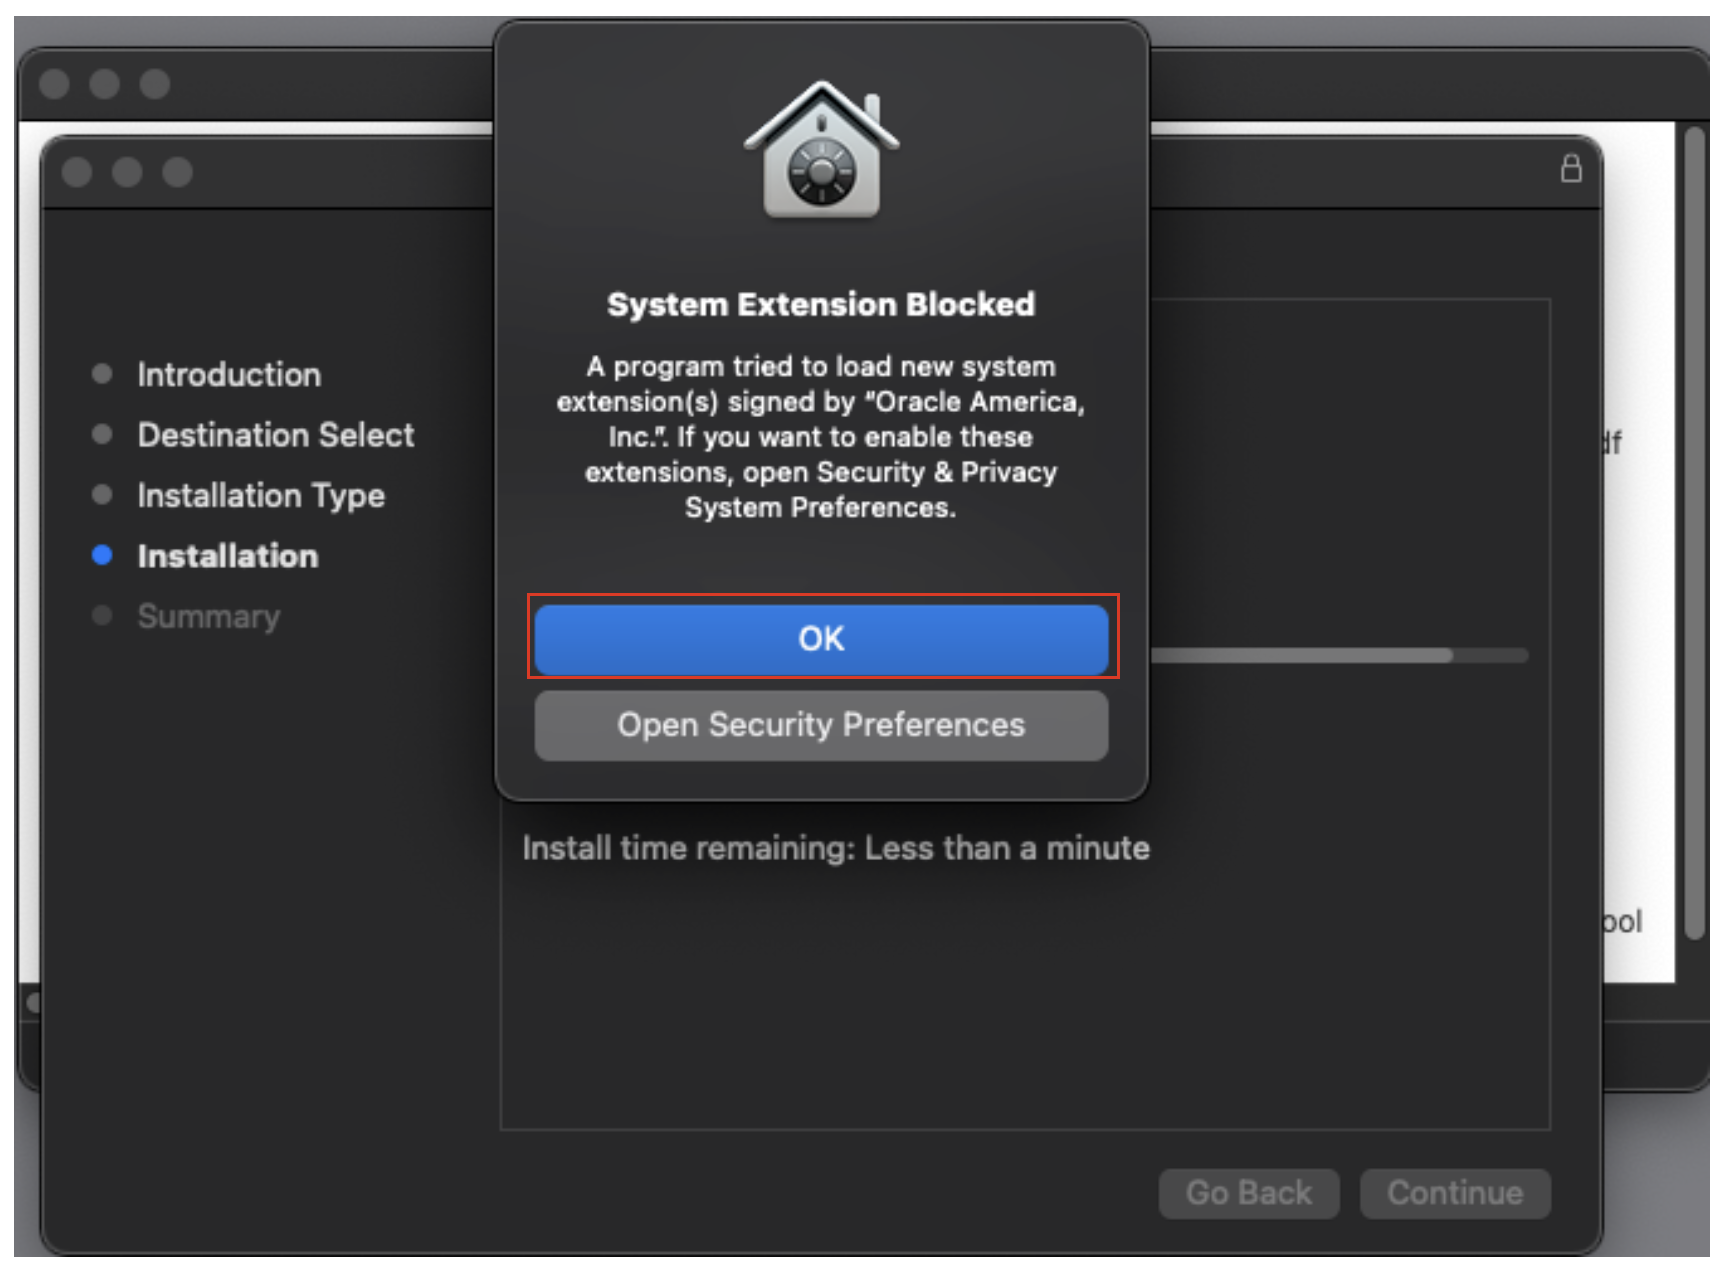
VirtualBox will issue a notification that the kernel extension it installed is currently blocked from running. Click OK.
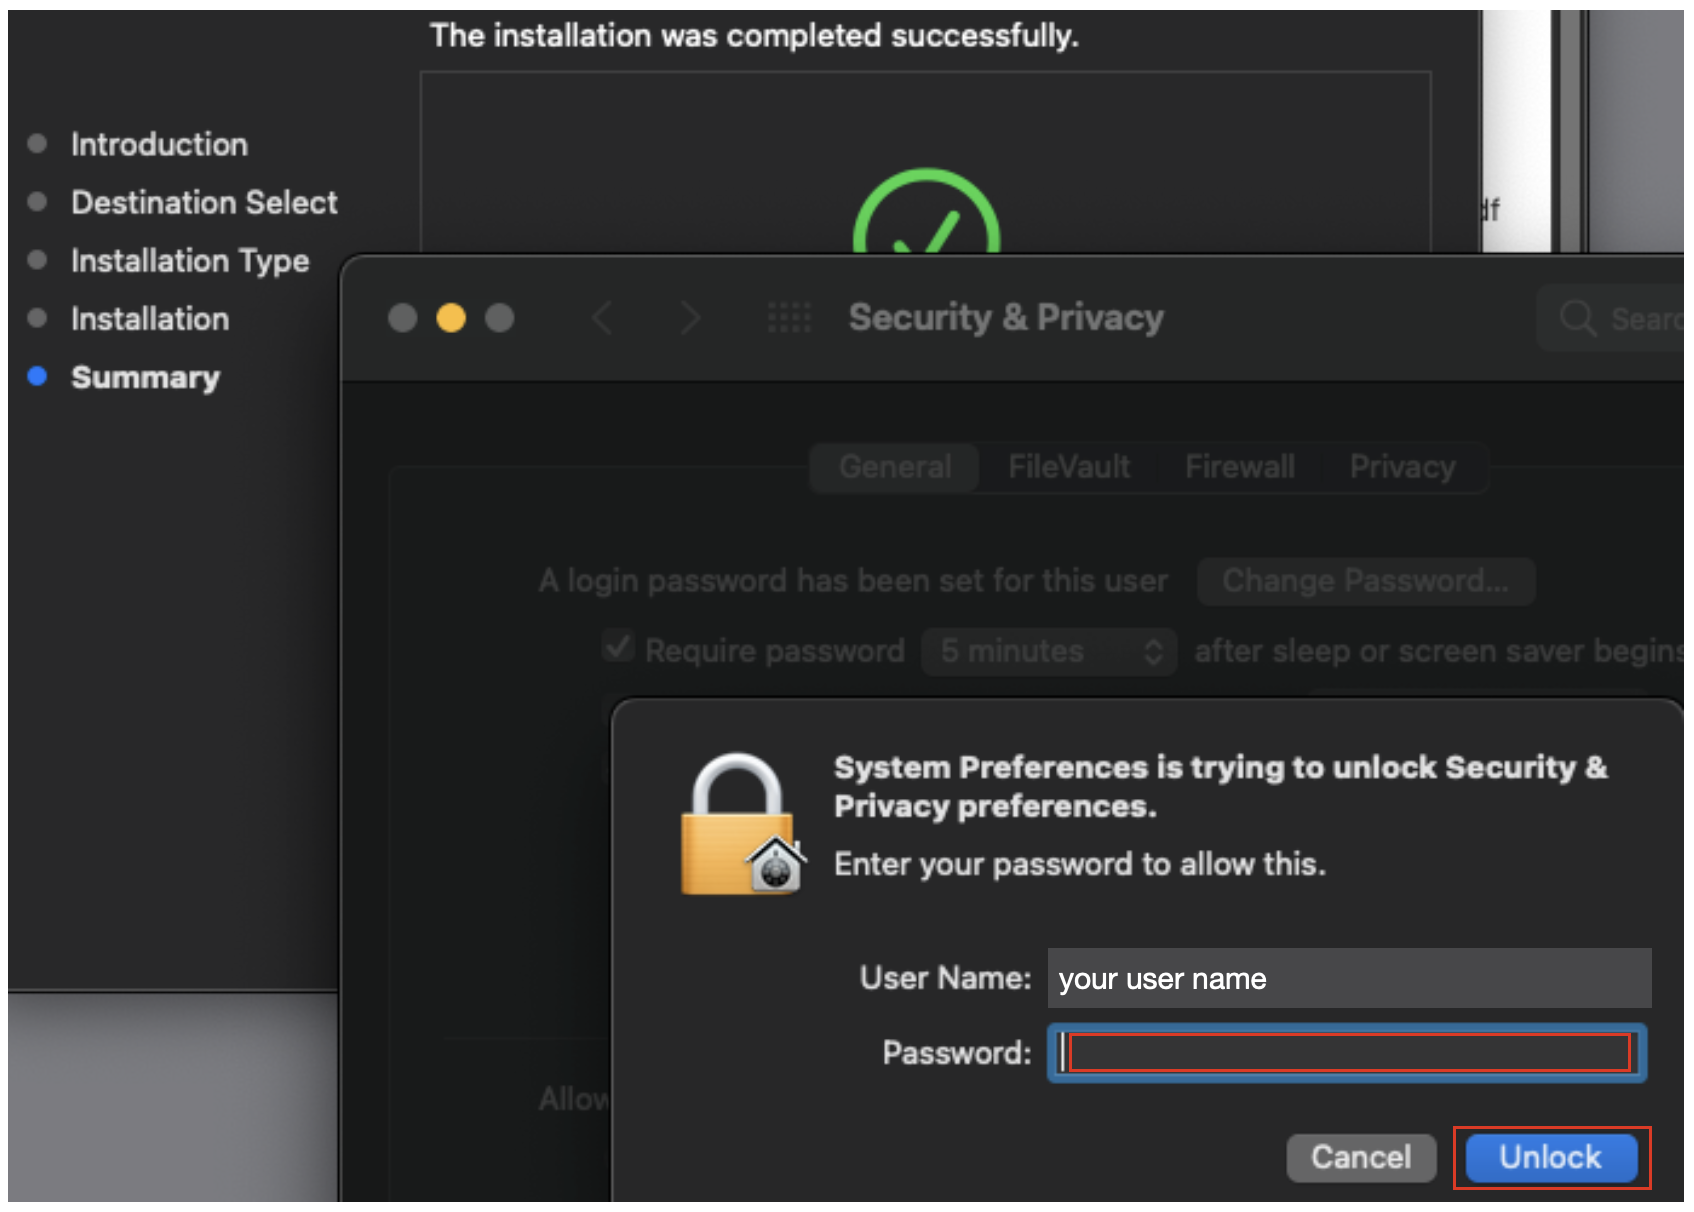
After the notification the install completed, go into the system security and privacy settings and authenticate with your login credentials.
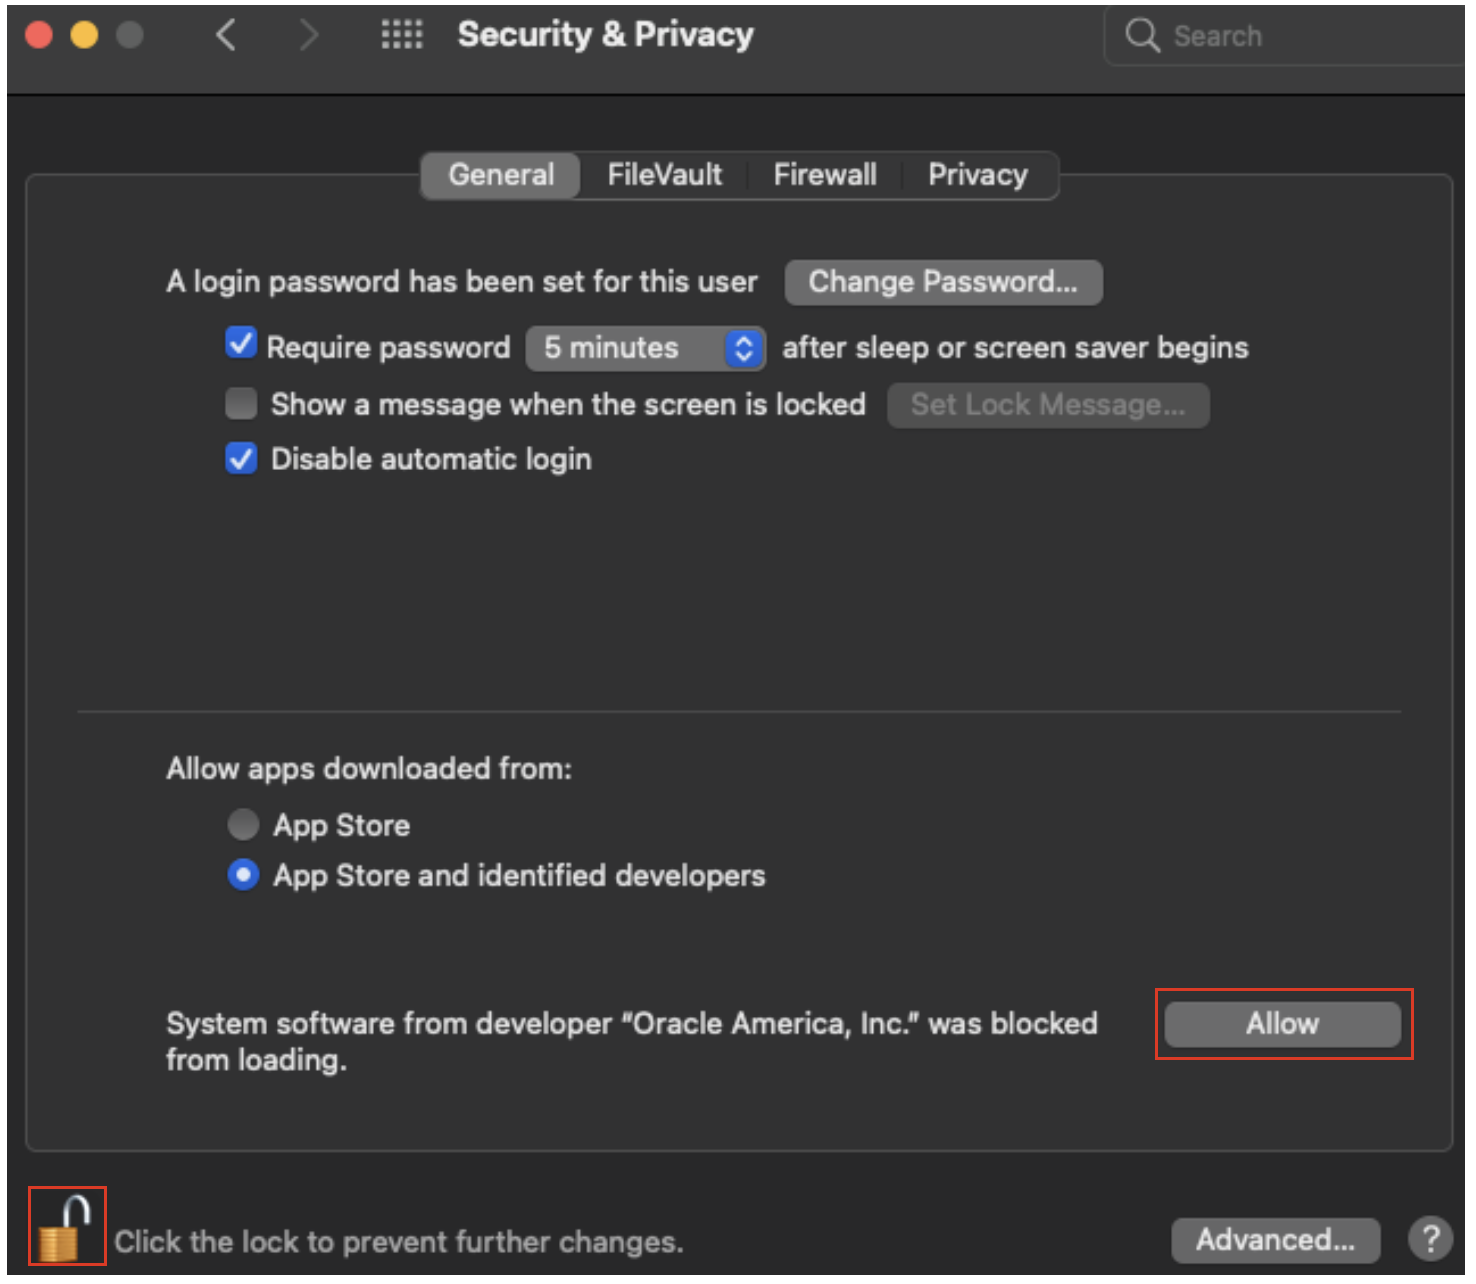
With the preferences unlocked, select allow to enable the VirtualBox extension to load.
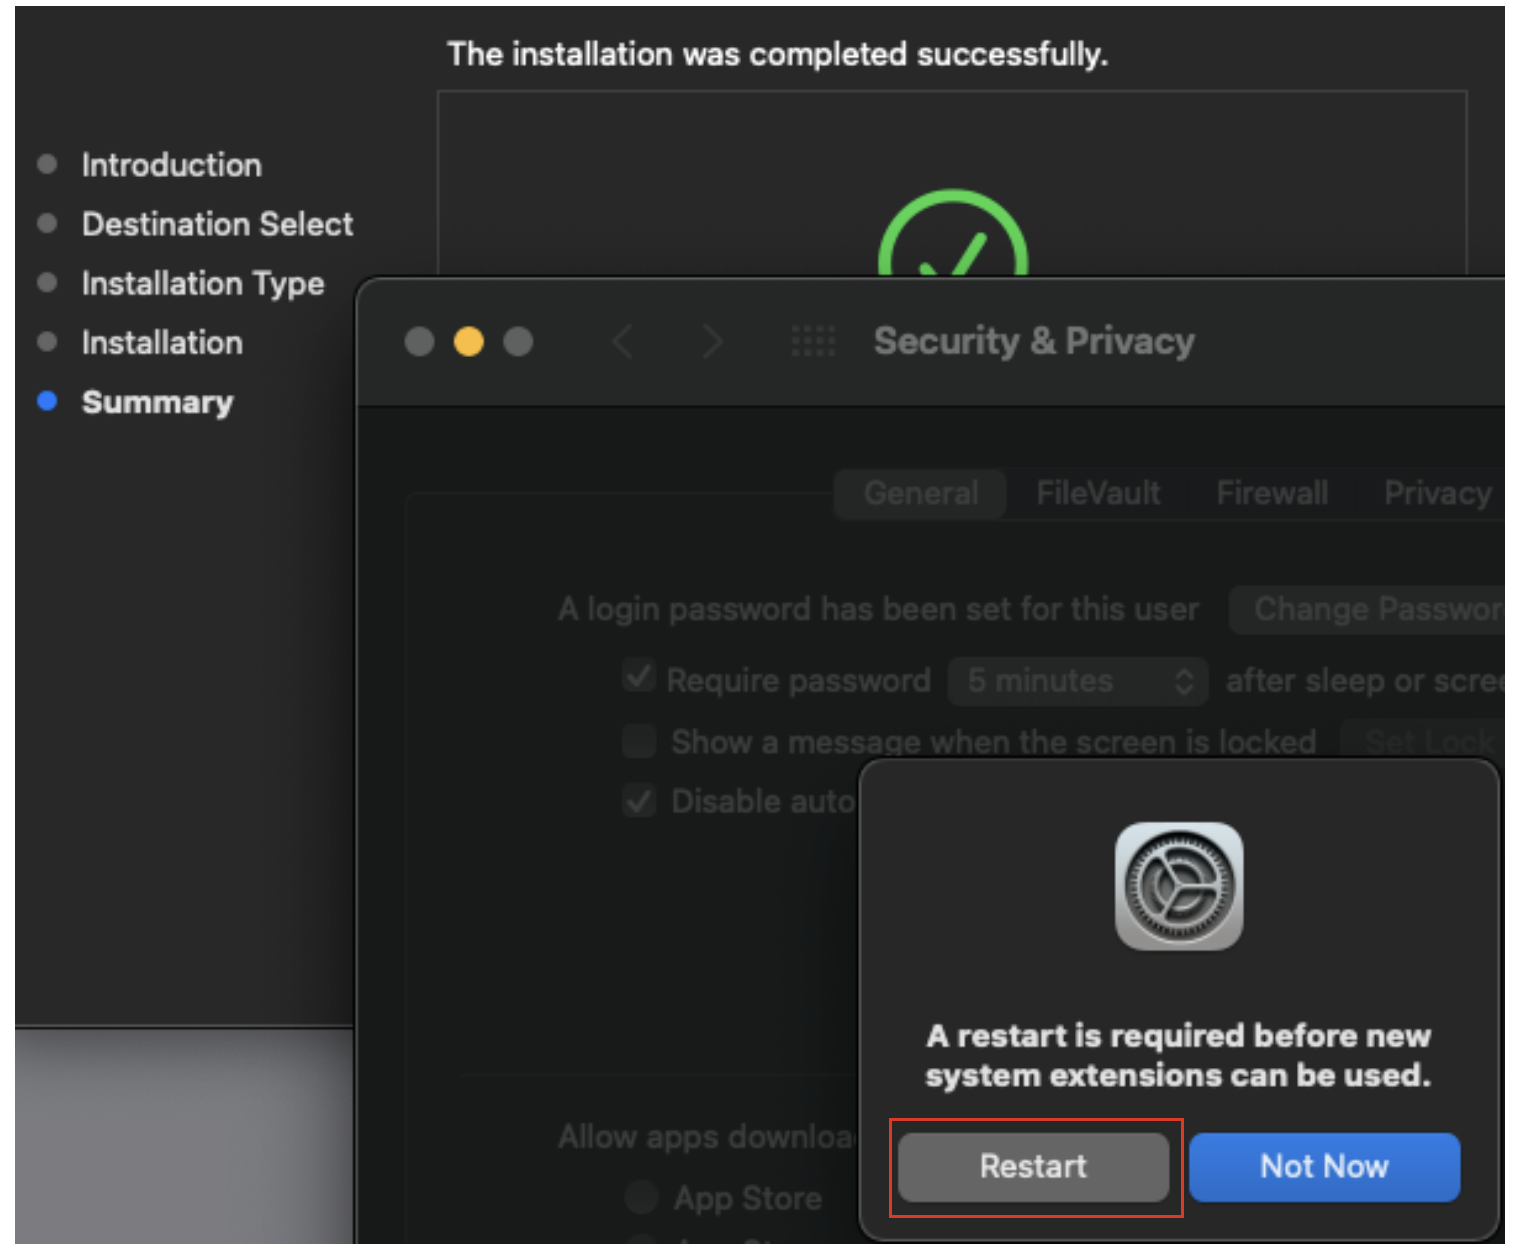
YOU SHOULD BE PROMPTED to restart the machine in order for the VirtualBox kernel extension to load and run. Select restart and after the reboot login to your account.
Check the VirtualBox application appears in the Applications folder.
