| Deletions are marked like this. | Additions are marked like this. |
| Line 19: | Line 19: |
| After that is complete (or when the CA normalization step is complete - you can check in the recon-all-status.log), you can start rerunning the base (remember to delete or rename the base if it already existed, e.g. {{{mv OAS2_0121 OAS2_0121_old}}}): |
After that is complete (or when the CA normalization step is complete - you can check in the recon-all-status.log), you can start rerunning the base (remember to delete or rename the base if it already existed, e.g. {{{mv OAS2_0121 OAS2_0121_old}}}). Or, if you prefer, you can wait until the recons are complete to check whether you are satisfied with the results before beginning the next step. To check the fixed version of these two timepoints, run (in different terminals): {{{ tkmedit OAS2_0121_MR1_fixed brainmask.mgz -aux T1.mgz -surfs tkmedit OAS2_0121_MR2_fixed brainmask.mgz -aux T1.mgz -surfs }}} To rerun the base, run this command: |
| Line 23: | Line 31: |
|
Once you are done with the base, check to see whether the surfaces are now including all white matter. {{{ tkmedit OAS2_0121_fixed1 brainmask.mgz -aux T1.mgz -surfs }}} Notice that it is not perfect. In this case, you can add more control points to the base and rerun with the command below: {{{ recon-all -base OAS2_0121_fixed1 -autorecon2 -autorecon3 }}} Now, the base is much better. Compare these images. we removed the pial surface in order to have a better view. <<BR>> {{attachment:0121_109_int.jpg}} {{attachmen:0121_109_after.jpg}} |
Using Control Points to Fix Intensity Normalization
To follow this exercise exactly be sure you've downloaded the tutorial data set before you begin. If you choose not to download the data set you can follow these instructions on your own data, but you will have to substitute your own specific paths and subject names.
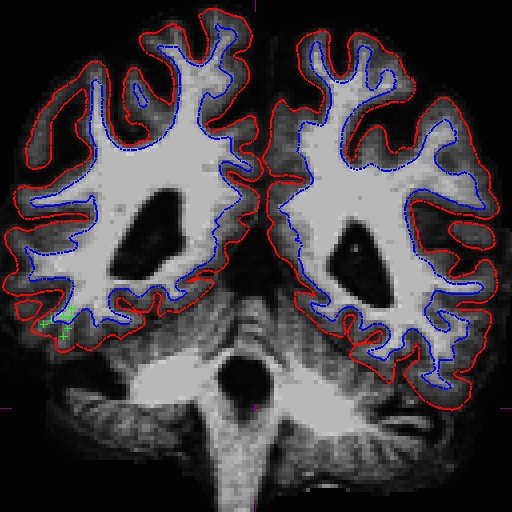
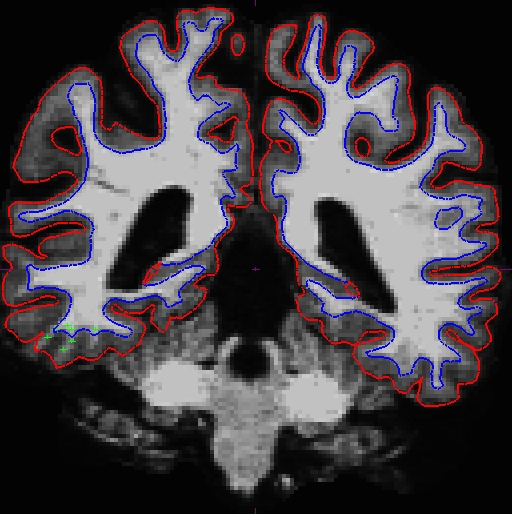
Notice that the intensity for the area in the bottom corner of the right hemisphere around slice 90 is only around 90 something instead of 110, and the surfaces here do not include all of the gm and wm. Because this problem occurs in both cross-sectionals, the base and subsequently the longitudinals are also affected. In cases like this, it depends on which data you are planning to use, you can choose to edit either the cross, base, or long. Control points work in all three stages.
In this example, we're demonstrating what the effect will be when adding control points at the very beginning of the stream - in the cross-sectionals. Find all the slices that have this problem and add control points carefully on the wm voxels.
Here is what we did. Left - OAS2_0121_MR1 (slice 87) and right - OAS2_0121_MR2 (slice 90).


Once you are satisfied with your control points placements, save it, and run the following commands to complete the fixed cross sectional runs:
recon-all -subjid OAS2_0121_MR1 -autorecon2 -autorecon3
recon-all -subjid OAS2_0121_MR2 -autorecon2 -autorecon3
After that is complete (or when the CA normalization step is complete - you can check in the recon-all-status.log), you can start rerunning the base (remember to delete or rename the base if it already existed, e.g. mv OAS2_0121 OAS2_0121_old). Or, if you prefer, you can wait until the recons are complete to check whether you are satisfied with the results before beginning the next step.
To check the fixed version of these two timepoints, run (in different terminals):
tkmedit OAS2_0121_MR1_fixed brainmask.mgz -aux T1.mgz -surfs
tkmedit OAS2_0121_MR2_fixed brainmask.mgz -aux T1.mgz -surfs
To rerun the base, run this command:
recon-all -base OAS2_0121 -tp OAS2_0121_MR1 -tp OAS2_0121_MR2 -all
Once you are done with the base, check to see whether the surfaces are now including all white matter.
tkmedit OAS2_0121_fixed1 brainmask.mgz -aux T1.mgz -surfs
Notice that it is not perfect. In this case, you can add more control points to the base and rerun with the command below:
recon-all -base OAS2_0121_fixed1 -autorecon2 -autorecon3
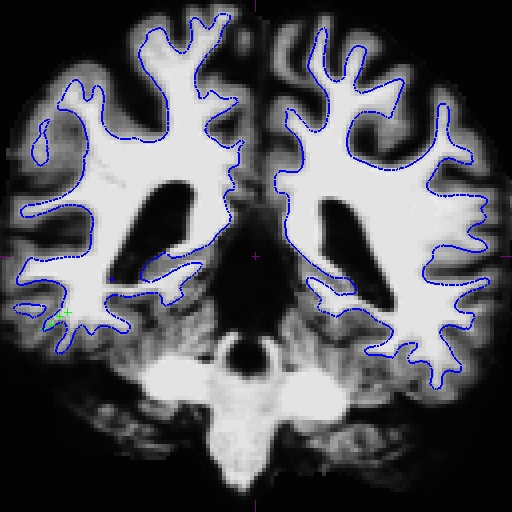
Now, the base is much better. Compare these images. we removed the pial surface in order to have a better view.

The last step is to rerun the longitudinals (also remove/rename existing longitudinal directories first):
recon-all -long OAS2_0121_MR1 OAS2_0121 -all
recon-all -long OAS2_0121_MR2 OAS2_0121 -all
To look at the output, open your subject in tkmedit using the following commands.
tkmedit OAS2_0121_fixed brainmask.mgz -aux T1.mgz -surfs
tkmedit OAS2_0121_MR1.long.OAS2_0121_fixed brainmask.mgz -aux T1.mgz -surfs
tkmedit OAS2_0121_MR2.long.OAS2_0121_fixed brainmask.mgz -aux T1.mgz -surfs
Here are the output images of the base. You can see the difference in the surfaces from the before (left) and after (right) image at slice 108, although no control points were copied over. The base improved, because of the adjusted intensity values in both cross-sectionals.
![]()
![]()
As for the longitudinals, control points were automatically copied over from the cross-sectionals, and the surfaces were initialized from base, therefore making a great improvement on the surfaces for the longitudinals.
The before (left) and after (right) images from OAS2_0121_MR1.long.OAS2_0121 at slice 107.
![]()
![]()
The before (left) and after (right) images from OAS2_0121_MR2.long.OAS2_0121 at slice 108.
![]()
![]()
