Correcting Pial Surfaces
To follow this exercise exactly be sure you've downloaded the tutorial data set before you begin. If you choose not to download the data set you can follow these instructions on your own data, but you will have to substitute your own specific paths and subject names.
The pial surface is created by expanding the white matter surface so that it closely follows the gray-CSF intensity gradient as found in the brainmask.mgz volume. Once an accurate white surface is created then you can work on correcting the pial surface if needed. The pial surface boundary and white matter surface boundary should not cross. After the pial surface has been generated, it's a good idea to visually check it for defects that may have been created during automatic topology fixing. To check the pial surface, it may be loaded into tkmedit and viewed along with the brainmask.mgz volume. If the surface appears not to follow the gray-CSF boundary in the volume, edits may be required.
Editing the Volume
Subject pial_before is an example of the pial surface including non-cortex within the boundaries. This page will take you through fixing this and other similar problems with the pial surface including non-cortex material.
First, make sure you have pial_before loaded in tkmedit:
tkmedit pial_before brainmask.mgz lh.white -aux-surface rh.white
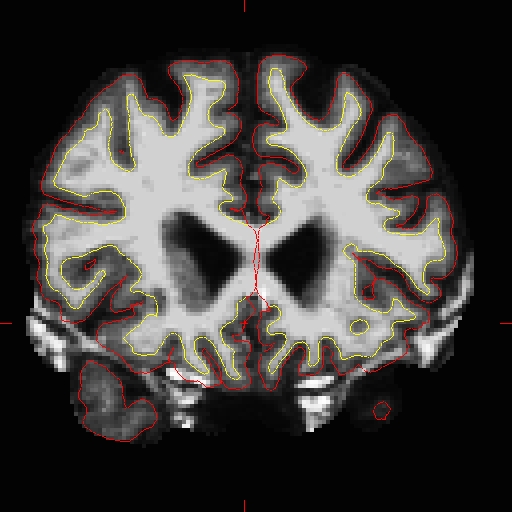
Use the arrow keys to go through the volume slice by slice, and view the pial surface (red line) and white matter surface (yellow line). Notice the bright diagonal line in slice 157 that has caused the pial surface to expand past the actual pial boundary. This is the result of a bad segmentation incorporating a piece of the dura within the pial surface.

To fix this type of error you can simply edit away the offending voxels from the brainmask.mgz volume. To do this you will need to select the edit voxels tool and set the brush to a size and shape comfortable for you. A circle brush of radius 2 works well for this edit. In the tkmedit toolbar, go to Tools -> Configure Brush Info... Set Radius to 2, and Shape to "Circle". Close the configuration menu, and click the "Edit Voxels" button in tkmedit toolbar.
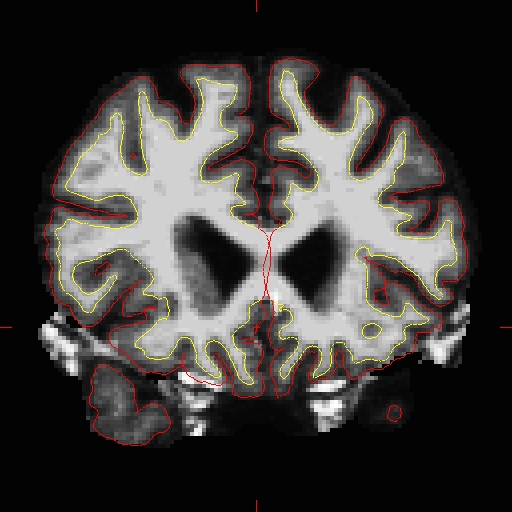
Find a place in the image where the dura is causing errors in the segmentation. Use the right mouse button to delete the voxels. It is not necessary to completely remove the dura to get an adequate pial surface, but it is good to do so until you are more familiar with manual editing. When you are finished removing the bright diagonal line in slice 161, it should look like this:

Continue on the other slices until the dura is removed.
Ctrl-z and Edit -> Undo Last Edit in tkmedit only allow you to go back one edit. If you remove too many voxels, you can use the clone tool to paint areas back in from the original T1 volume, similar to painting in voxels in section 1.1.
You can check your result by viewing the brain.mgz volume in the pial_after directory.
Regenerating the Surface
When you are finished editing the voxels, you will need to regenerate the surfaces. Since the white matter hasn't been changed, you don't need to resegment the volume. You can regenerate the pial surface with:
recon-all -autorecon2-pial -autorecon3 -subjid pial_before
This step will take a long time and there is no need to run it for the tutorial purposes.
